File Management
About File Properties
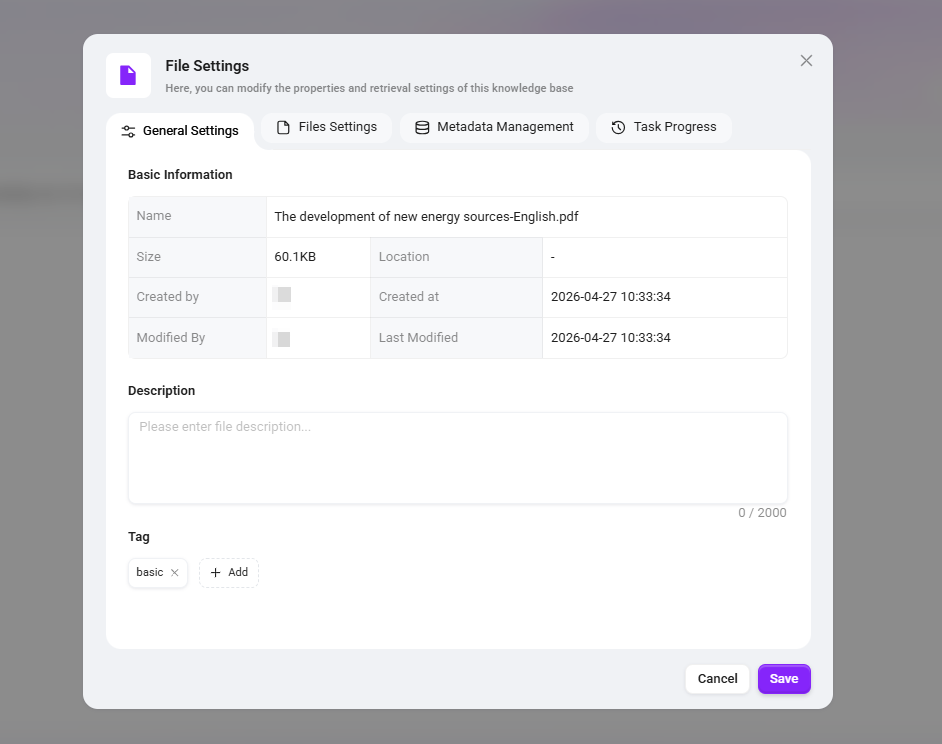
File properties are settings for individual files, while the knowledge base space settings mentioned earlier are settings for the knowledge base. The knowledge base space settings include file setting content, and these settings can be inherited into file properties.
General Settings
- Basic Information: The basic information in file properties includes file name, size, creator, creation time, modifier, modification time, description, tags.
💡 Tip: Only files in the enterprise space support tags, and tags can be added; files in the personal space do not support the tag feature.
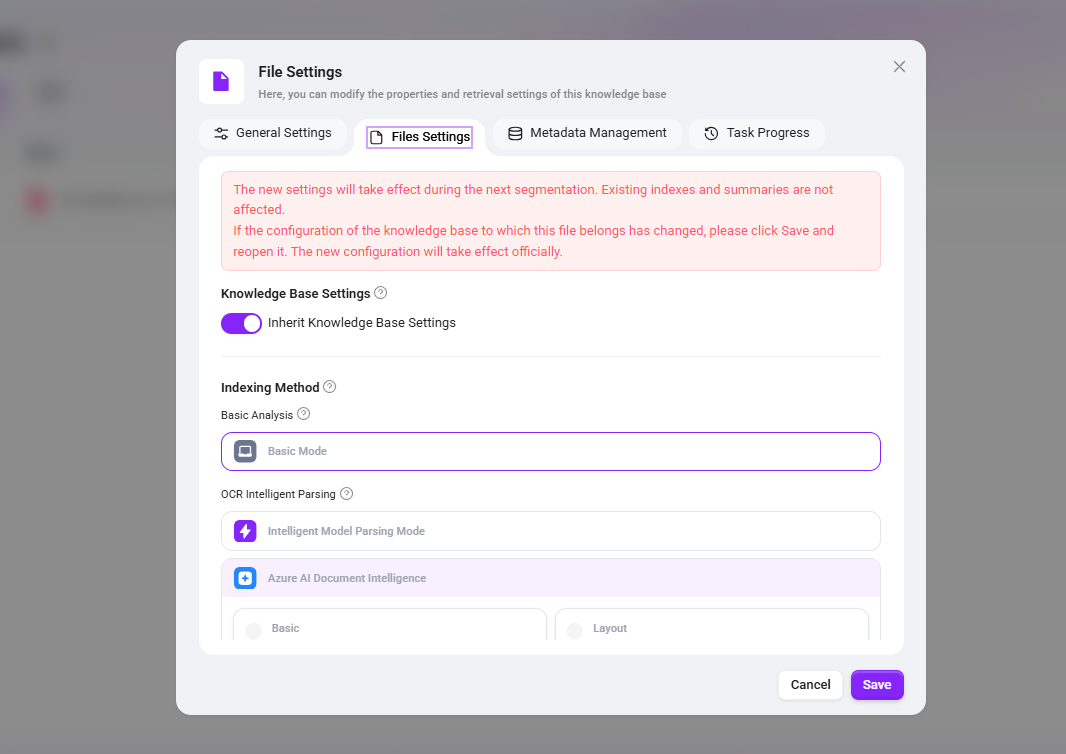
File Settings
- Space Settings: File settings inherit space settings by default and require no additional configuration. If a file needs custom settings, turn off the "Inherit Space Settings" button.
- Indexing Method: Basic parsing, OCR intelligent parsing.
- Segmentation Settings: Default, fine-grained, custom.
- Retrieval Settings: File preview, file indexing.
- File Summary Generation: Whether to enable summary, full-text summary prompt words.
💡 Tip: For details of the above file settings, refer to "How to Configure Knowledge Base Space Settings"
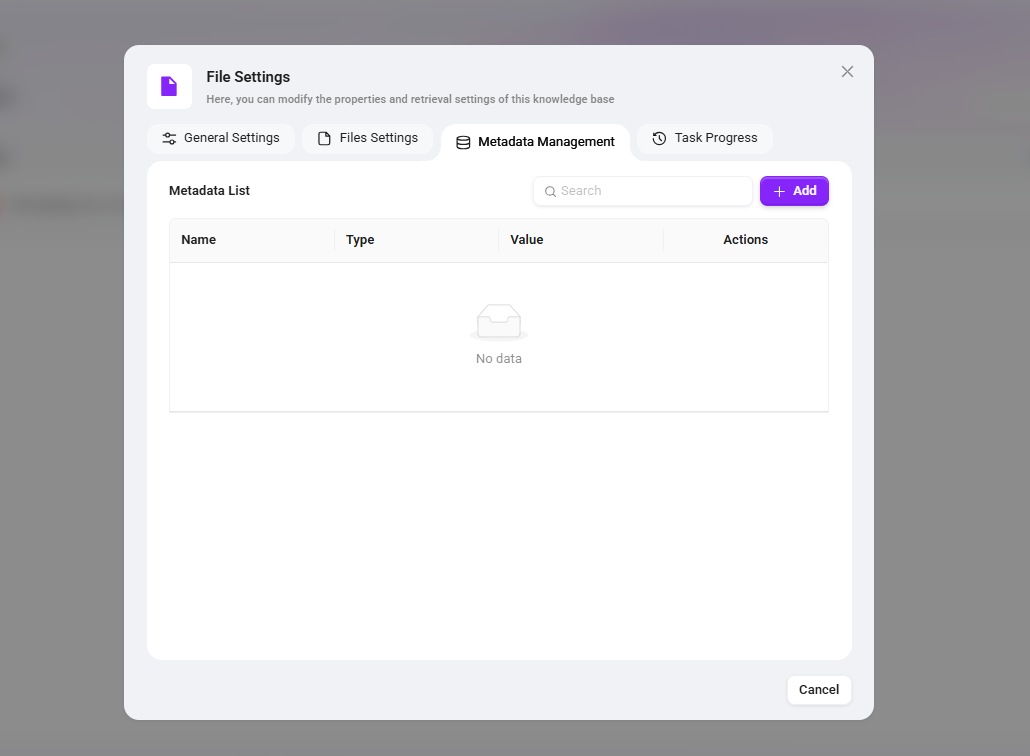
Metadata
Metadata is used to describe the attribute information of a file or the knowledge base itself, such as name, location, tags, category, etc.
- When uploading a file, the system automatically saves basic metadata, such as file size, name, storage location, etc.
- Users can also add custom metadata, such as tags, category, uploader, etc.
- When retrieving knowledge base files, metadata filter conditions can be combined to improve search hit rates.
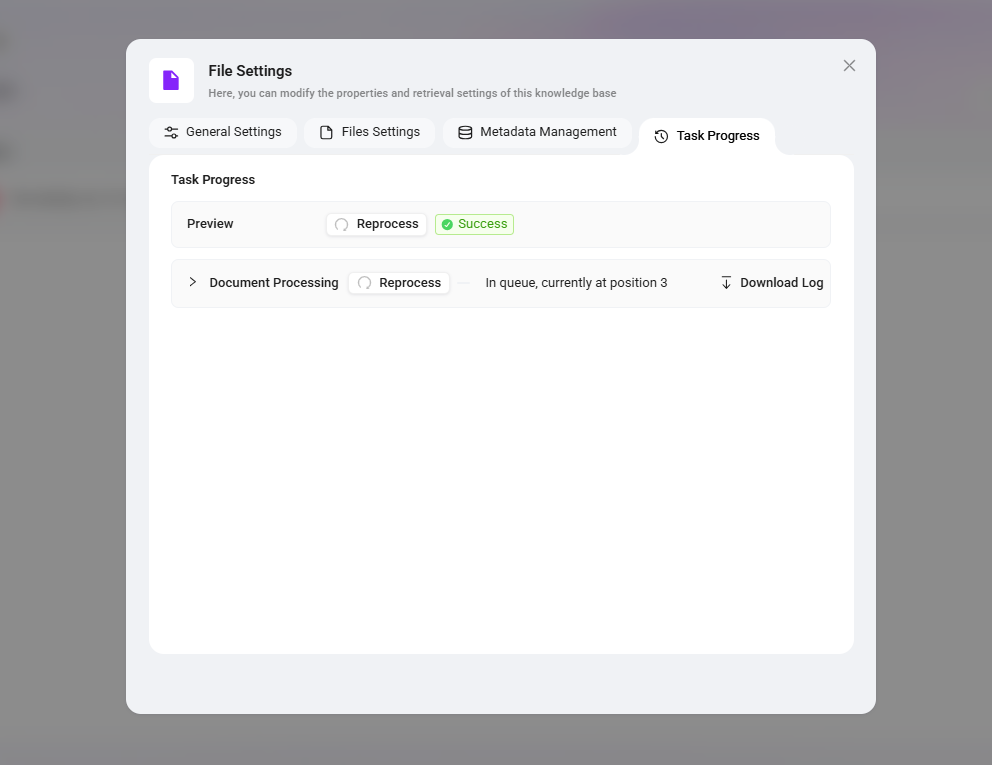
Task Progress
You can view file preview and processing progress here, and finely control each processing step.
- Preview: Supports online preview of file content. If loading is abnormal, click the Reprocess button to reload.
- File Processing: Click to expand the detailed list of processing steps. Each step displays the runtime and supports individual reprocessing.
- If metadata, etc. has been added to the current knowledge base, the processing chain will include the corresponding metadata processing steps; if not added, they will not be displayed.
- If the knowledge base is in Pipeline mode, the processing steps will fully match the bound preprocessing Pipeline flow.
- Each step displays the runtime and supports individual reprocessing. Click the retry button next to any failed or retry-required step to reprocess it individually without rerunning the entire process from the beginning.
- Download Logs: Supports downloading processing logs for troubleshooting exceptions or verifying processing results.
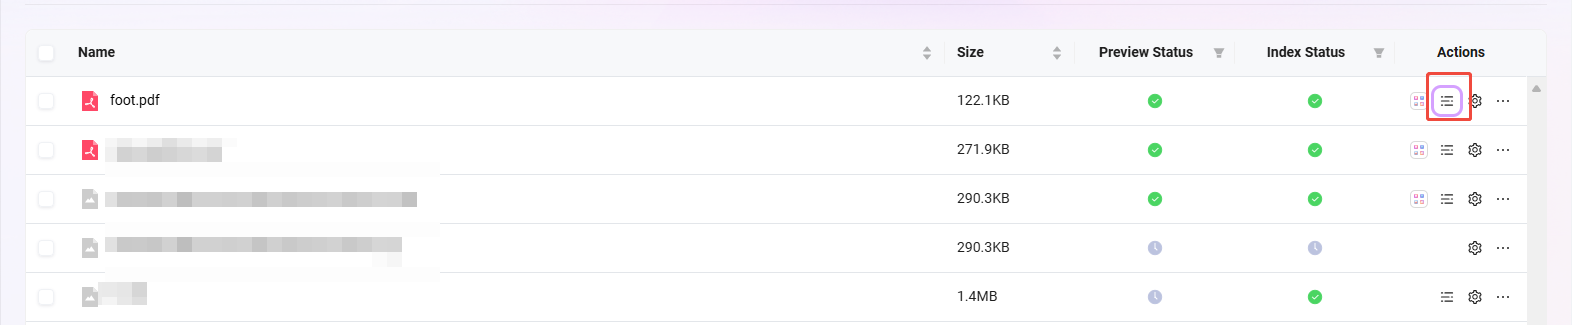
Segment Preview
- Segment Preview supports viewing the segmentation of the file. Each segment has a serial number and supports editing the segment content.
- Editing segment content does not affect the original file; it only modifies the content used for indexing and preview.
- In the segment preview interface, keyword search is supported, allowing quick location of the segment containing the keyword and improving search efficiency.
Notes on Document Configuration
| Primary Module | Secondary Module | Configuration Item Description | Whether Re-vectorization Is Required After Configuration |
|---|---|---|---|
| Segment Preview | Text Editing | Edit and modify text | Takes effect immediately |
| Segment Preview | Text Editing | Apply bold and italic formatting to text | Takes effect immediately |
| Segment Preview | Text Editing | Add tables, ordered/unordered lists in segments, insert selected lists, insert interactive cards | Takes effect immediately |
| File Properties | General Settings | Add file description | Takes effect immediately |
| File Properties | General Settings | Add new tags | Takes effect immediately |
| File Properties | File Settings | Choose whether to inherit space settings | Requires executing "Resegment" to take effect |
| File Properties | Metadata Management | Add new metadata | Requires executing "Resegment" to take effect |
| File Properties | Metadata Management | Delete or modify metadata | No resegmentation required; the original data will be retained |
File Operations
Create Folder & Upload File
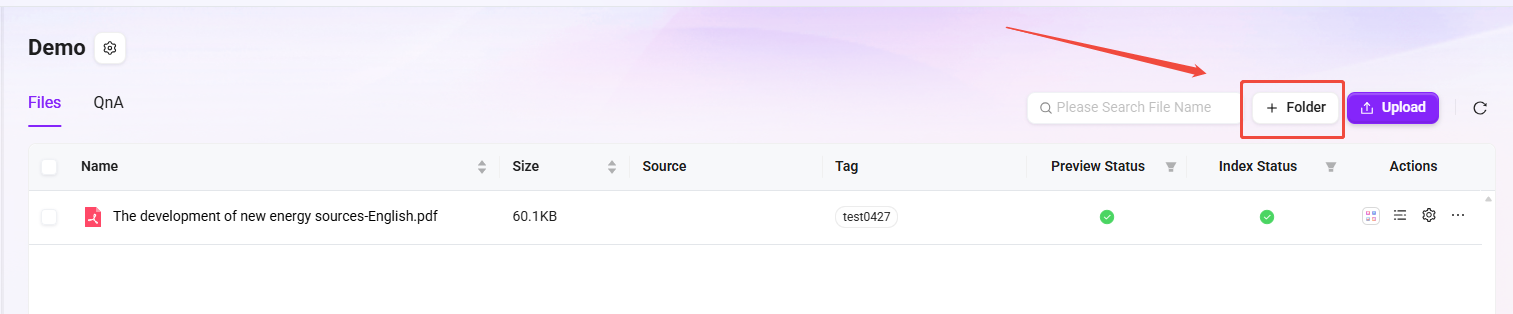
Create Folder: Both My Space and Enterprise Space support folder creation. On the knowledge base page, click "Create Folder" on the right, enter the folder name, and click "Confirm".
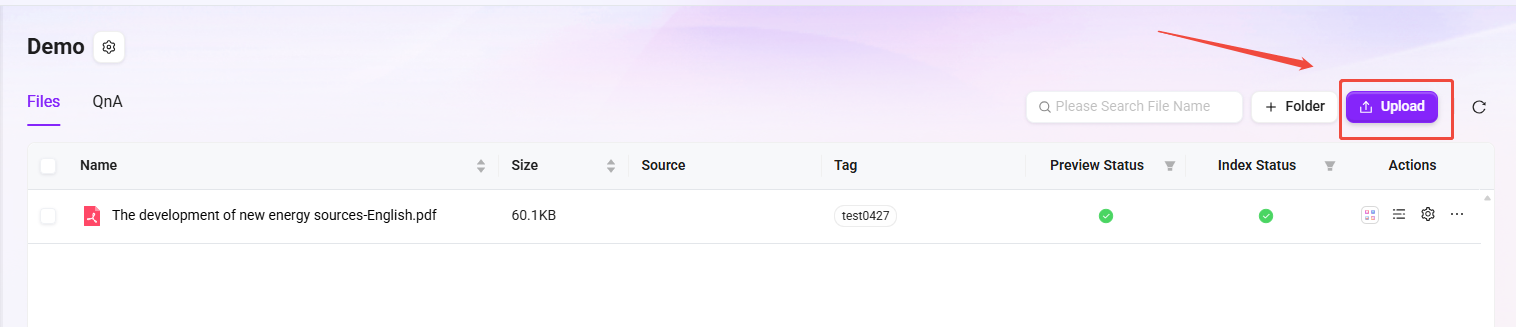
Upload File: Upload files in My Space and Enterprise Space. The system will automatically parse and index them, and they can only be used after indexing succeeds. Click "Upload File" in the upper-right corner of the page, select the file to upload, click "Open", and wait for Indexing Successful before using the file.
- File upload has four statuses: Waiting for Indexing, Indexing, Indexing Successful, Indexing Failed.
- Only files with the status of indexing successful can be previewed and used normally.
- You must have edit permission for the enterprise space to create folders or upload files. Please ensure you have the relevant permissions before operating.
- Up to 10 files can be uploaded simultaneously, and each file must not exceed 100MB.
- Supported file formats include: xml, xmind, pdf, doc, docx, xls, xlsx, ppt, pptx, txt, md, csv, json, jpg, jpeg, png, mp3, flac, mp4.
- Administrators can configure the range of file types allowed for upload in the current environment through the environment variable
BOT_FILE_ACCEPT(this range is a subset of the above 19 formats). - The number and types of file types users can select in the knowledge base cannot exceed the range defined by
BOT_FILE_ACCEPT.
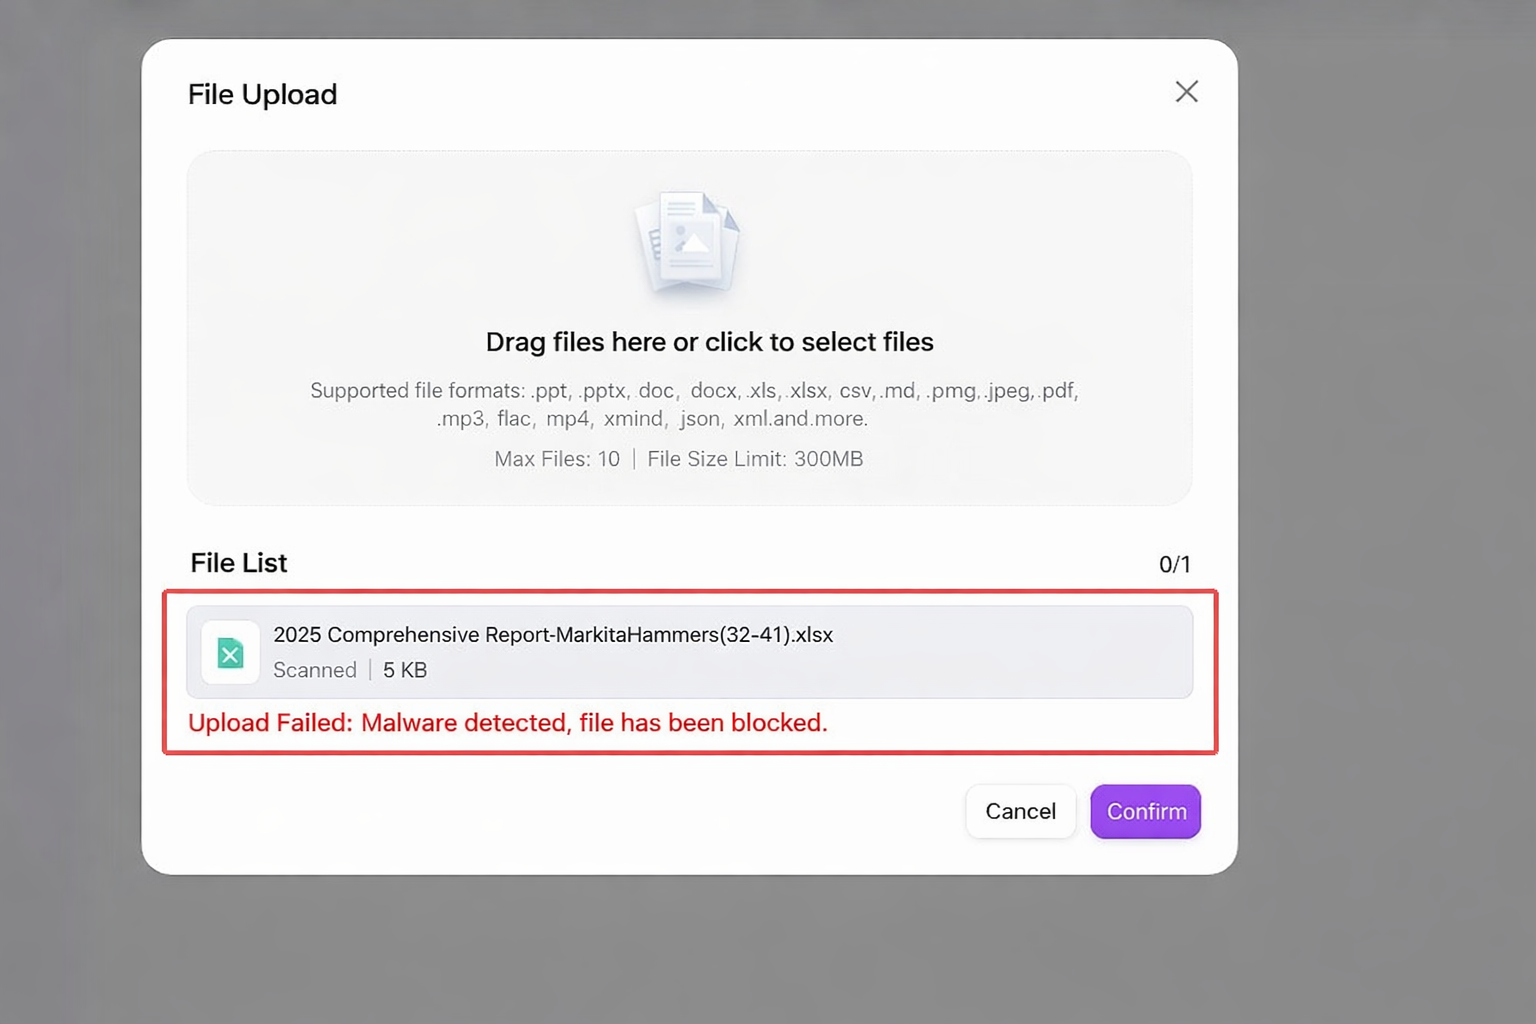
File Upload Security
💡 Tip: This feature is only supported in V4.1.2 and above
To ensure the security of uploaded content and prevent malicious file uploads, the system integrates a file security scanning feature, which needs to be configured in environment variables.
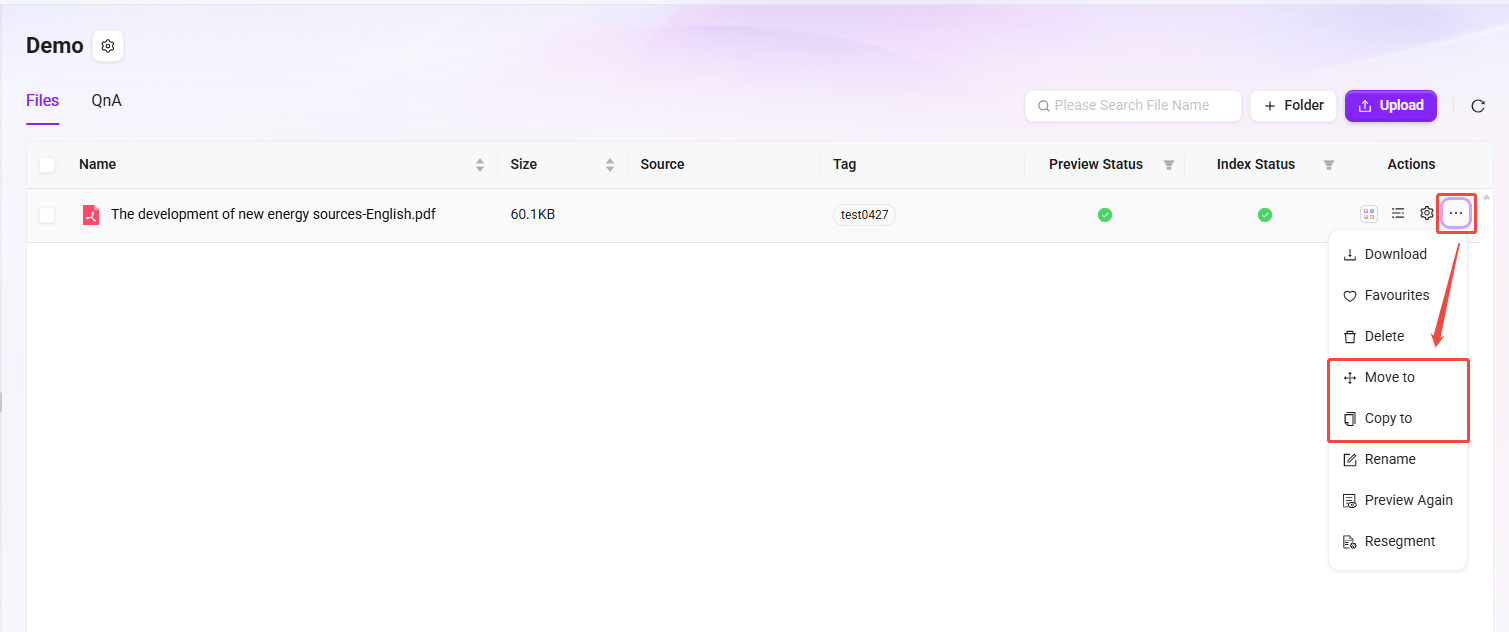
Move & Copy Files
Move/Copy Files: Select the file to move or copy, click "···" on the right, choose "Move to"/"Copy to", select the destination location, and click "Confirm".
- Files in My Space do not support moving or copying; only files in Enterprise Space support moving and copying.
- In addition, moving and copying files in Enterprise Space can only be performed within the same knowledge base.
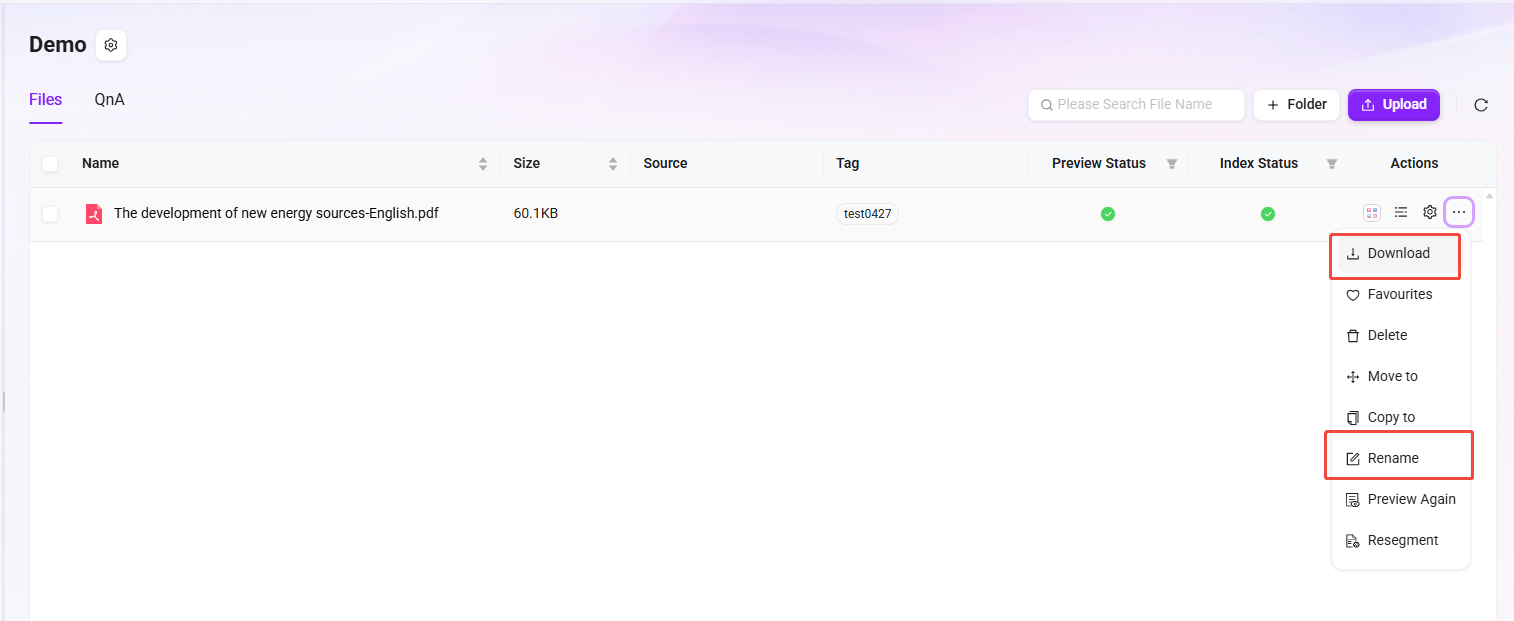
Download & Rename Files
- Specific examples of download & rename are as follows:
- Select the file "Azure - Compliance Offerings (September 2024).pdf";
- Click "···" on the right or click "Download"/"Rename" at the bottom of the page;
- Click "Download" to complete the download, or click "Rename", enter the new file name, and click "Confirm".
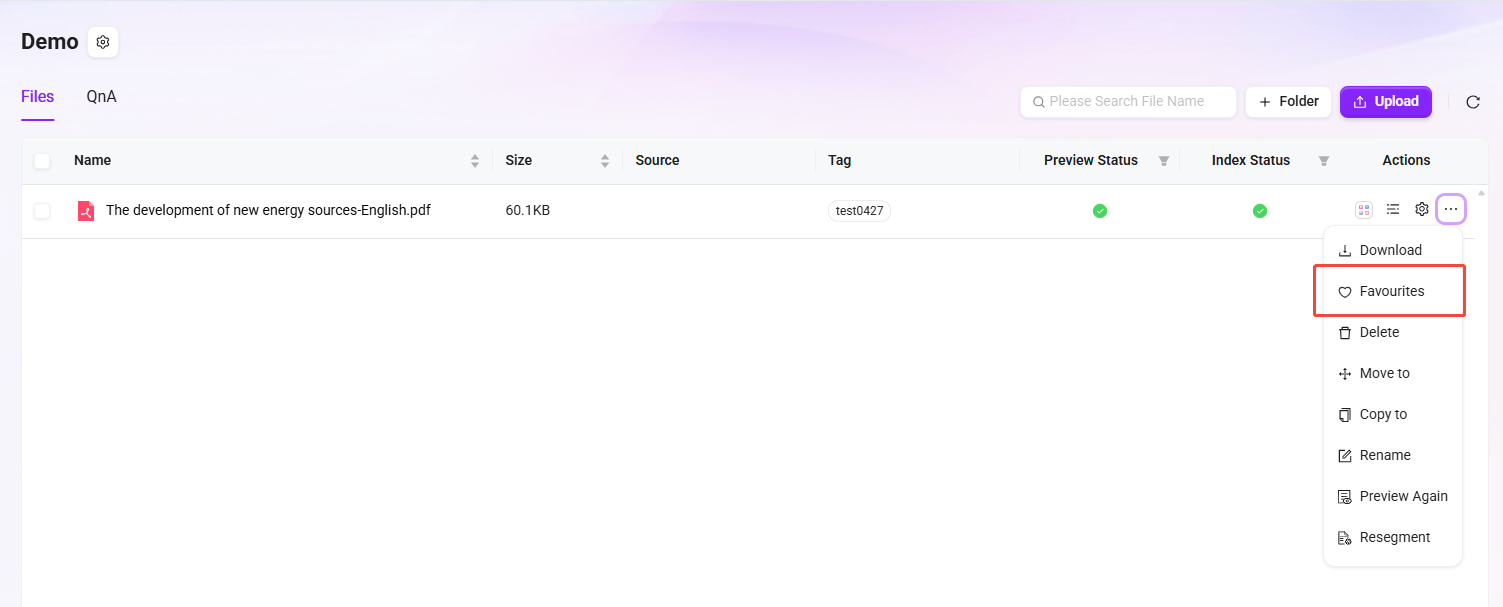
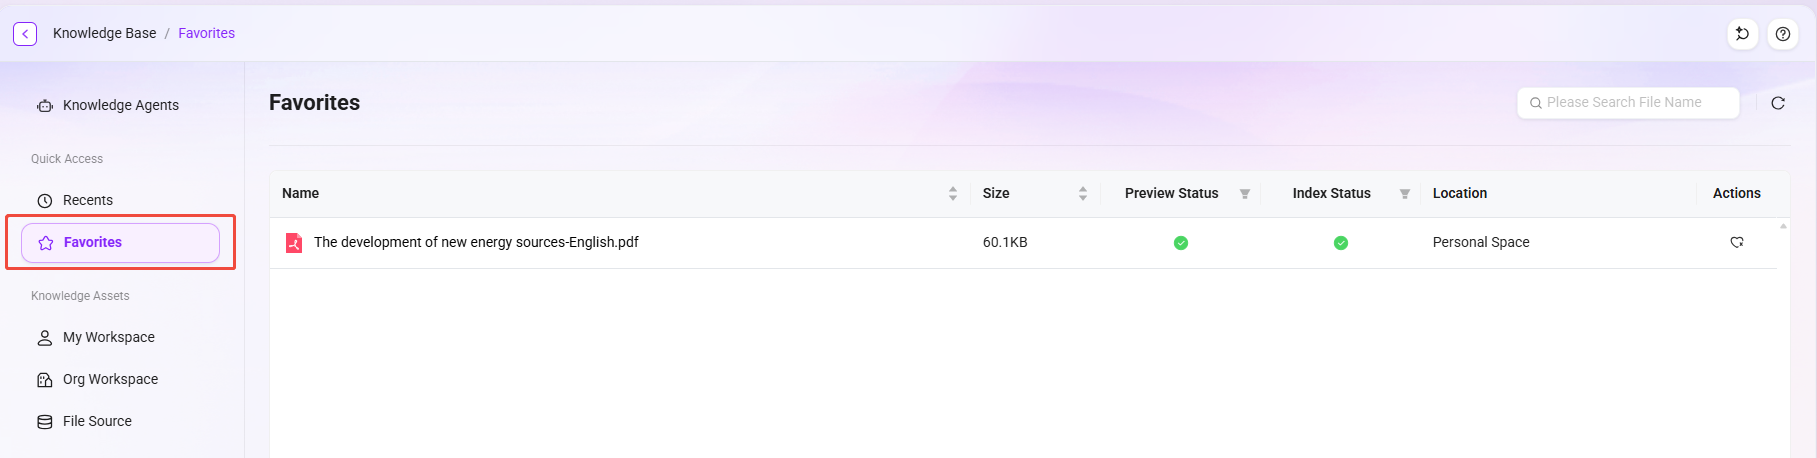
Favorite Files
- Specific examples of favoriting files are as follows:
- Select the file to favorite;
- Click "···" on the right;
- Select "Favorite". After favoriting successfully, a prompt "Successfully added to favorites list" will appear at the top of the page;
- After favoriting successfully, Unfavorite is supported in the favorites file list.
💡 Tip: Files in both My Space and Enterprise Space support favoriting. Favorited files can be viewed in "Knowledge->Favorites".
Favorite File Operation:
File Favorites List:
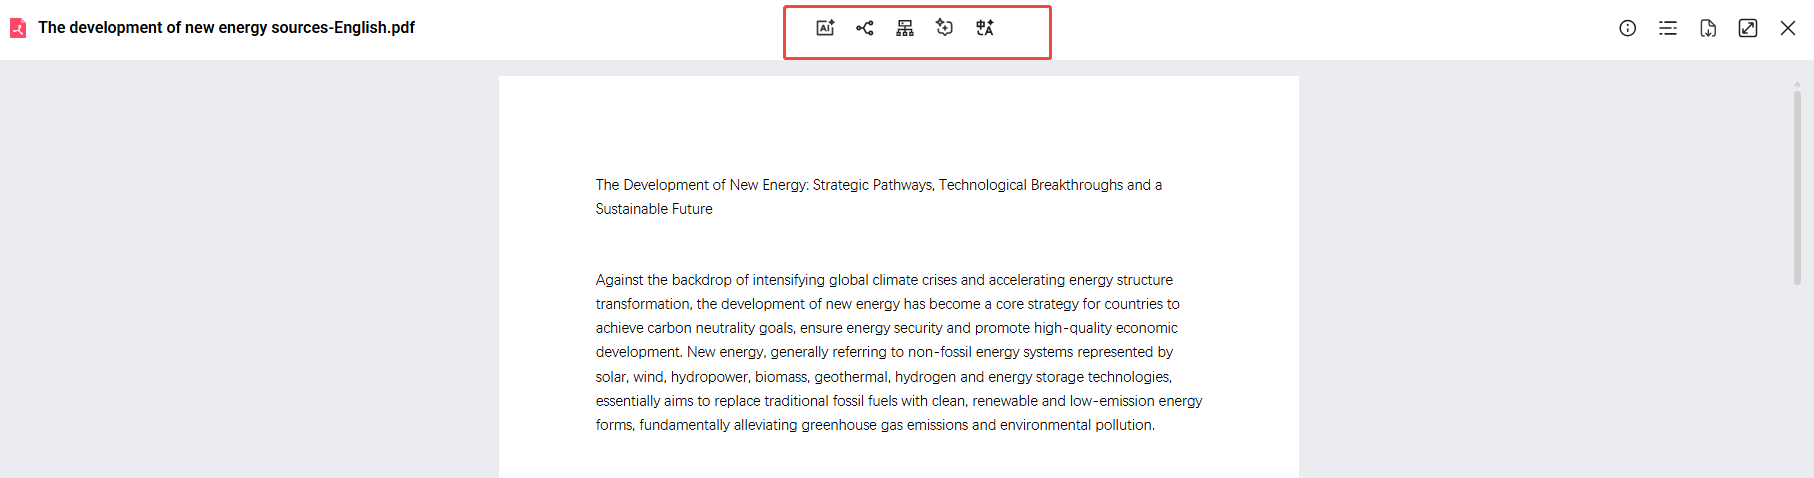
Preview Files
After a file is uploaded and indexed successfully, there will be a preview process, with the status Preview Successful. Click the file name to view the preview.
At the top of the preview page, you can view the file's summary, mind map, outline, and conversation.
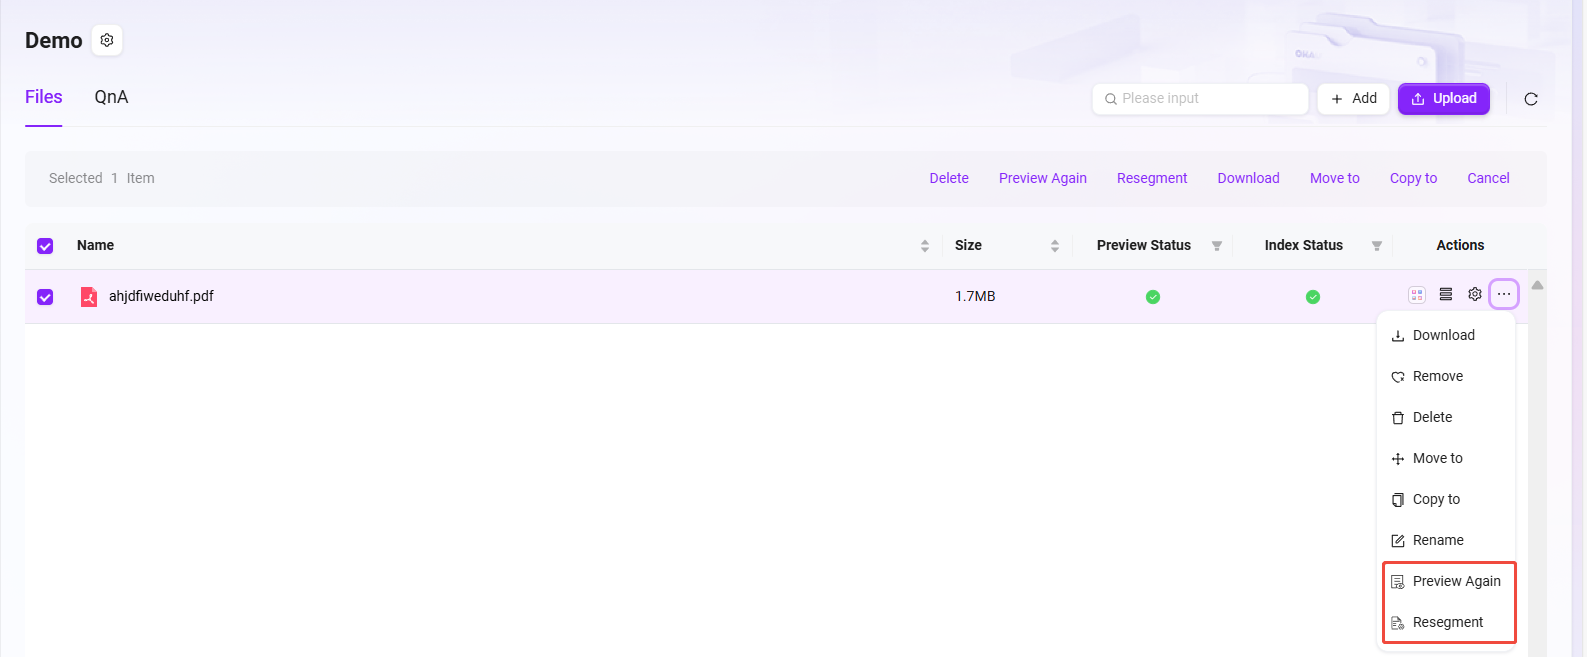
Re-preview & Re-segment
After selecting a file, the buttons "Re-preview" and "Re-segment" will appear.
- Re-preview refreshes the file display effect to ensure the content presentation meets expectations.
- Re-segment is used to adjust the file structure, making paragraph or segment division more reasonable and optimizing the content organization logic.
What is QnA?
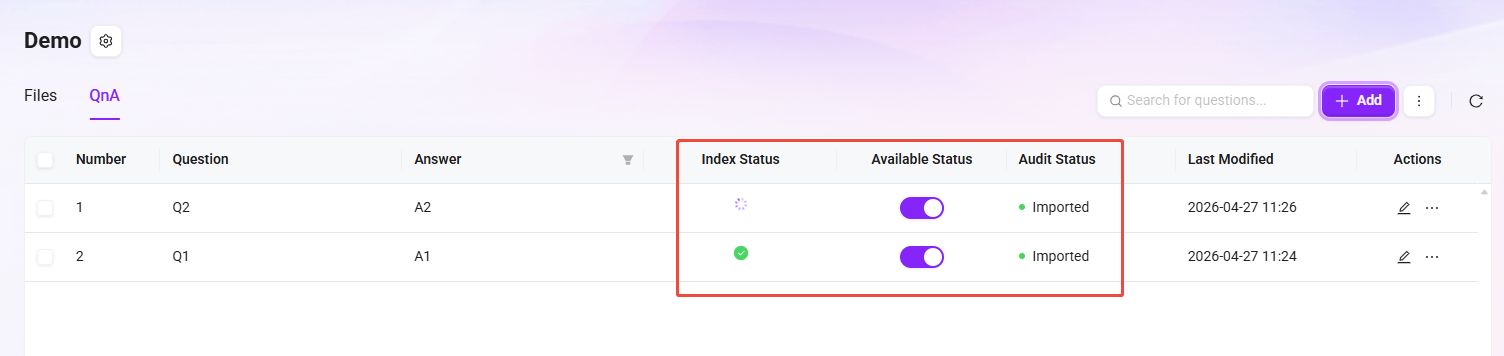
Enterprise Space has the QnA feature. When the agent retrieves a question in QnA, it will directly provide the preset answer instead of relying on online Q&A. This effectively avoids issues such as inaccurate or inconsistent answers caused by complex online information, ensuring that responses precisely match enterprise needs and standards.
QnA supports retrieval based on multiple dimensions such as enterprise space, question, and answer, enabling quick location of the required information, greatly improving information lookup efficiency, helping enterprise employees quickly obtain accurate knowledge, and accelerating business processes.
QnA-related Operations
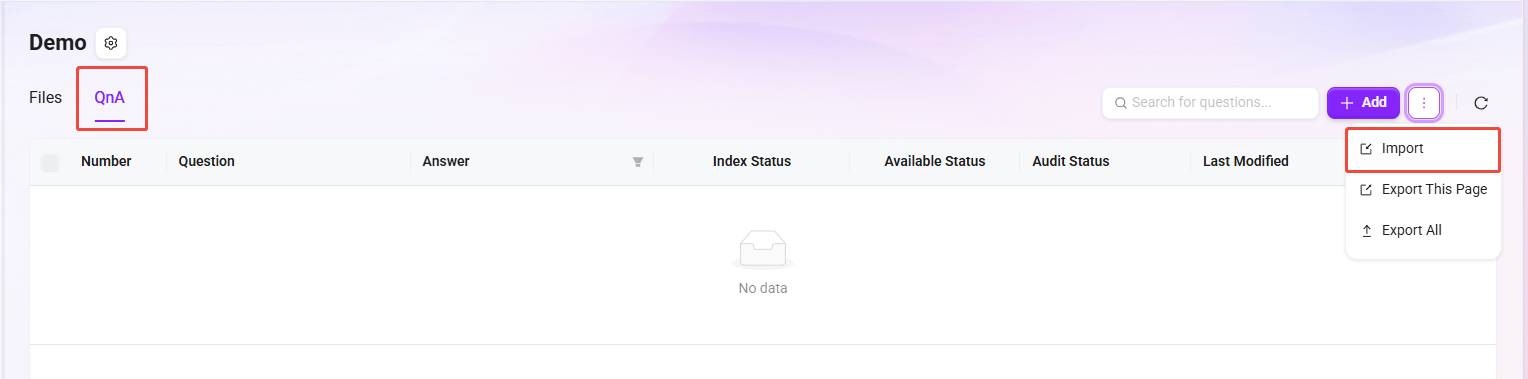
Import Q&A Pairs
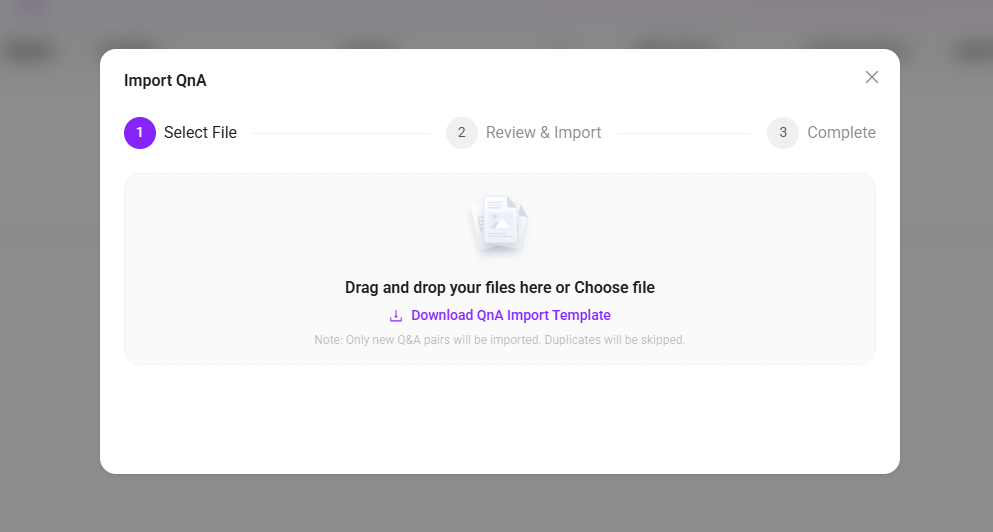
QnA has two upload methods, one of which is Import QnA. Import QnA supports batch import and is suitable when there are many QnA entries.
Specific steps for importing QnA:
-
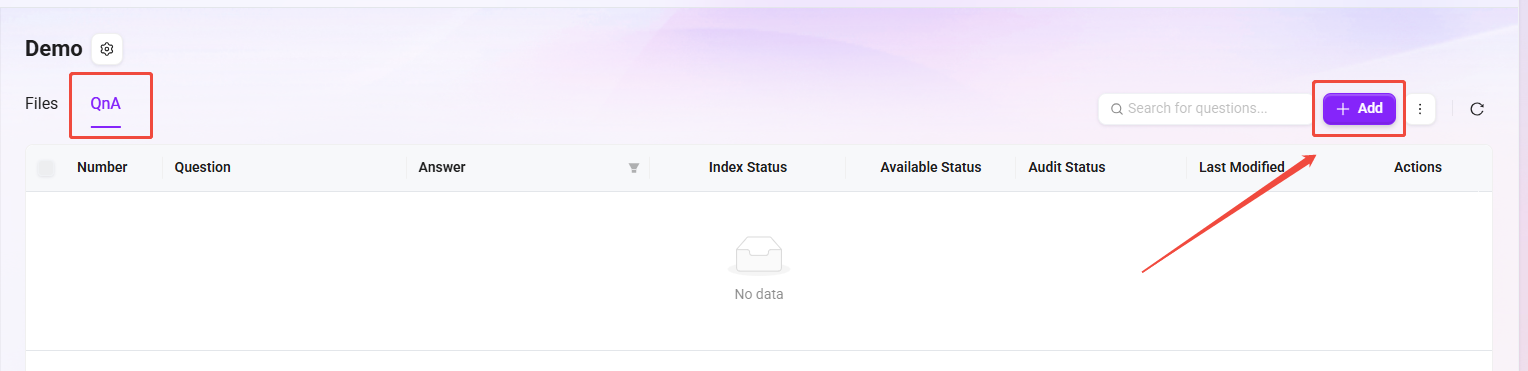
Enter the Enterprise Space knowledge base and open the QnA interface;
-
Click the "···" button on the right, select "Import", and the import page will pop up;
-
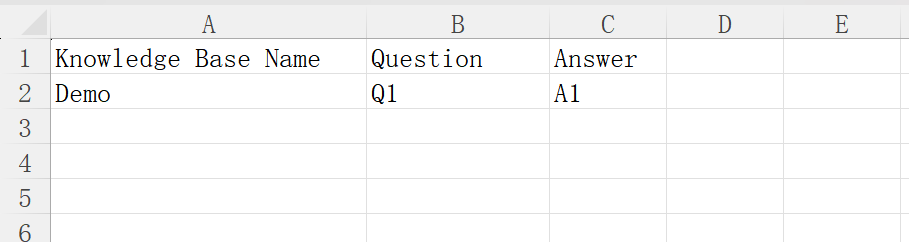
You can choose "Download Q&A Pair Import Template", complete the template file, and fill in Enterprise Space, Question, Answer (Enterprise Space refers to the knowledge base name under the enterprise space);
-
After completing the template file, enter the import page again following the above steps, and drag and drop or select the template file you just completed;
-
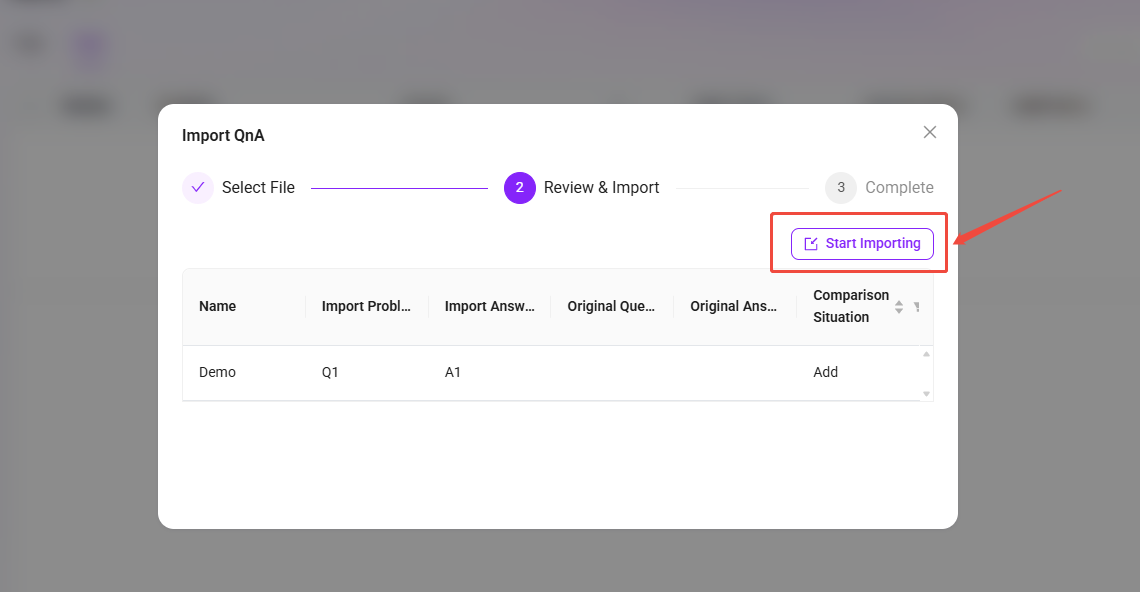
The file information will be previewed automatically. After confirming it is correct, click "Start Import" on the right;
-
Wait until Import Successful is displayed.
💡 Tip: Only newly added QnA entries are imported. Questions duplicated with existing QnA entries will be skipped.

Add QnA
QnA has two upload methods. The other is Add QnA, which allows only one entry to be added at a time.
The steps for adding QnA are as follows:
-
Enter the Enterprise Space knowledge base and open the QnA interface;
-
Click the "Add" button on the right to enter the add interface, with the question panel on the left and the answer panel on the right;
-
On the question side, select the knowledge base name where the QnA belongs;
-
Click the "Add" button to add multiple questions;
-
On the answer side, enter the answer. Answer input supports text, links, images, videos, etc.;
-
After entering the answer and questions, click "Save", and the QnA will be added successfully.
💡 Tip: When adding multiple questions at once, these multiple questions share only one answer, which is the answer entered on the right-side answer page.
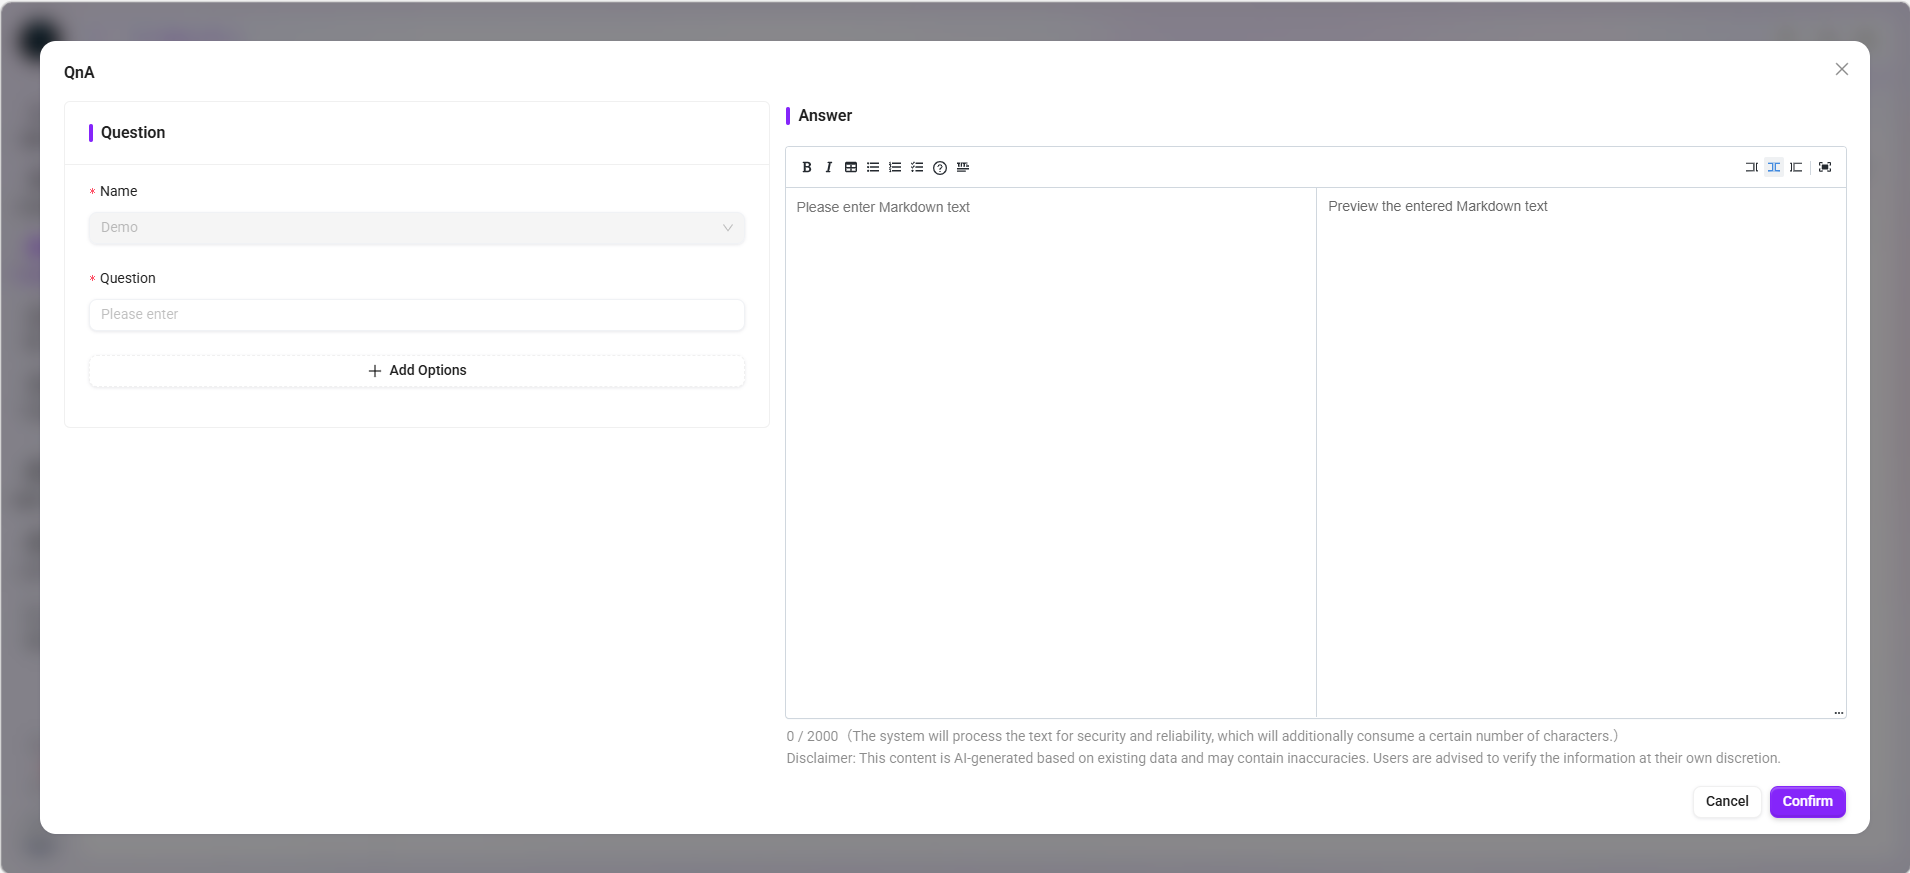
- "Answer" contains rich text style tags, so it is recommended to limit it to within 2000 characters overall, which will be beneficial for AI responses.
- To insert a video, embedded code is required, for example
<iframe src="//player.bilibili.com/player.html?aid=535563667&bvid=BV1jM411S74q&cid=1322473540&p=1" scrolling="no" border="0" frameborder="no" framespacing="0" allowfullscreen="true"> </iframe>.
Review QnA
The QnA approval process is designed to ensure the accuracy and standardization of knowledge base content. This process mainly targets questions and answers submitted by non-admin users, ensuring that content enters the QnA repository for general users only after administrator review. Content submitted by administrators does not require review and takes effect directly. All questions pending review will automatically be arranged at the top of the list for administrators to process with priority.
QnA approval statuses: Pending Review, Added to Repository, Rejected
- Pending Review: Submitted questions and answers automatically enter the "Pending Review" status, waiting for administrator review and processing.
- Added to Repository: After administrator review and approval, the questions and answers enter the QnA repository and can be viewed by general users.
- Rejected: If the content does not meet standards, the administrator can choose to reject it. Rejected content will not be shown to general users, but will remain in the system for subsequent review.
QnA approval operations: Approve, Reject, Batch Operations
- Approve: Administrators approve content that meets requirements, allowing it to enter the QnA repository. Approved QnA entries can no longer be rejected.
- Reject: For content that does not meet standards, administrators can choose to reject it.
- Batch Operations: Supports administrators selecting multiple pending review items for batch approval.

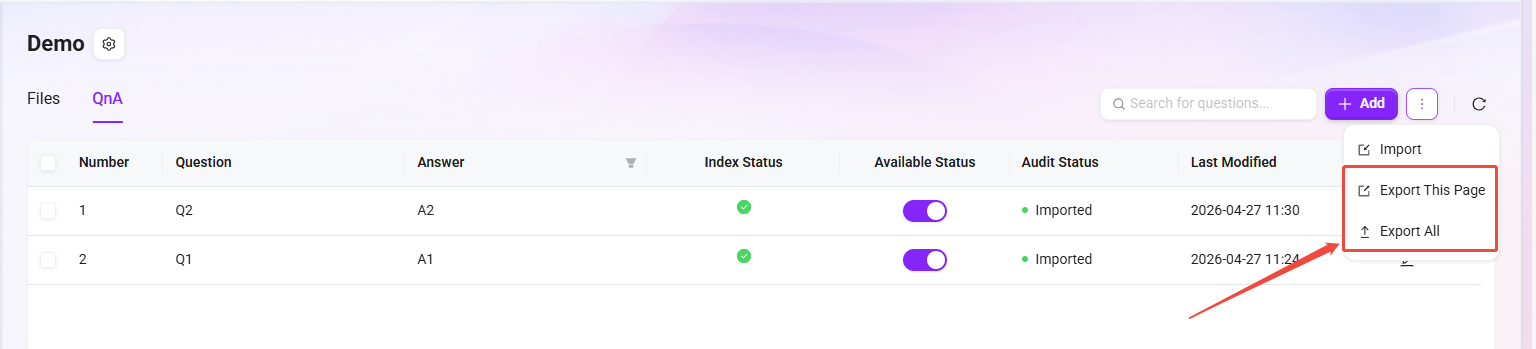
Export QnA
QnA export is currently supported. You can export the current page or export all QnA.
The specific steps for exporting QnA are as follows:
- On the QnA page, click "Export" on the right;
- Select "Export Current Page" or "Export All";
- After export, you can check the file in the default local location.