How to Use Data?
Concepts
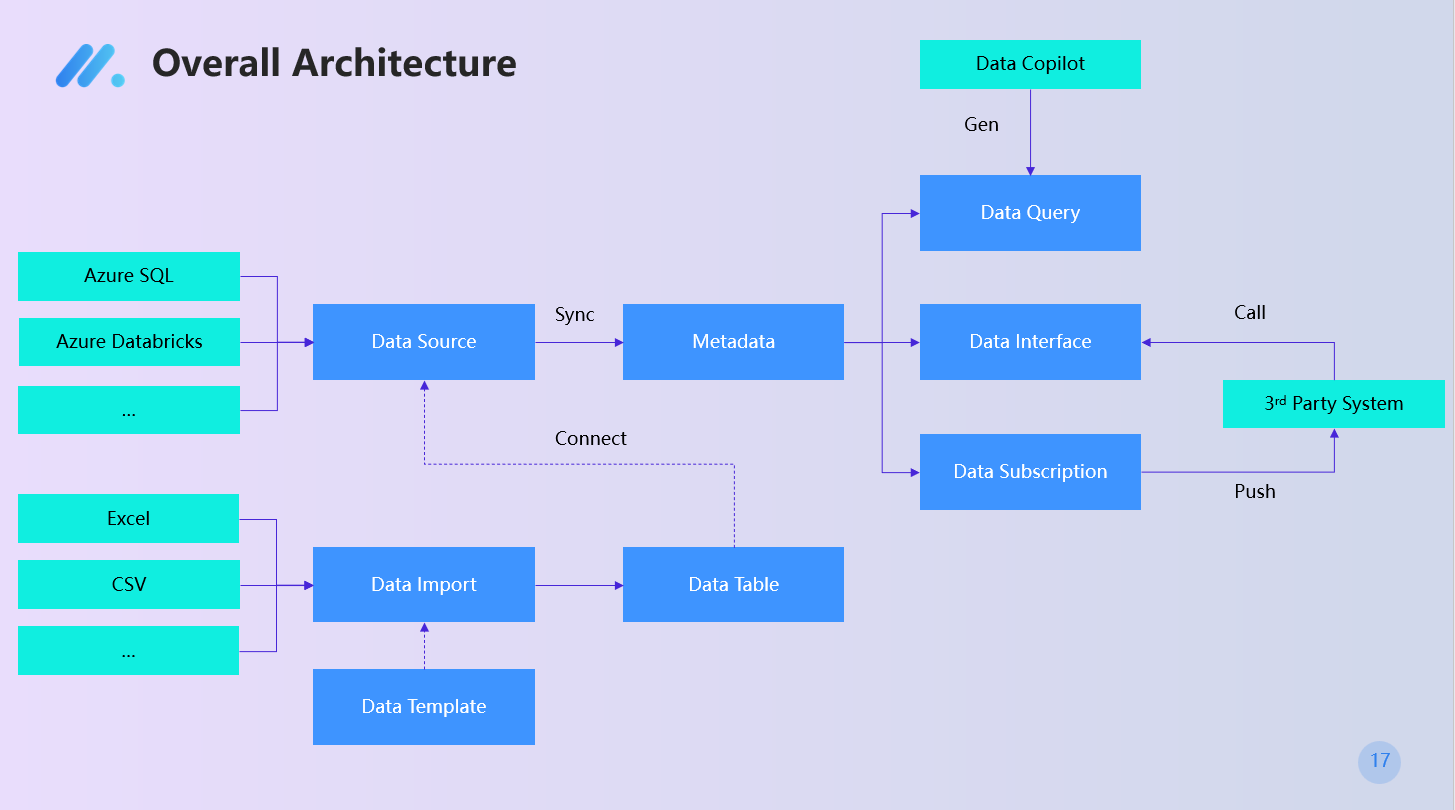
The Data module is designed to help enterprises efficiently manage, utilize, and share their data assets. Through flexible data interfaces, metadata management, data source configuration, and data import features, users can fully control and optimize the data flow process. The product provides an intuitive operation interface, making it easy for users to query, preview, and operate data, while also supporting data subscription and push functions to ensure data timeliness and accuracy.
Overall Architecture
Data Assets
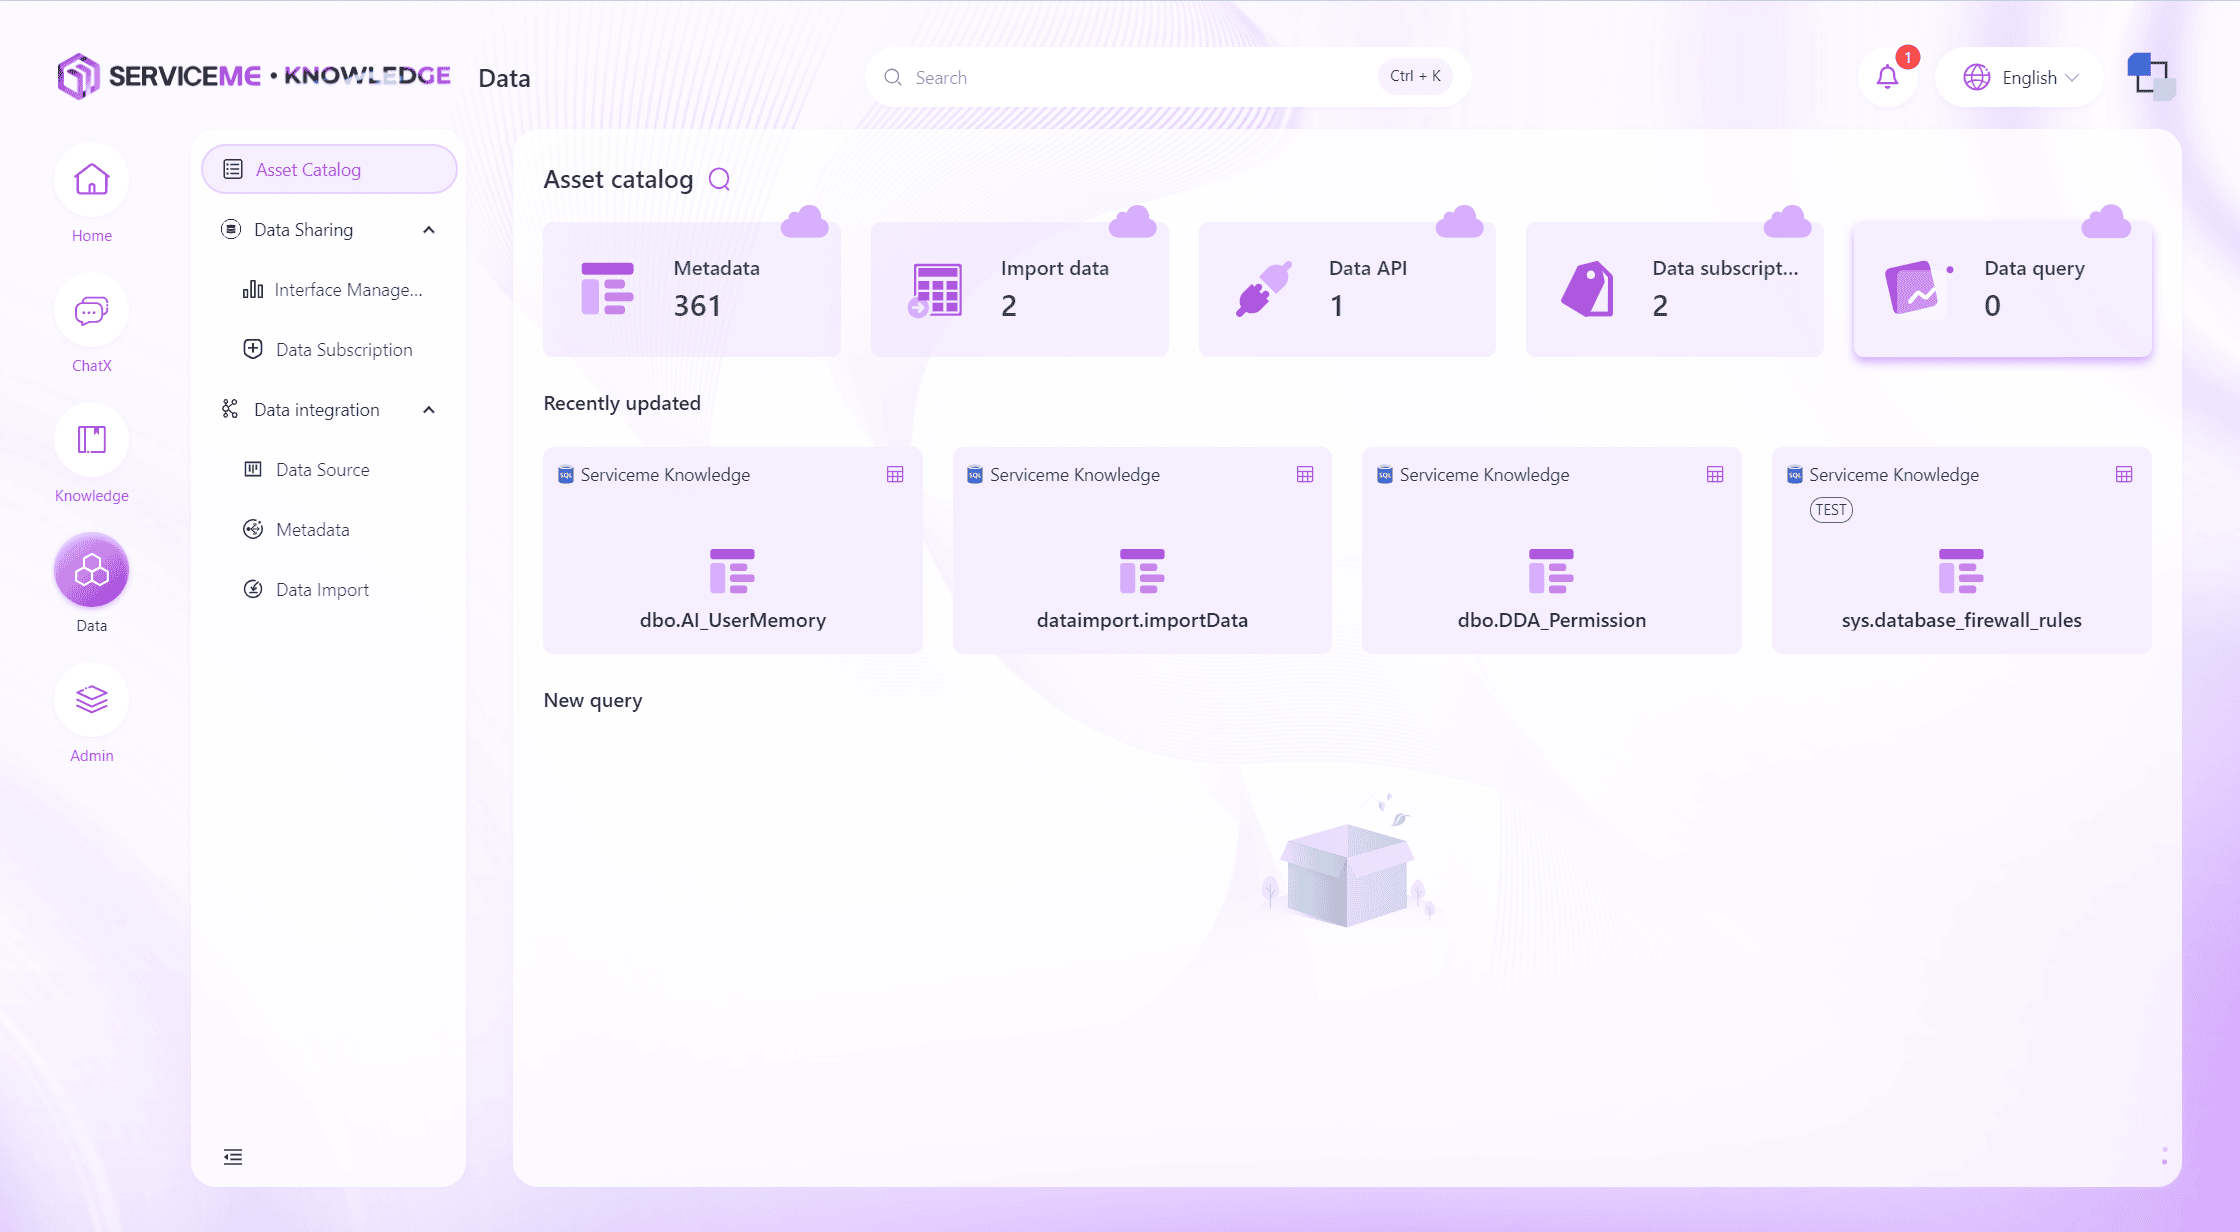
As the entry point of the Data module, the Data Assets module provides an overview, allowing enterprise users to intuitively grasp the quantity and detailed information of various data assets in the system, helping users fully understand the current data landscape and its distribution.
Search Data Assets
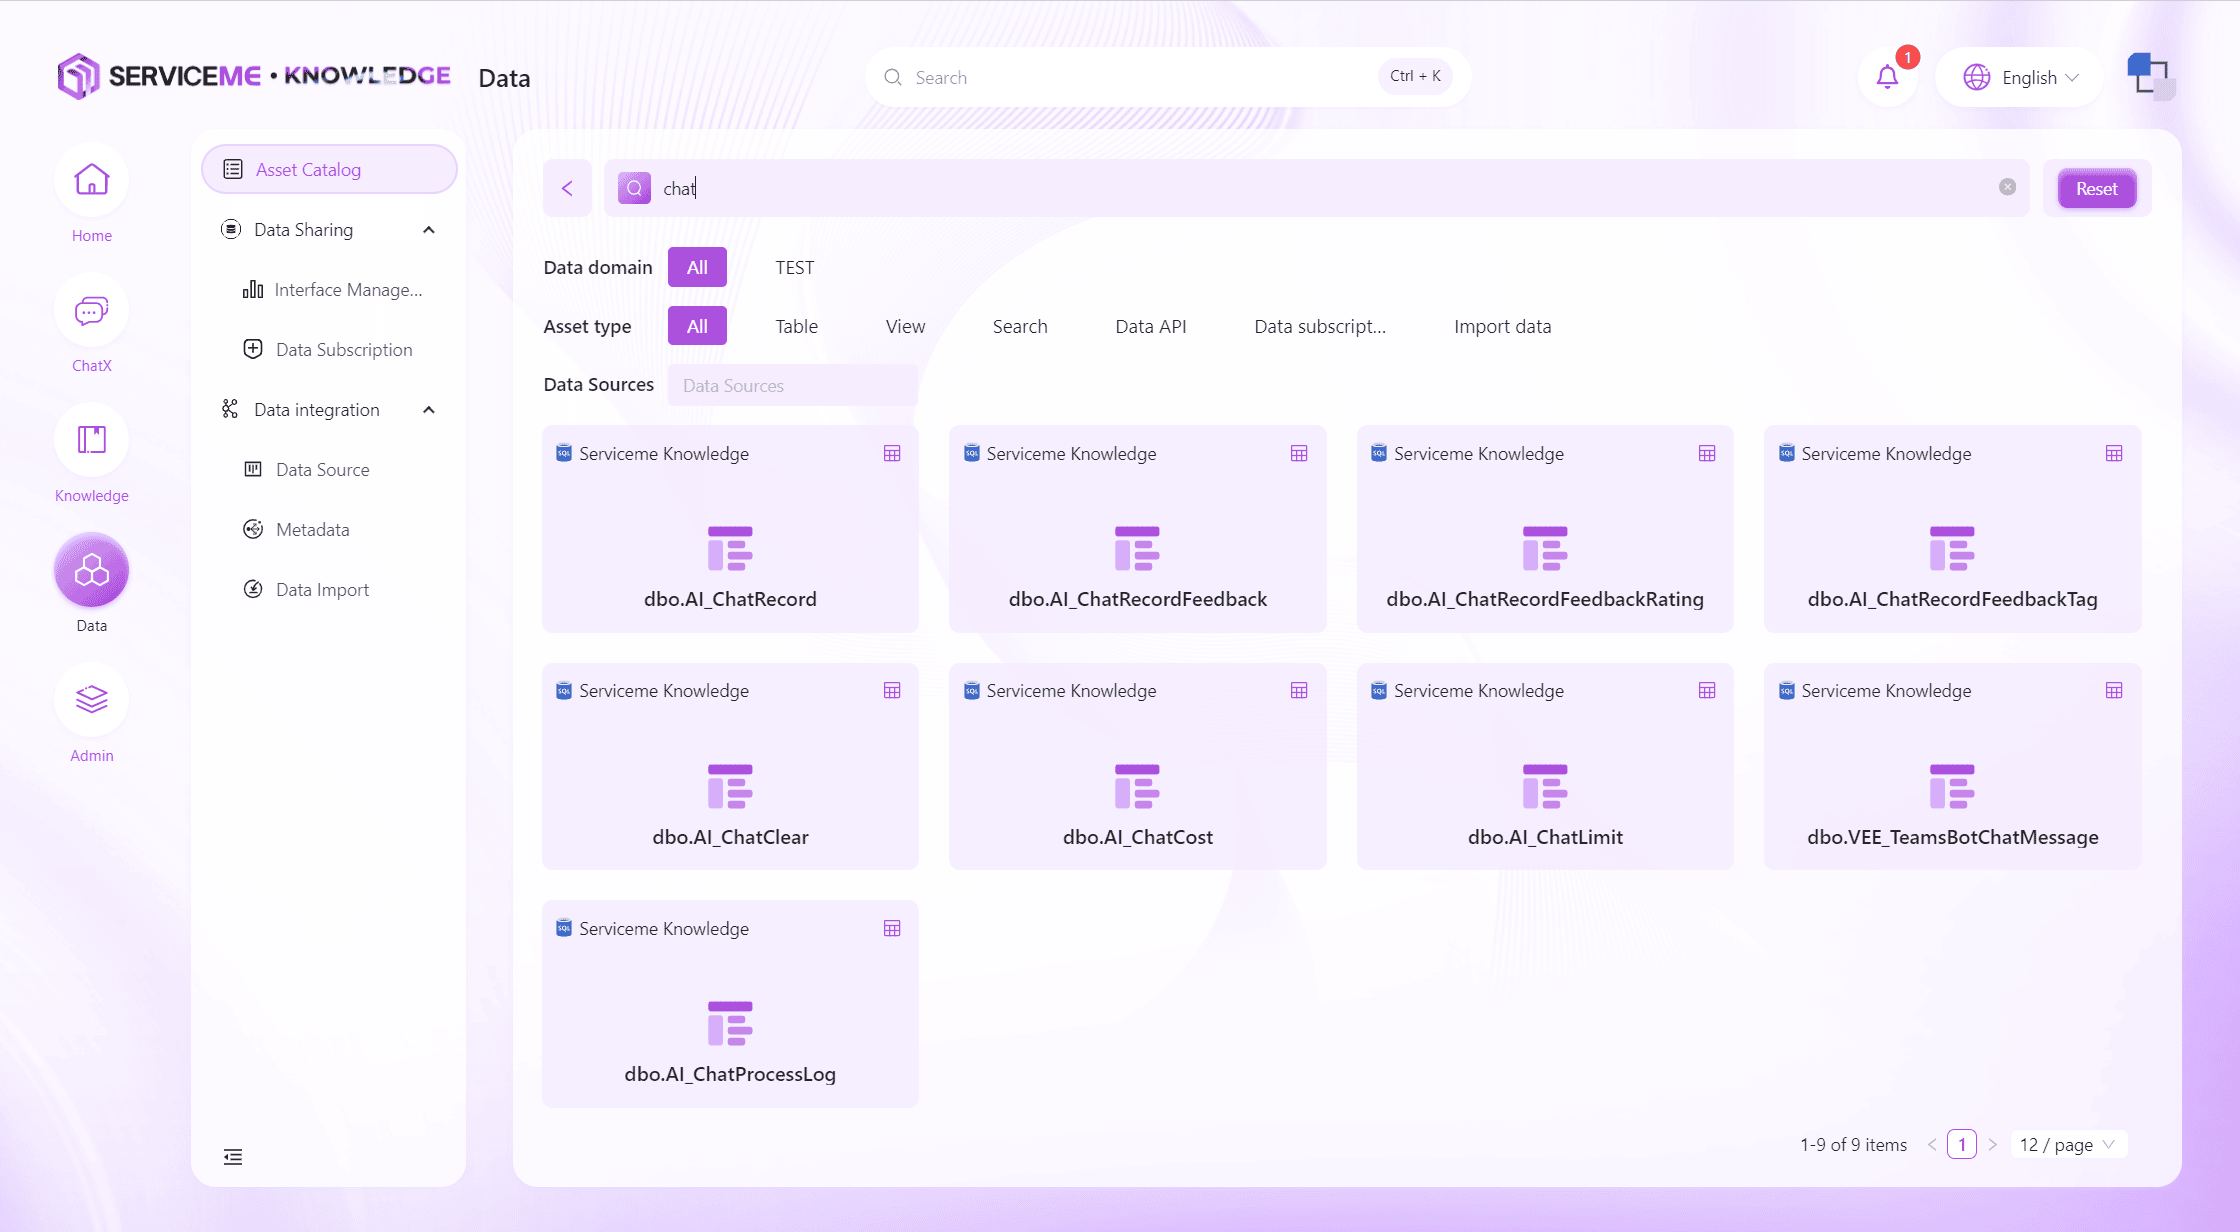
Through the search function (magnifying glass), you can quickly locate data assets by keywords, data asset categories, and other information.
View Asset Data and Metadata
Each data asset card provides quick links for data preview and metadata viewing.

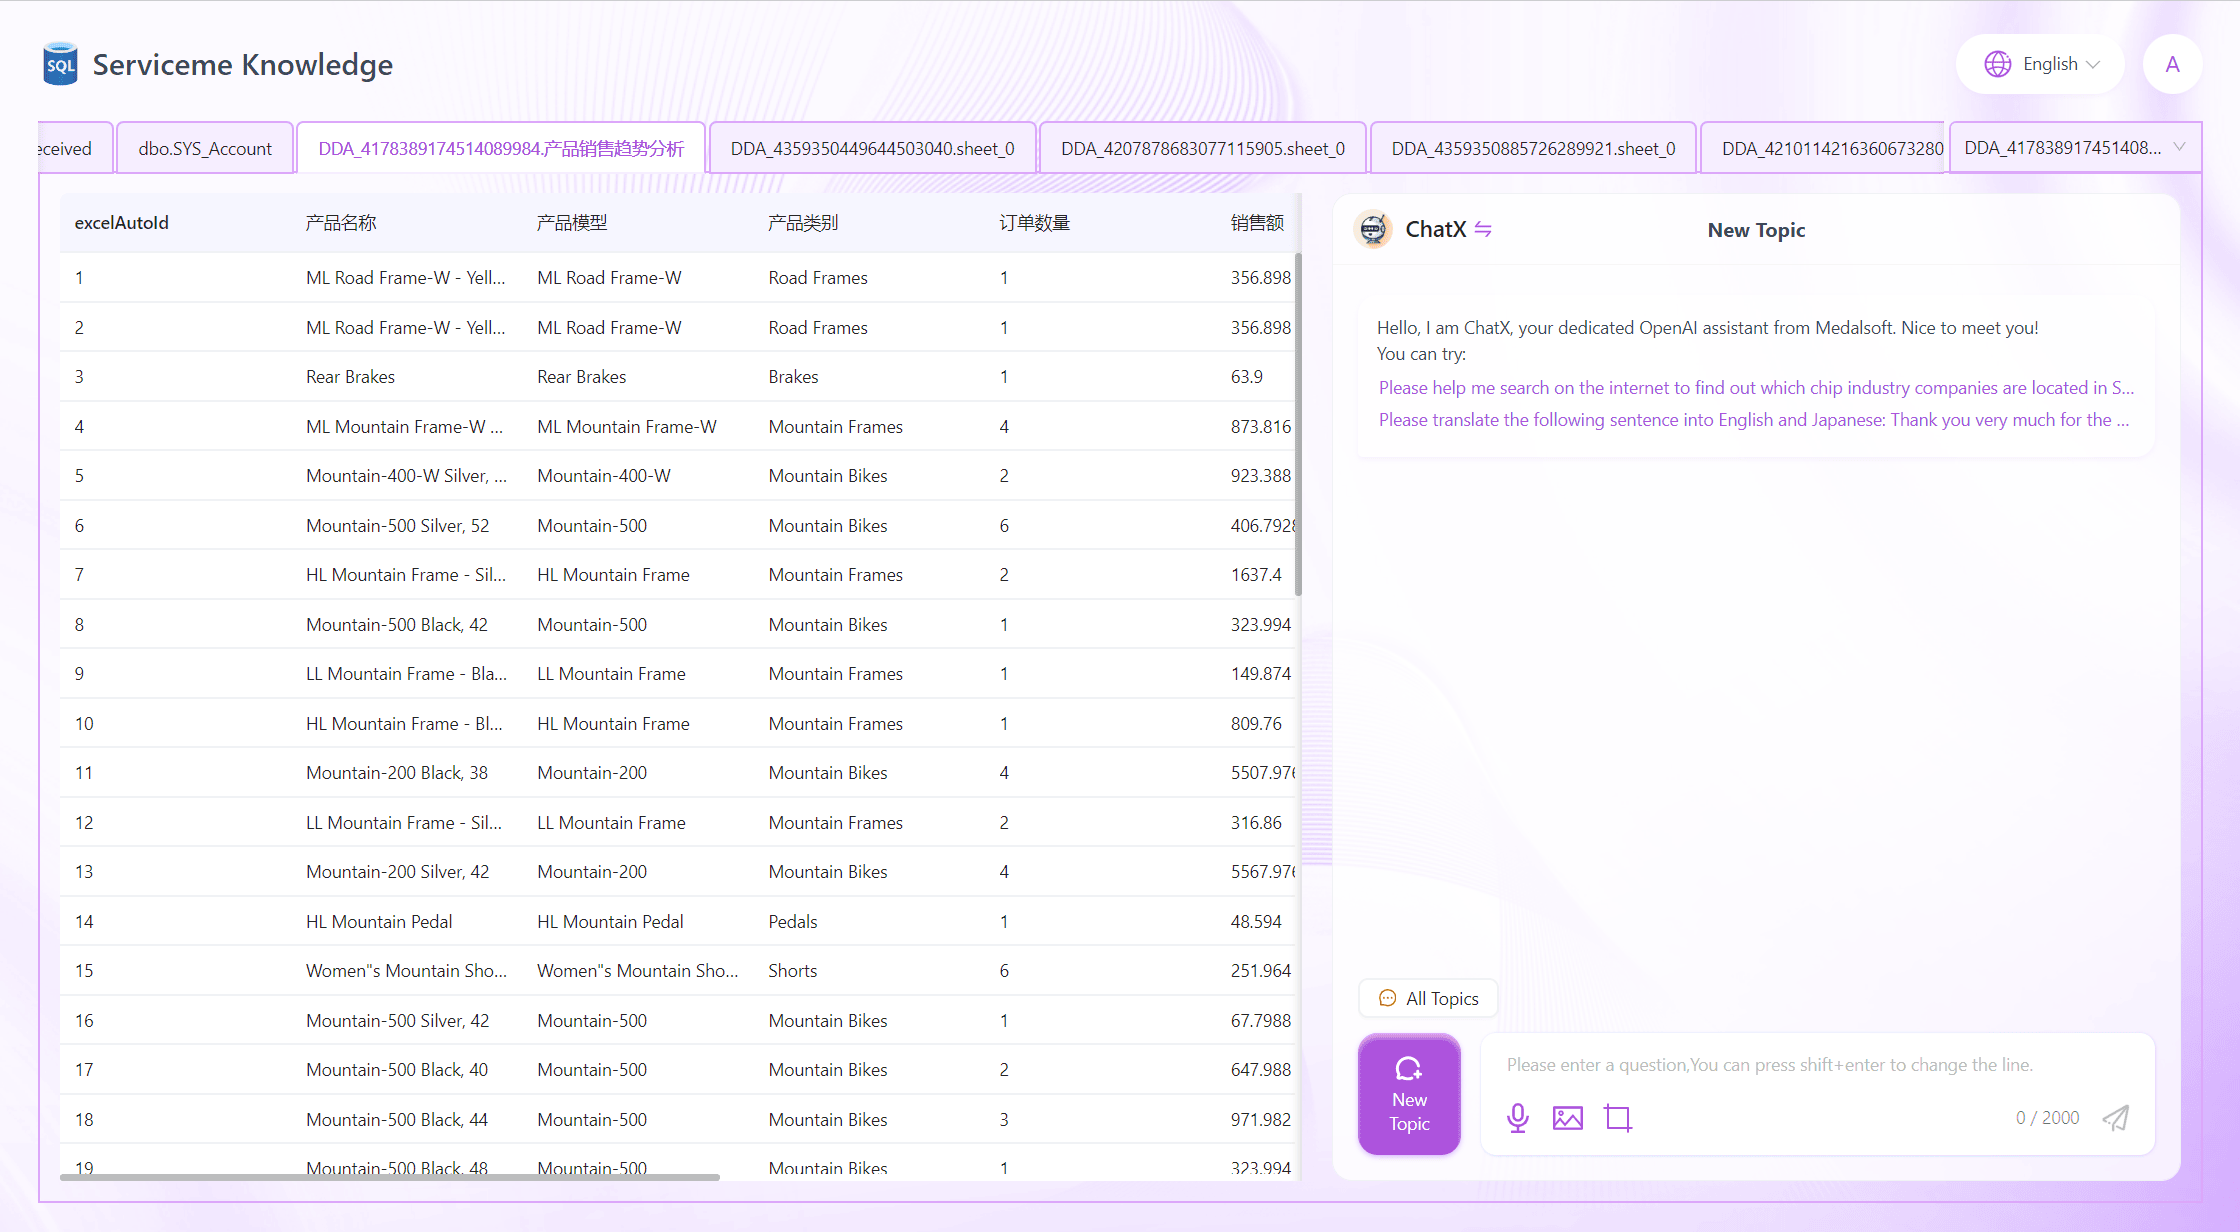
Clicking the center area of the card will enter the data preview interface, where users can see a portion of the data in the corresponding data table, and more data can be loaded by scrolling down.
If the ChatX module is enabled, an Agent chat interface will be displayed on the right side, allowing users to query the current data in natural language and have the system provide insights.
Click [View Metadata] in the upper right corner of the card to enter the metadata viewing interface. Here, the table name, comments, remarks, etc. of the metadata will be displayed, as well as all field names, comments, and type information within the table.
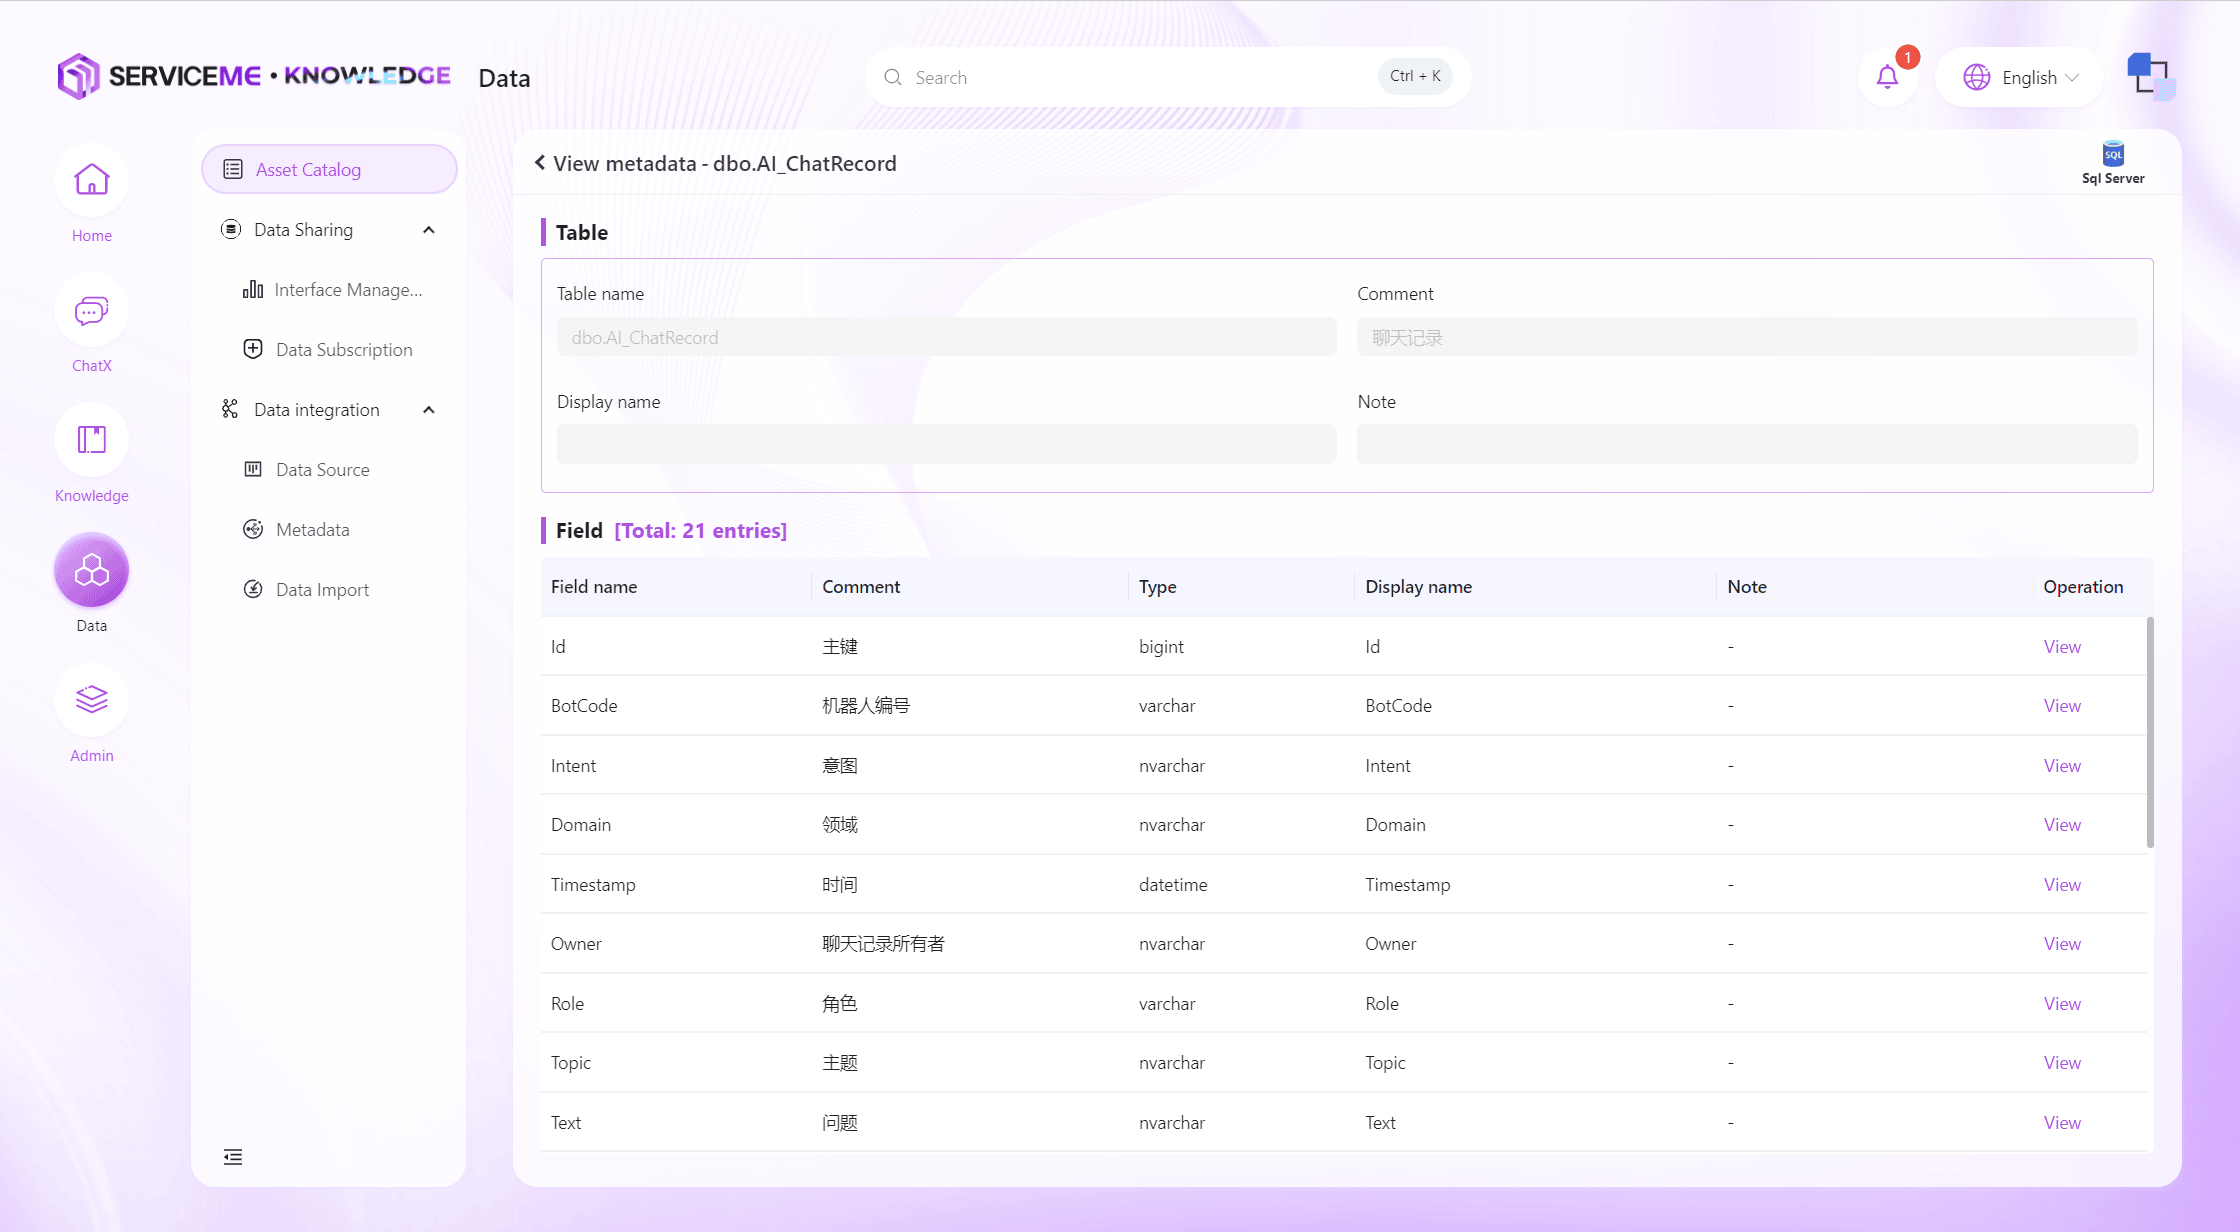
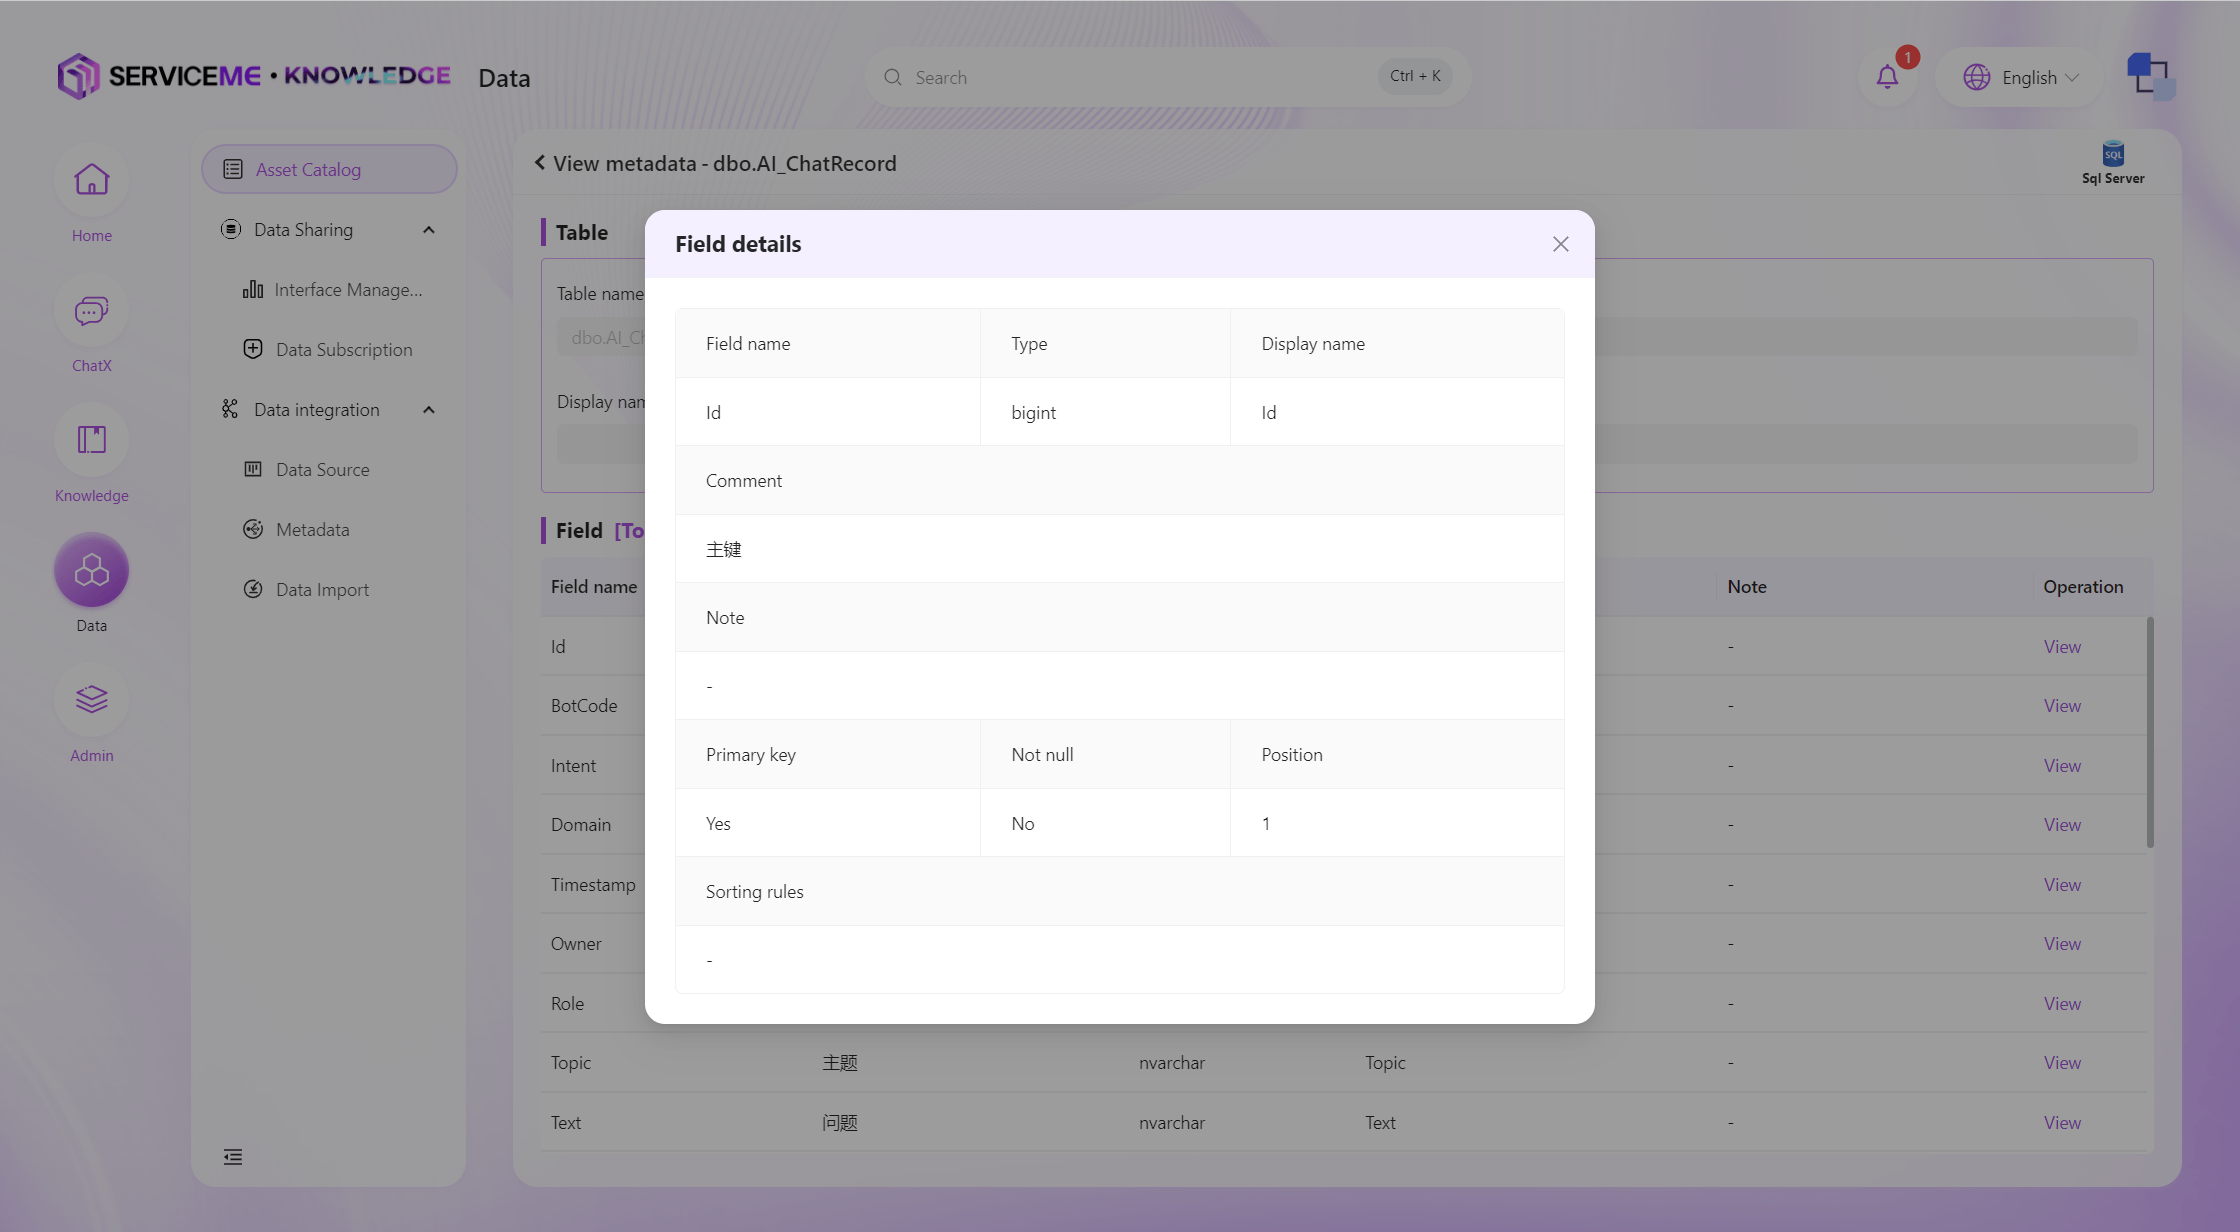
Click the [View] button to enter the field details page.
Data Interfaces
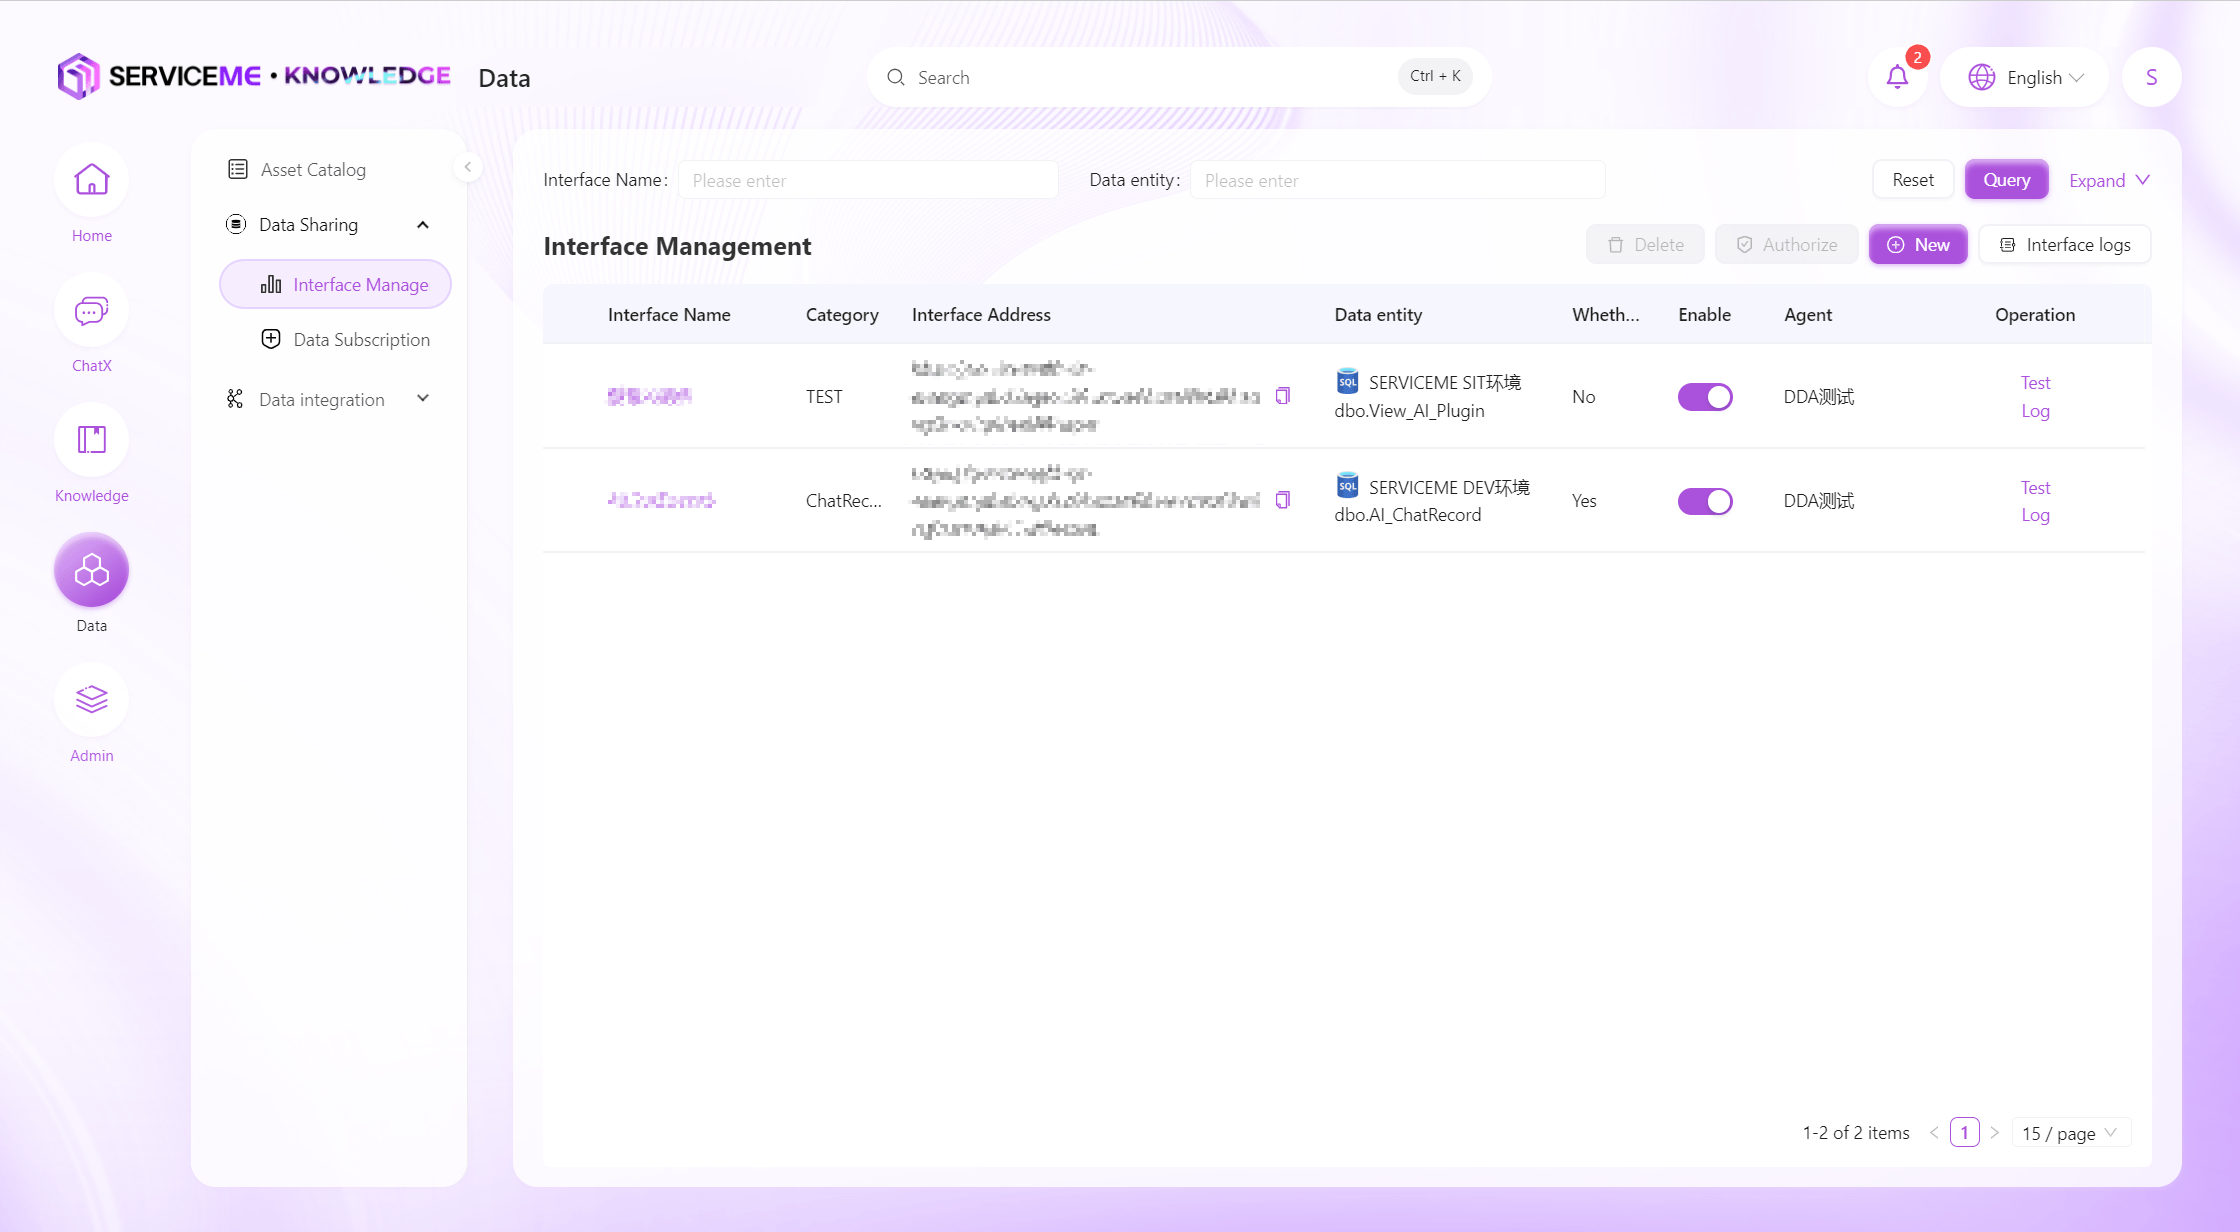
Provides easy-to-use functions for creating, modifying, and testing data interfaces. Users can efficiently develop and maintain data interfaces, and also supports interface log queries to ensure the stability and traceability of interface operations.
Instructions
- Search: Filter by interface name or data entity name
- Create New: Click to pop up a window to define a new data interface
- Interface Logs: Enter the data interface log viewing page
- Authorize: Grant interface access permissions to specified clients. Interfaces cannot be accessed without binding to a client
- Row Operations
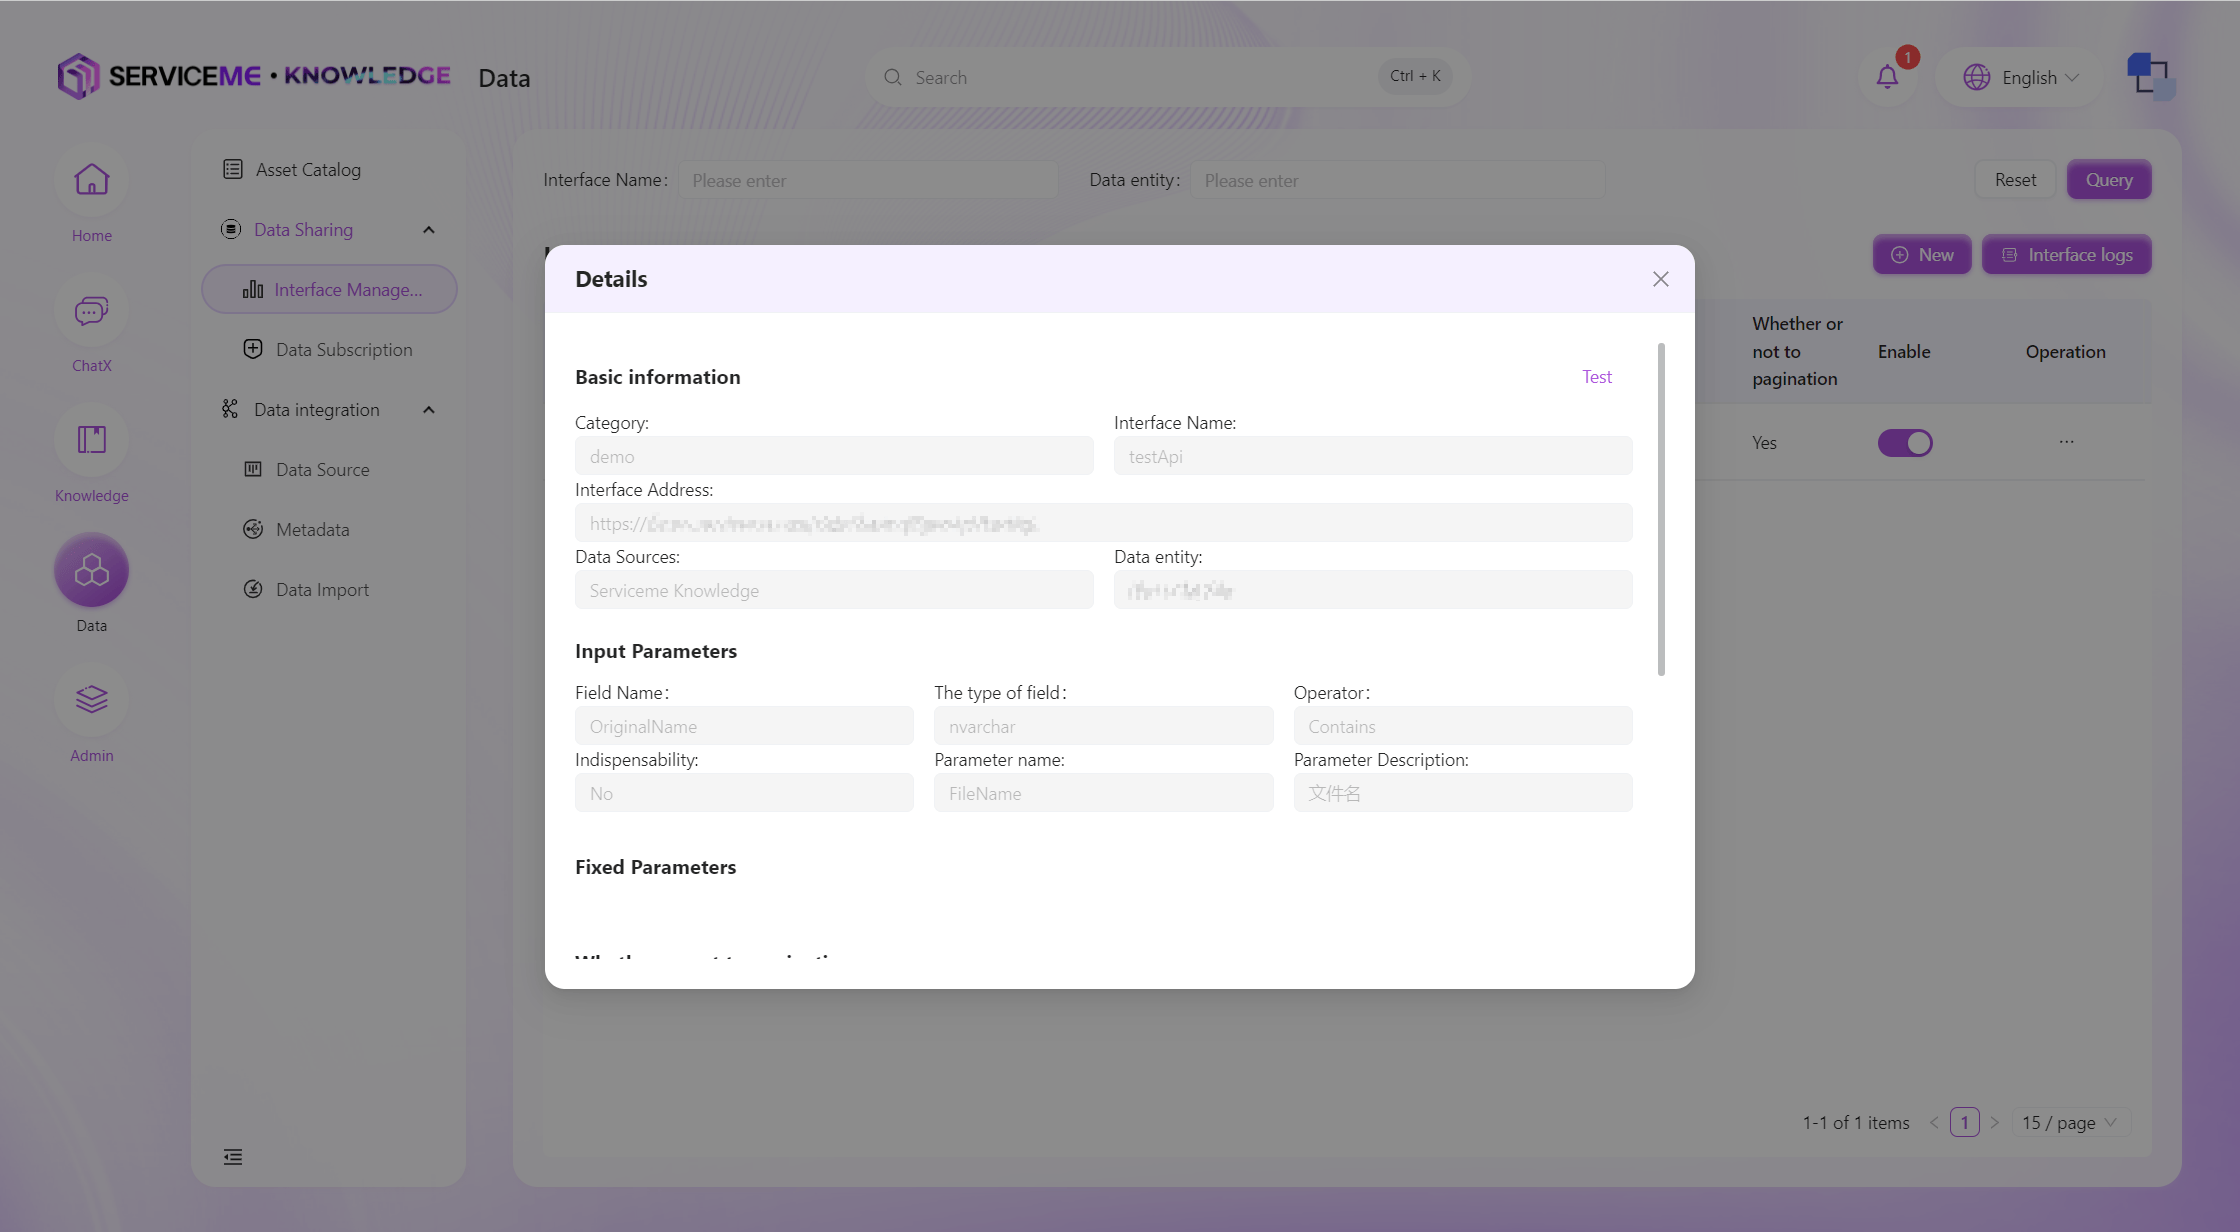
- Details: View detailed information about the interface
- Edit: Modify an already created interface
- Logs: View only logs related to this interface
- Enable/Disable: Disabled interfaces cannot be called, but the interface itself will not be deleted and can be enabled at any time
- Delete: Delete the interface
Interface Details
Create Data Interface
By creating an interface, you can add new data interfaces to the system. Users can add different data interfaces for querying different data entities, conditions, and fields. Currently, only single data entity query interface definitions are supported. If you need to perform associated queries on multiple entities, please first combine them into a view on the upstream platform, and then add conditions for querying through the data interface.
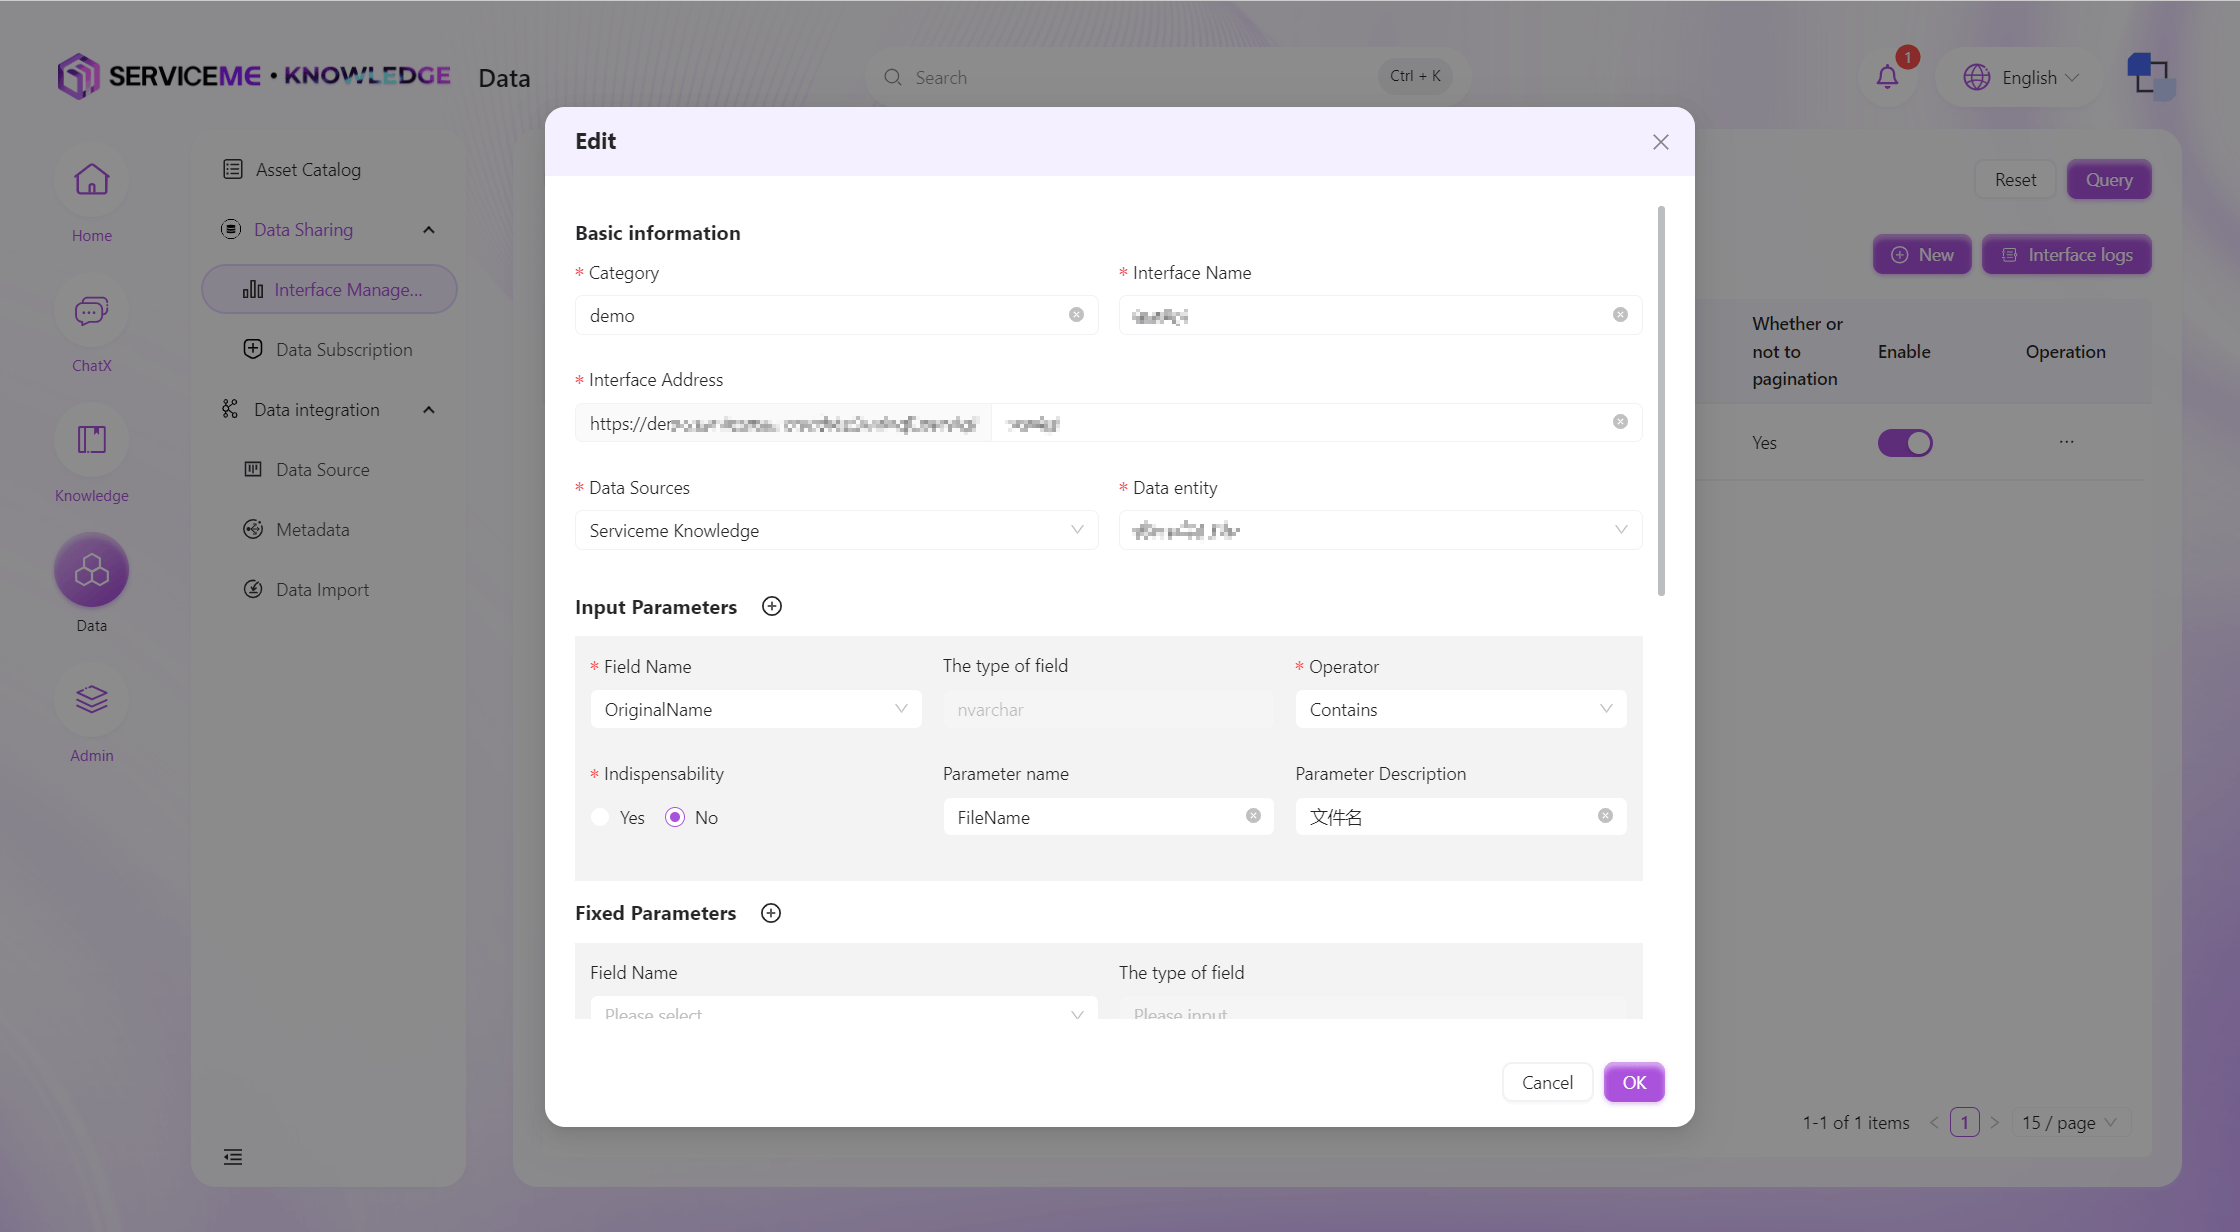
Field Descriptions
- Category: The category of the interface, which can be used as a grouping identifier when there are many data interfaces
- Interface Name: Used as the unique identifier for the interface
- Interface Address: The access address after the interface is published, which cannot be the same as other interfaces
- Data Source: The data source for the interface. The data domain must be maintained in the system before it can be selected here
- Data Entity: The data entity from which the interface queries data
- Input Parameters: One or more input parameters can be defined for the interface to filter data, providing common operators such as
equals,contains,greater than, etc. Input parameters are passed by the interface caller - Fixed Parameters: Fixed parameters/conditions that do not need to be passed by the caller. For example, if you always query provinces in China, you can set China as a fixed parameter
- Pagination: No, always returns all records that meet the conditions. Yes, the number of items per page is specified by the caller's
pageSizeparameter, and the page number bypageIndex. The total number of records and total pages correspond to the return parameterstotalCountandtotalPage - Sort Conditions: Control the sorting of query results by specifying the sort field and direction (ascending or descending)
- Return Parameters: Control which fields are returned through the interface. Fields not selected will not appear in the query result message (can be used to control the transmission of sensitive information)
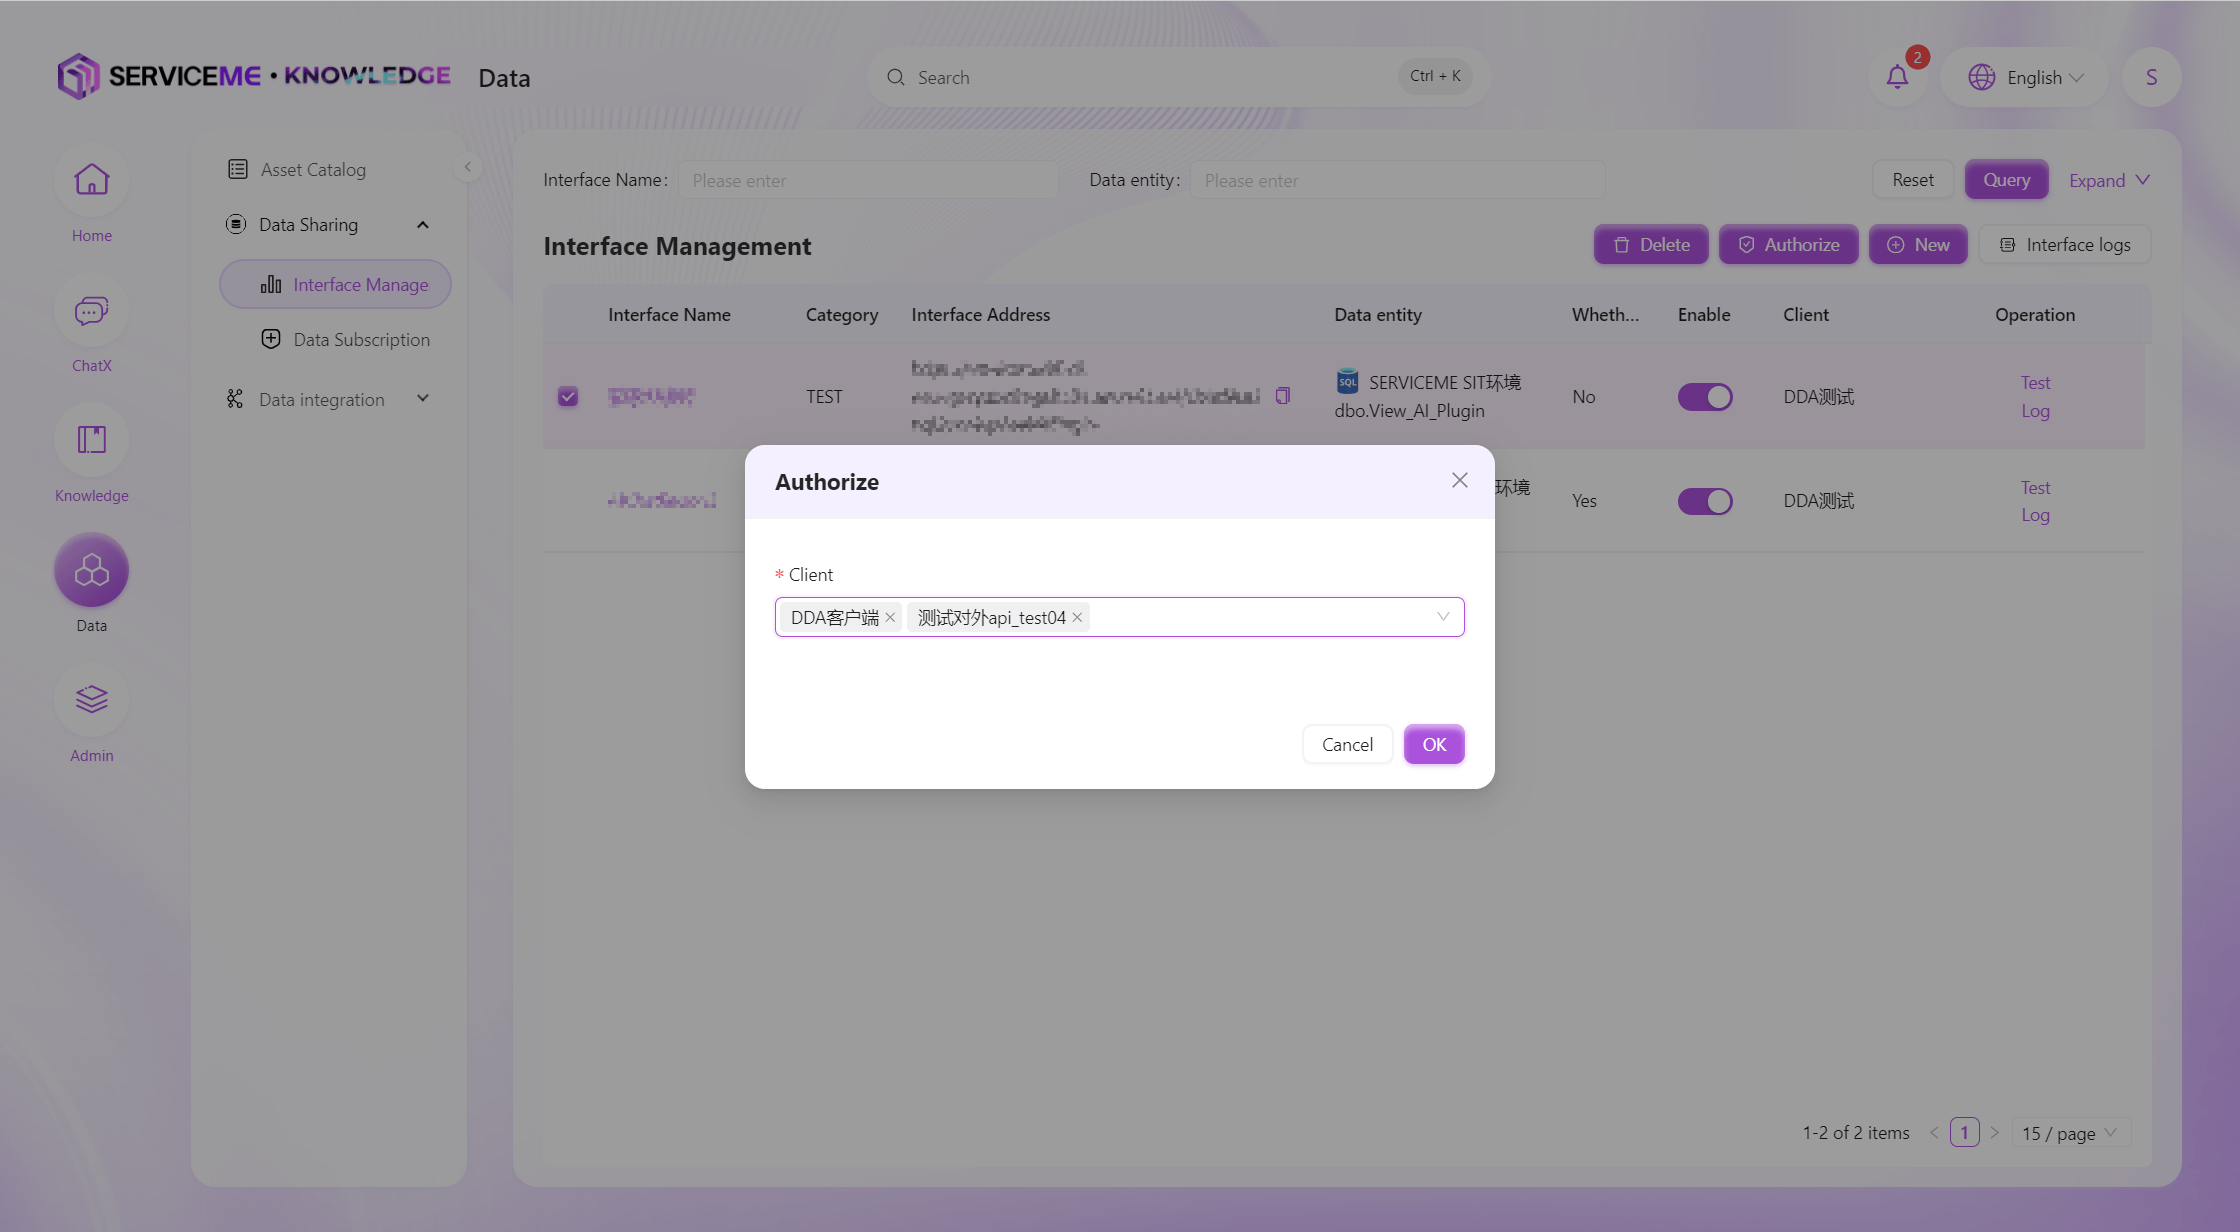
Data Interface Authorization
All data interfaces must be authorized before they can be called by external systems. A client represents the identifier of an external system, and usually one client corresponds to one external system. Before authorization, the SERVICEME administrator needs to add the client to the system, so that the corresponding client can be selected for authorization here.
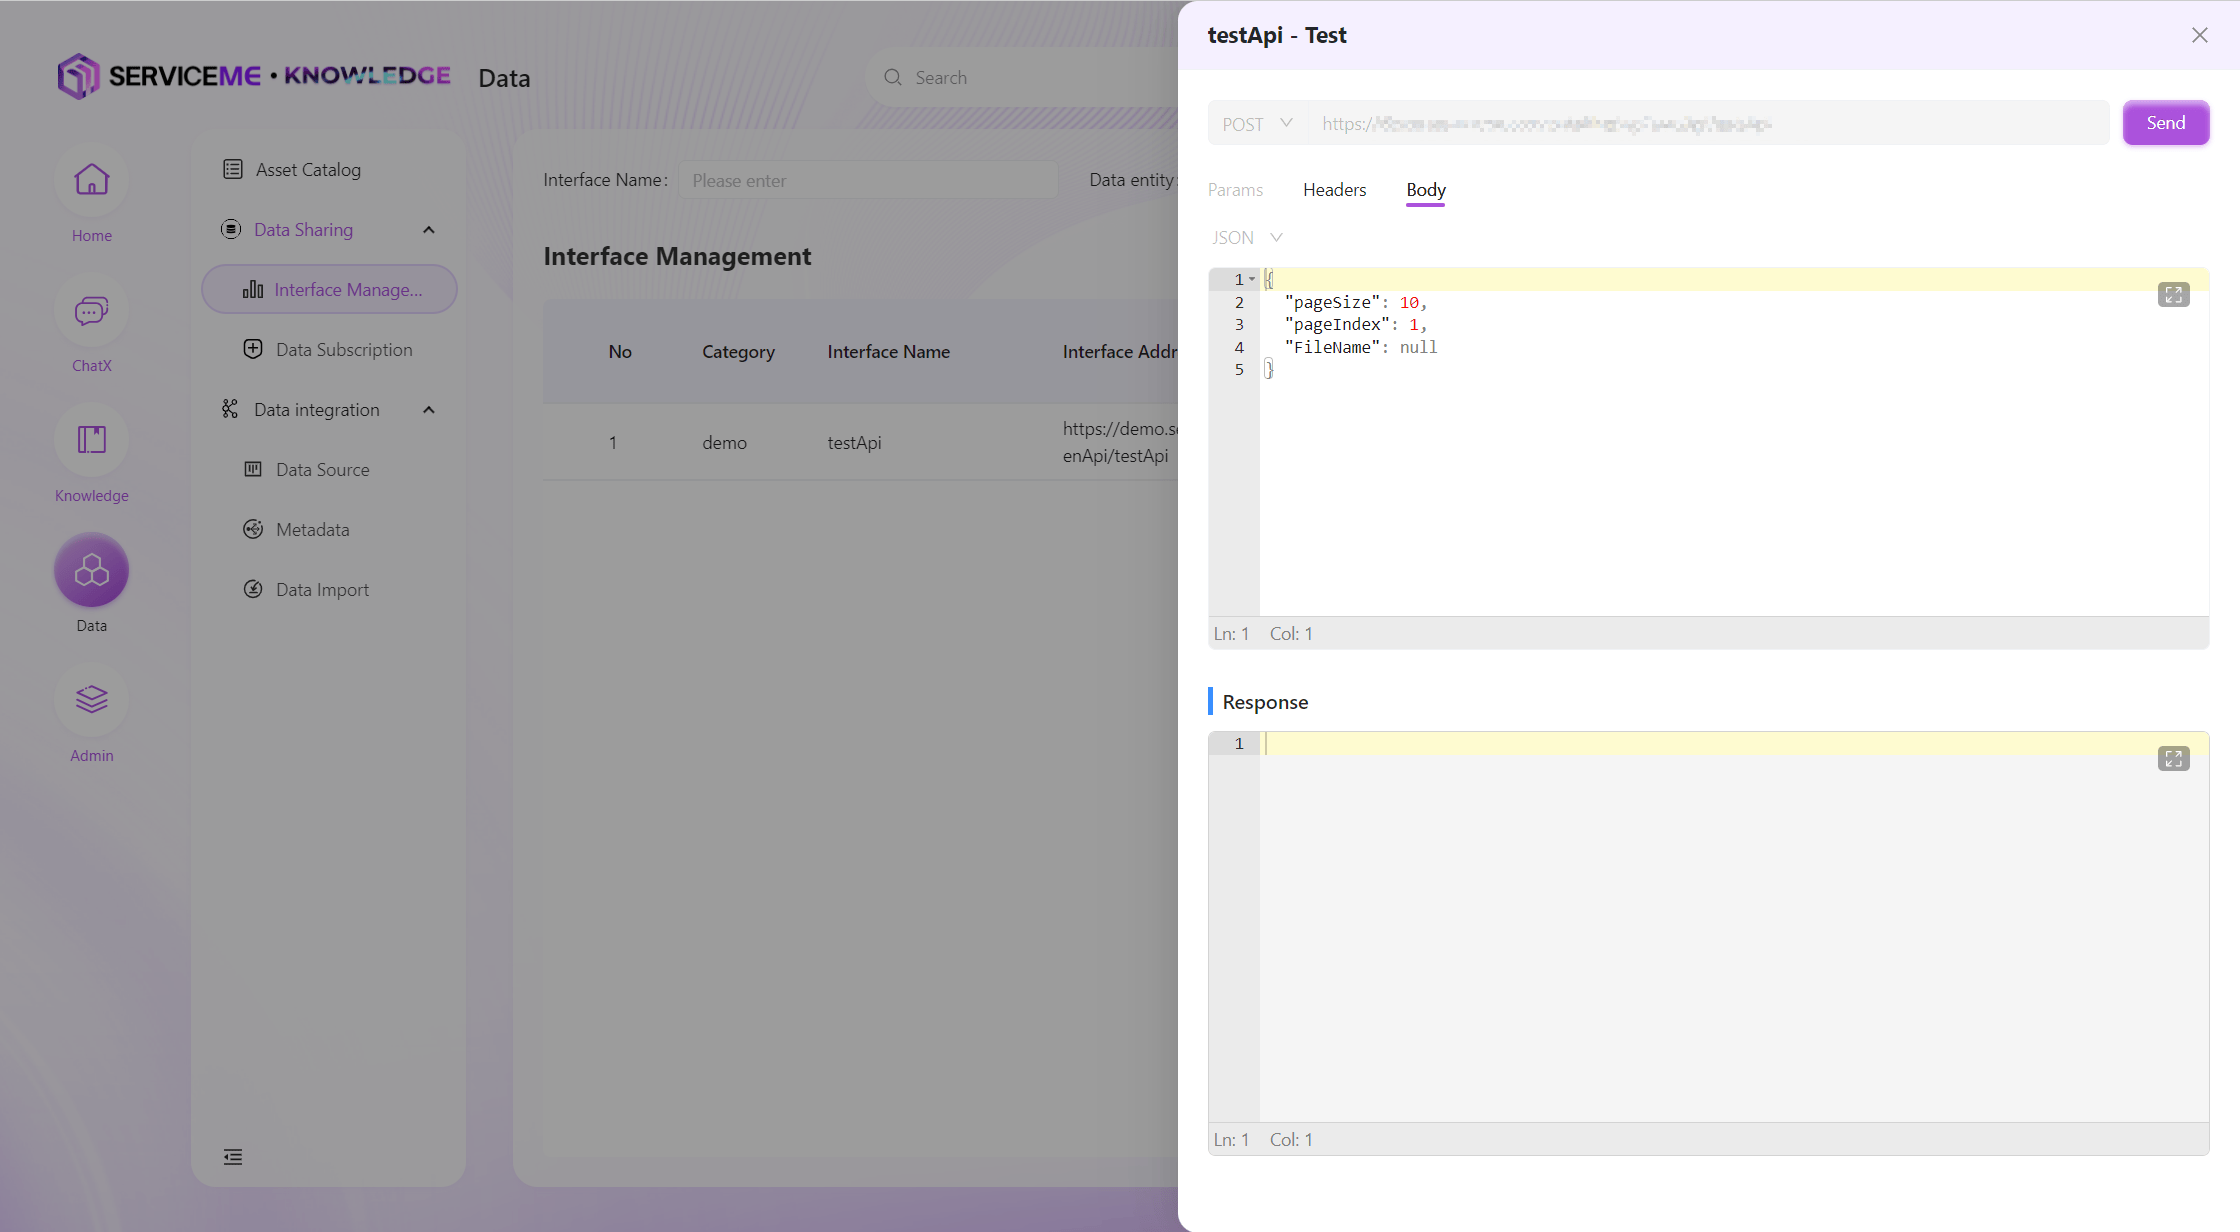
Interface Testing (Preview)
Test already created data interfaces to determine whether the interface meets expectations through detailed input and output messages.
Note: The interface must be authorized to a client before testing, and the calculated Authorization must be filled in the Header for the call to succeed, otherwise the request will be rejected. For the Authorization algorithm, please refer to [Technical Guide/DATA Development Integration]
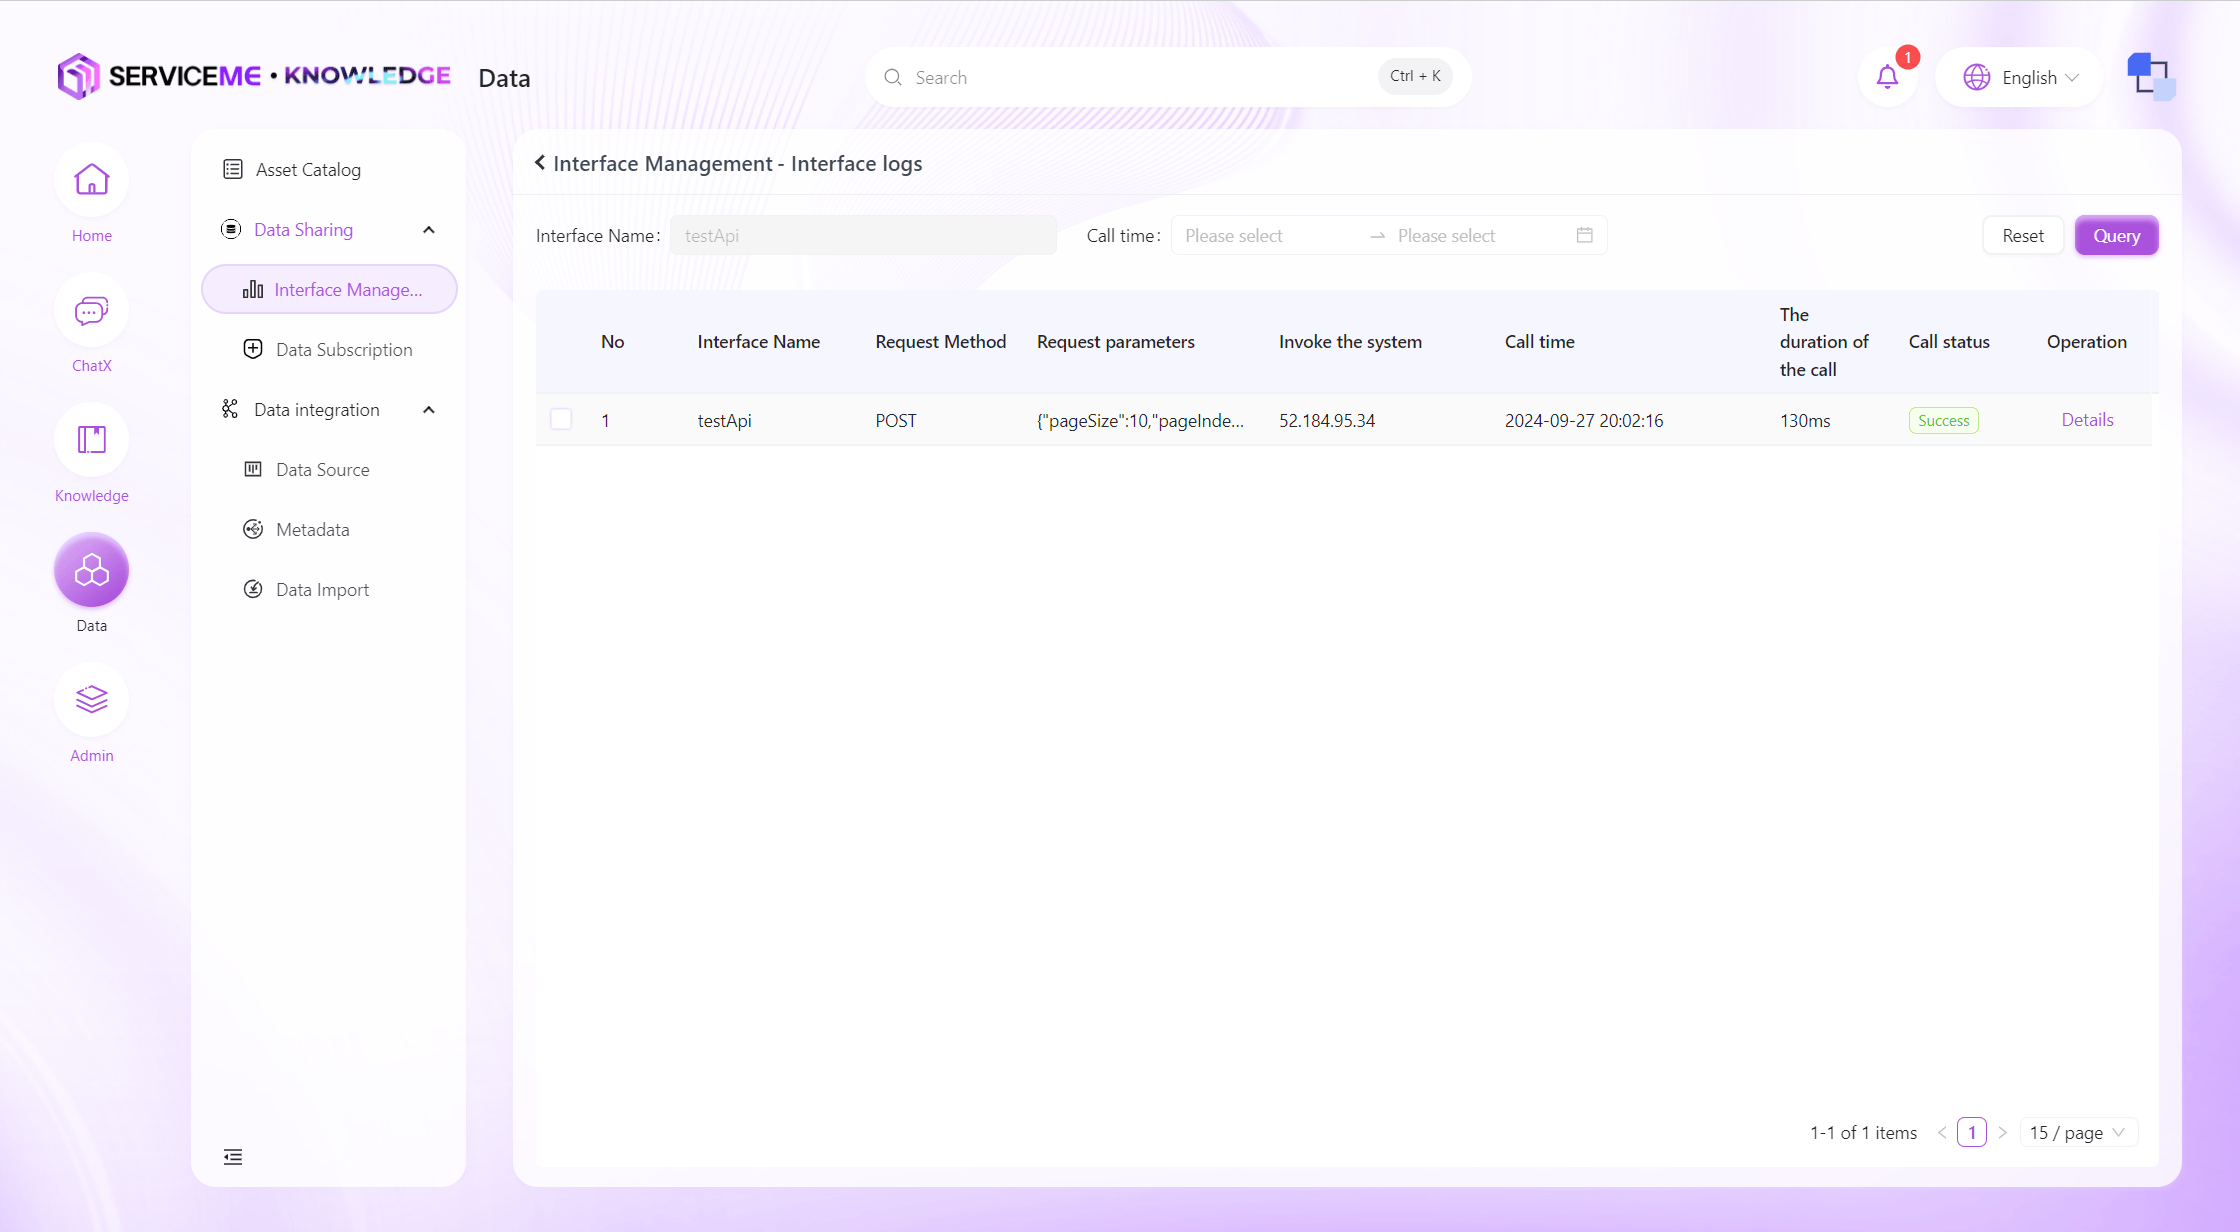
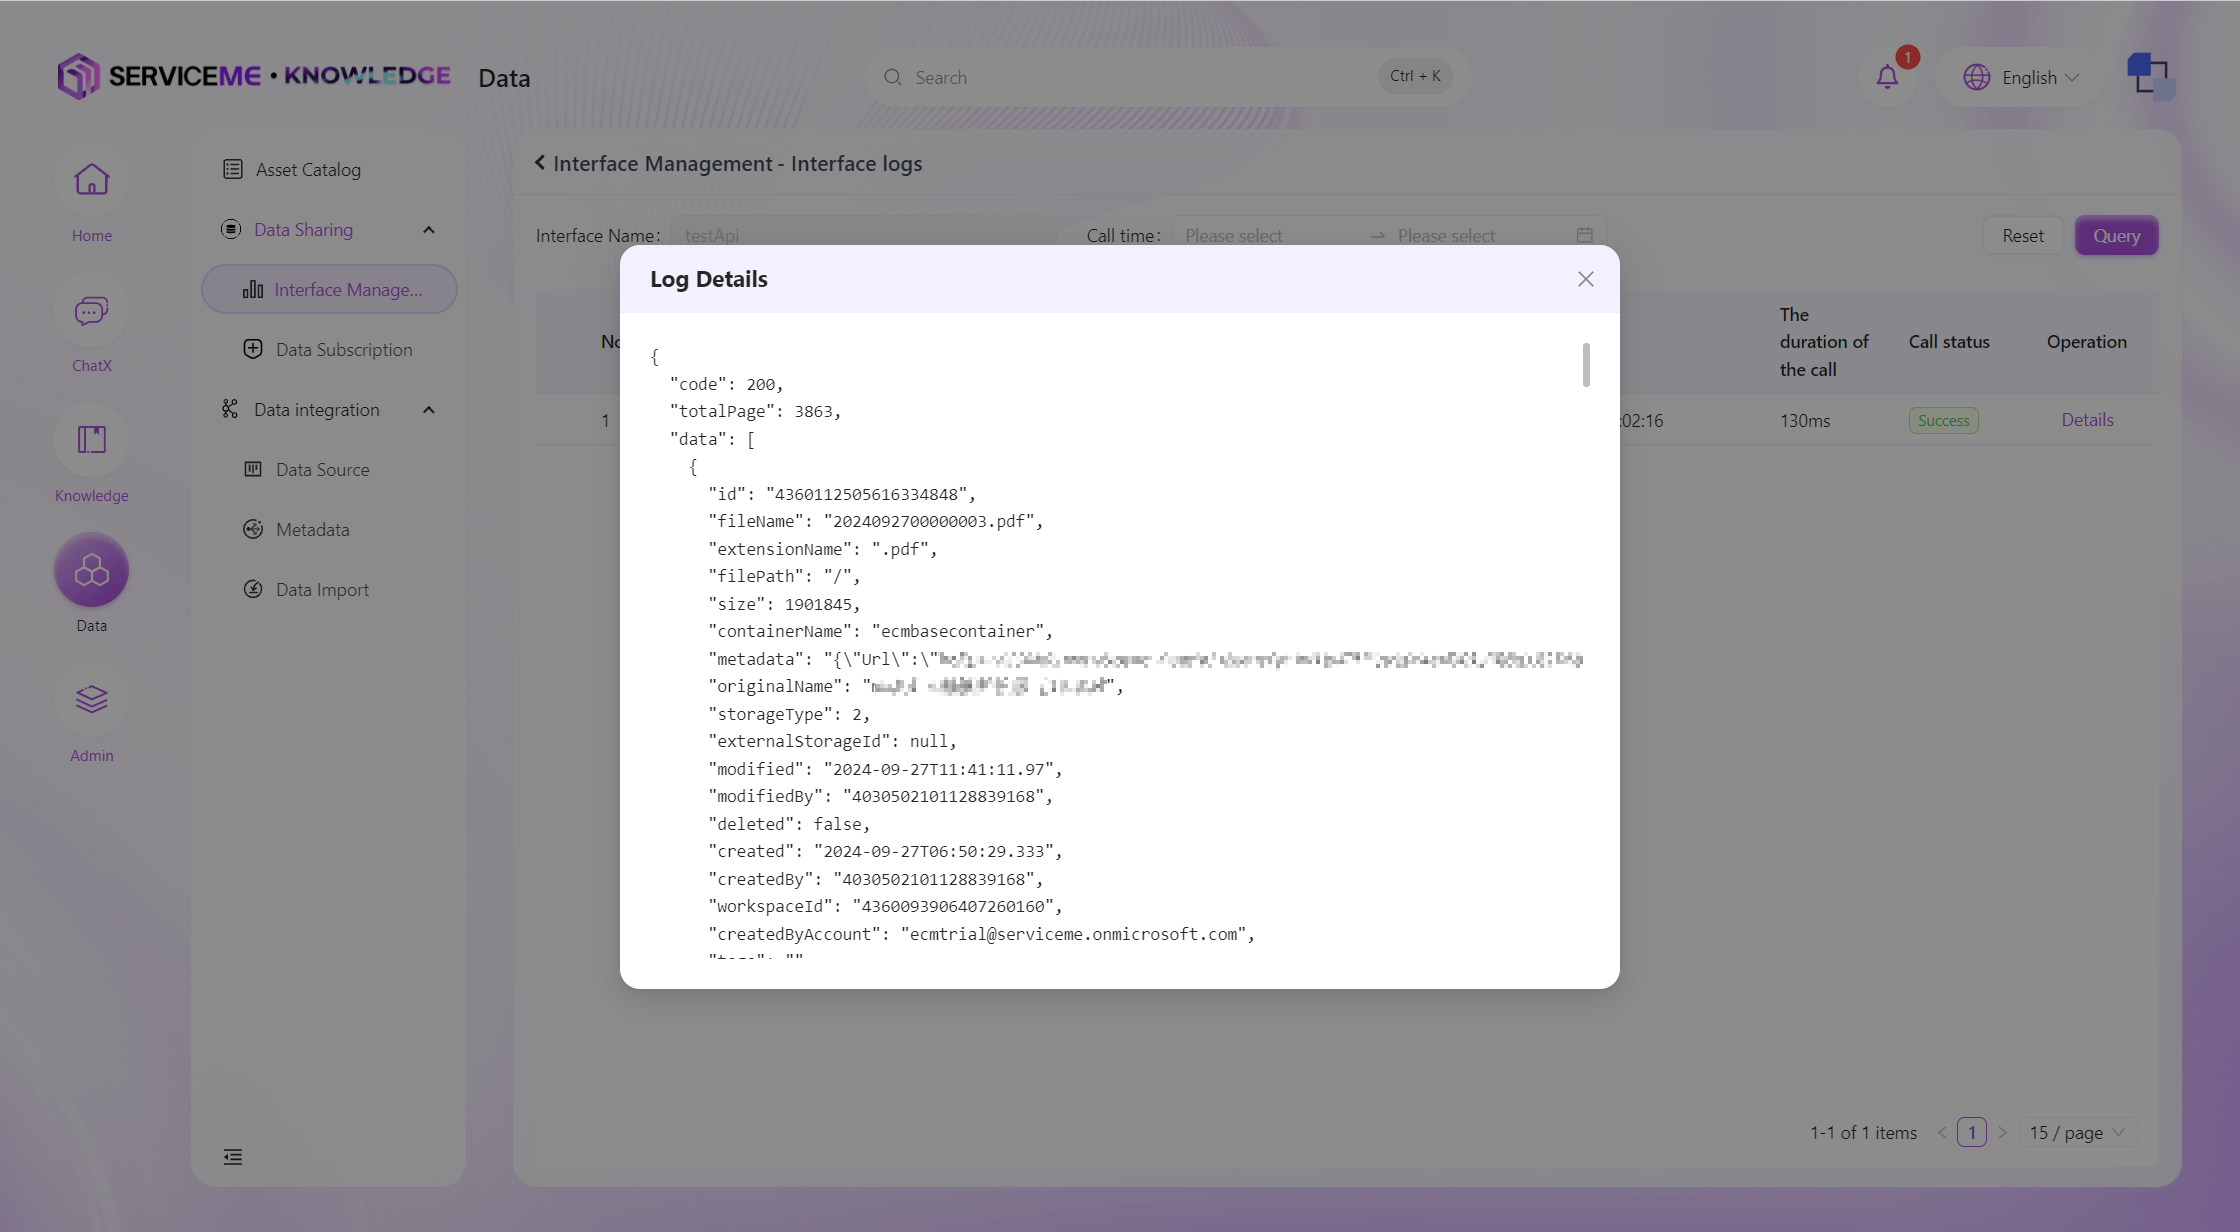
View Interface Logs
You can query all data interface query logs in the system for a recent period. The system will record information such as the caller's IP address and the returned message.
Data Subscription
In contrast to data interfaces, data subscription is when the SERVICEME platform actively pushes data to external systems. Users can set the conditions and frequency of data subscriptions here. The system will check at the trigger time whether there is data that meets the conditions, and if so, push the corresponding data to the specified interface.
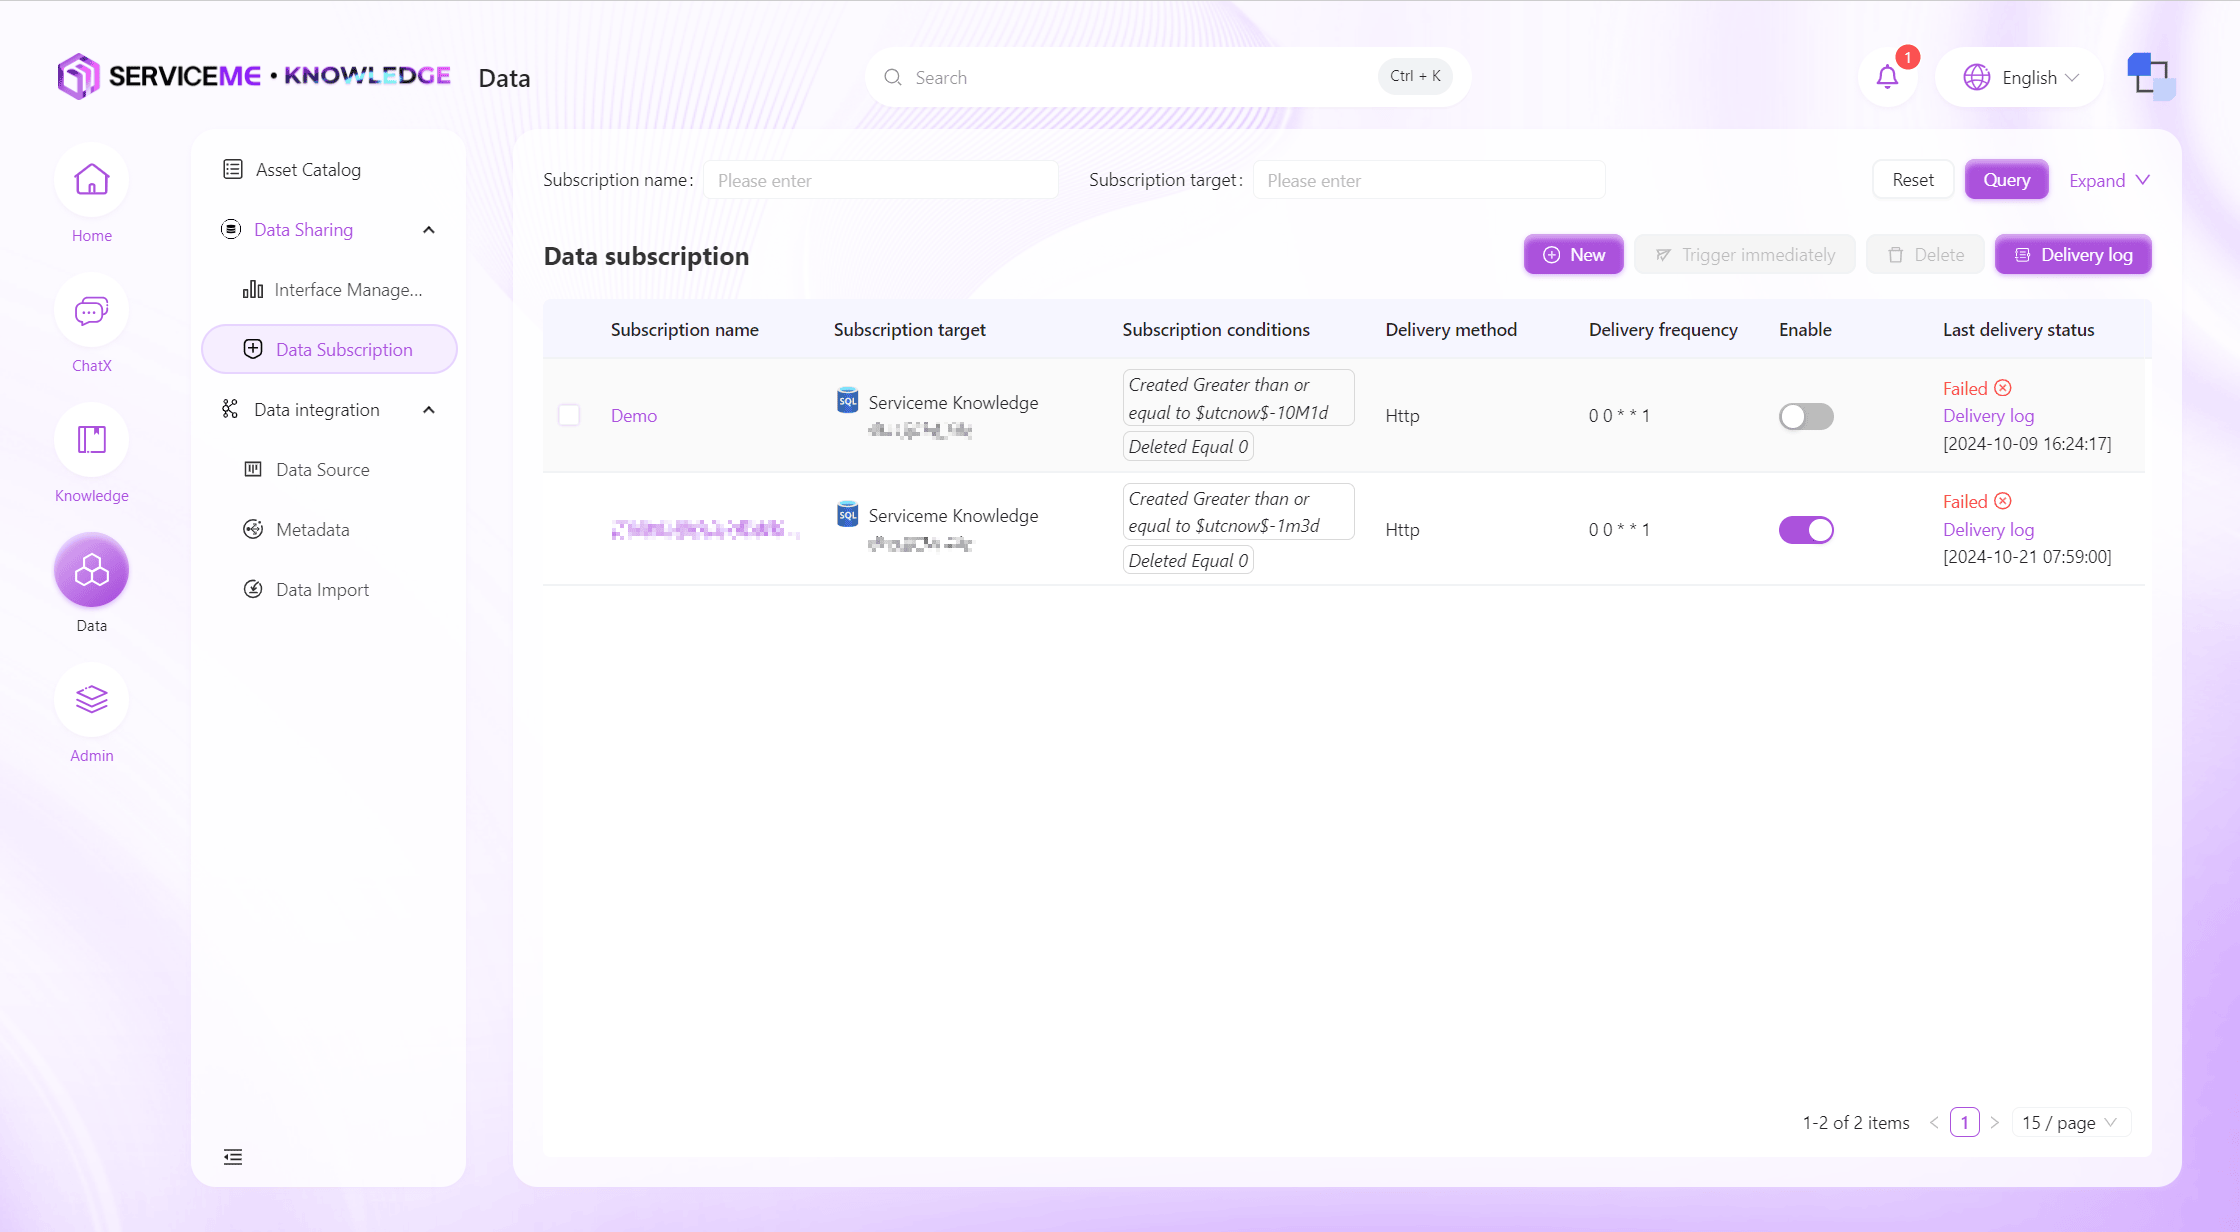
Instructions
- Query: Query data subscriptions by subscription name and other conditions
- Create New: Fill in the parameters for data definition and create
- Trigger Immediately: Click to immediately check if there is data that meets the conditions, and if so, push immediately
- Delete: Remove the data subscription, it will no longer be triggered or push data
- Push Logs: Query all push logs across data subscriptions
- Row Operations
- Enable/Disable: Disabled subscriptions will no longer be triggered or push data
- View Push Logs: View only logs related to the current subscription
Create and Edit Data Subscription
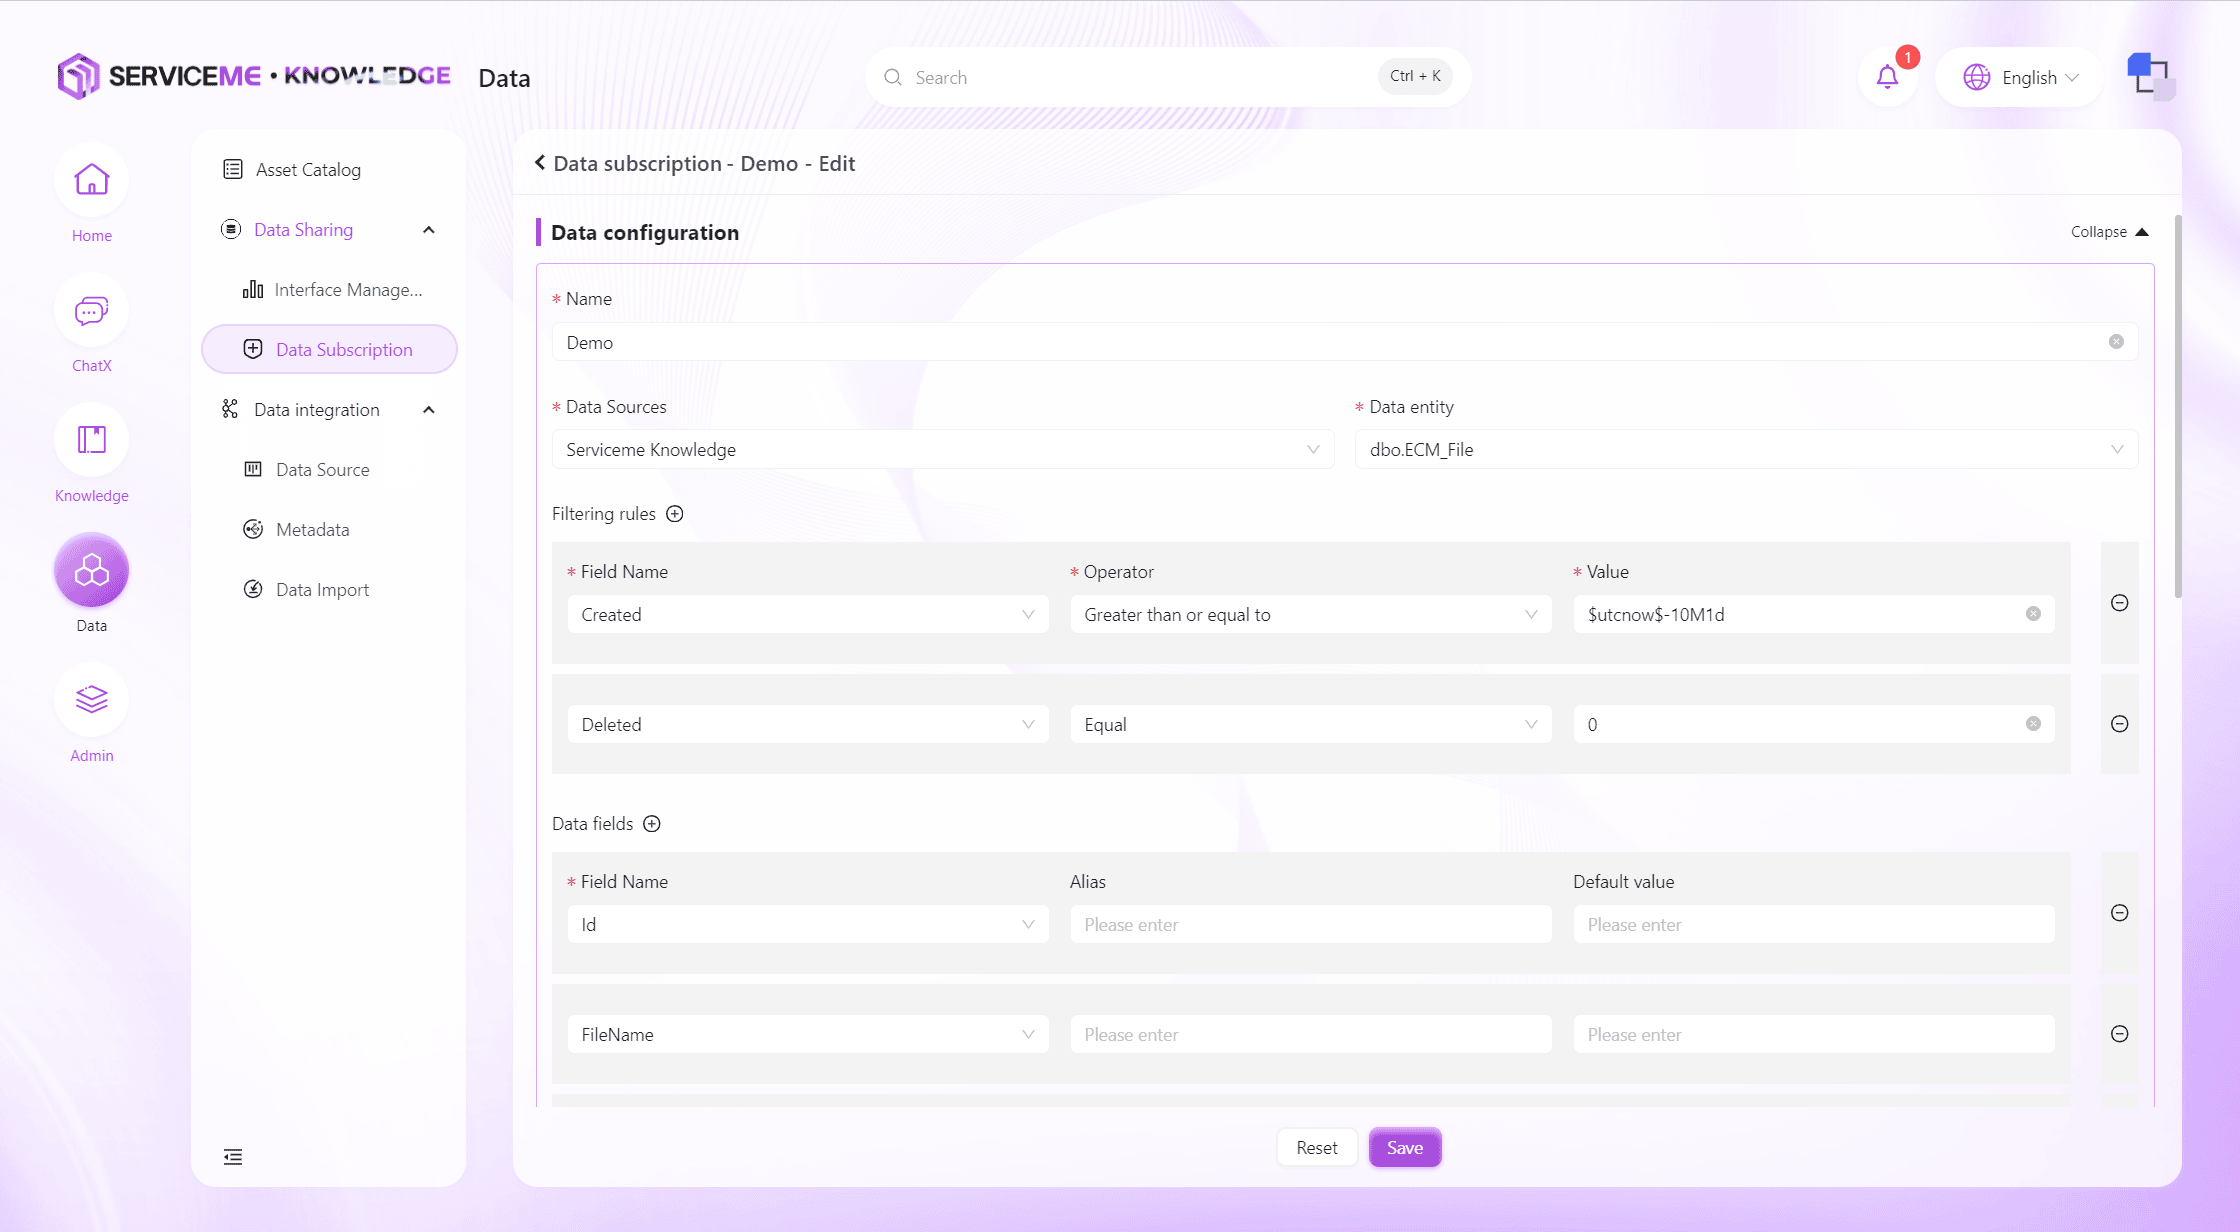
Field Descriptions
- Data Configuration
- Name: The unique identifier for the data subscription
- Data Source: The data source for the data subscription
- Data Entity: The data entity (table or view) queried by the data subscription
- Filter Rules: Used to determine whether there is data that meets the conditions, multiple conditions can be combined
- Data Fields: The data fields finally pushed by the data subscription, aliases and default values can be set here
- Subscription Configuration
- Push Method: The protocol for pushing, currently supports HTTP message method
- Frequency: Push frequency, supports
CRONS (5 digits)expressions - Batch Size: If the data that meets the conditions exceeds the batch size, it will be pushed in several batches to control the amount of data pushed at one time
- API: The API address of the data receiver, a complete address including domain name and interface path needs to be entered here. For example:
https://www.baidu.com/api/sendData - HTTP Method: Supports
POSTandPUT - Headers:
HTTP Headerthat needs to be passed to the receiver, can be used to pass a fixedapi_keyrequired for authentication - Body: The message format received by the receiver. If not adjusted, all data will be placed in the
dataproperty of the JSON object as an array.
Special Rules
- For date-type fields, you can use
date variablesin the value input box to easily query data within a specific time range.
Date Variable Examples
$utcnow-1m$ Last minute
$utcnow-1h$ Last hour
$utcnow-1d$ Last day
$utcnow-1w$ Last week
$utcnow-1M$ Last month
$utcnow-1y$ Last year

Combination
$utcnow-1h20m$ Last one hour and twenty minutes
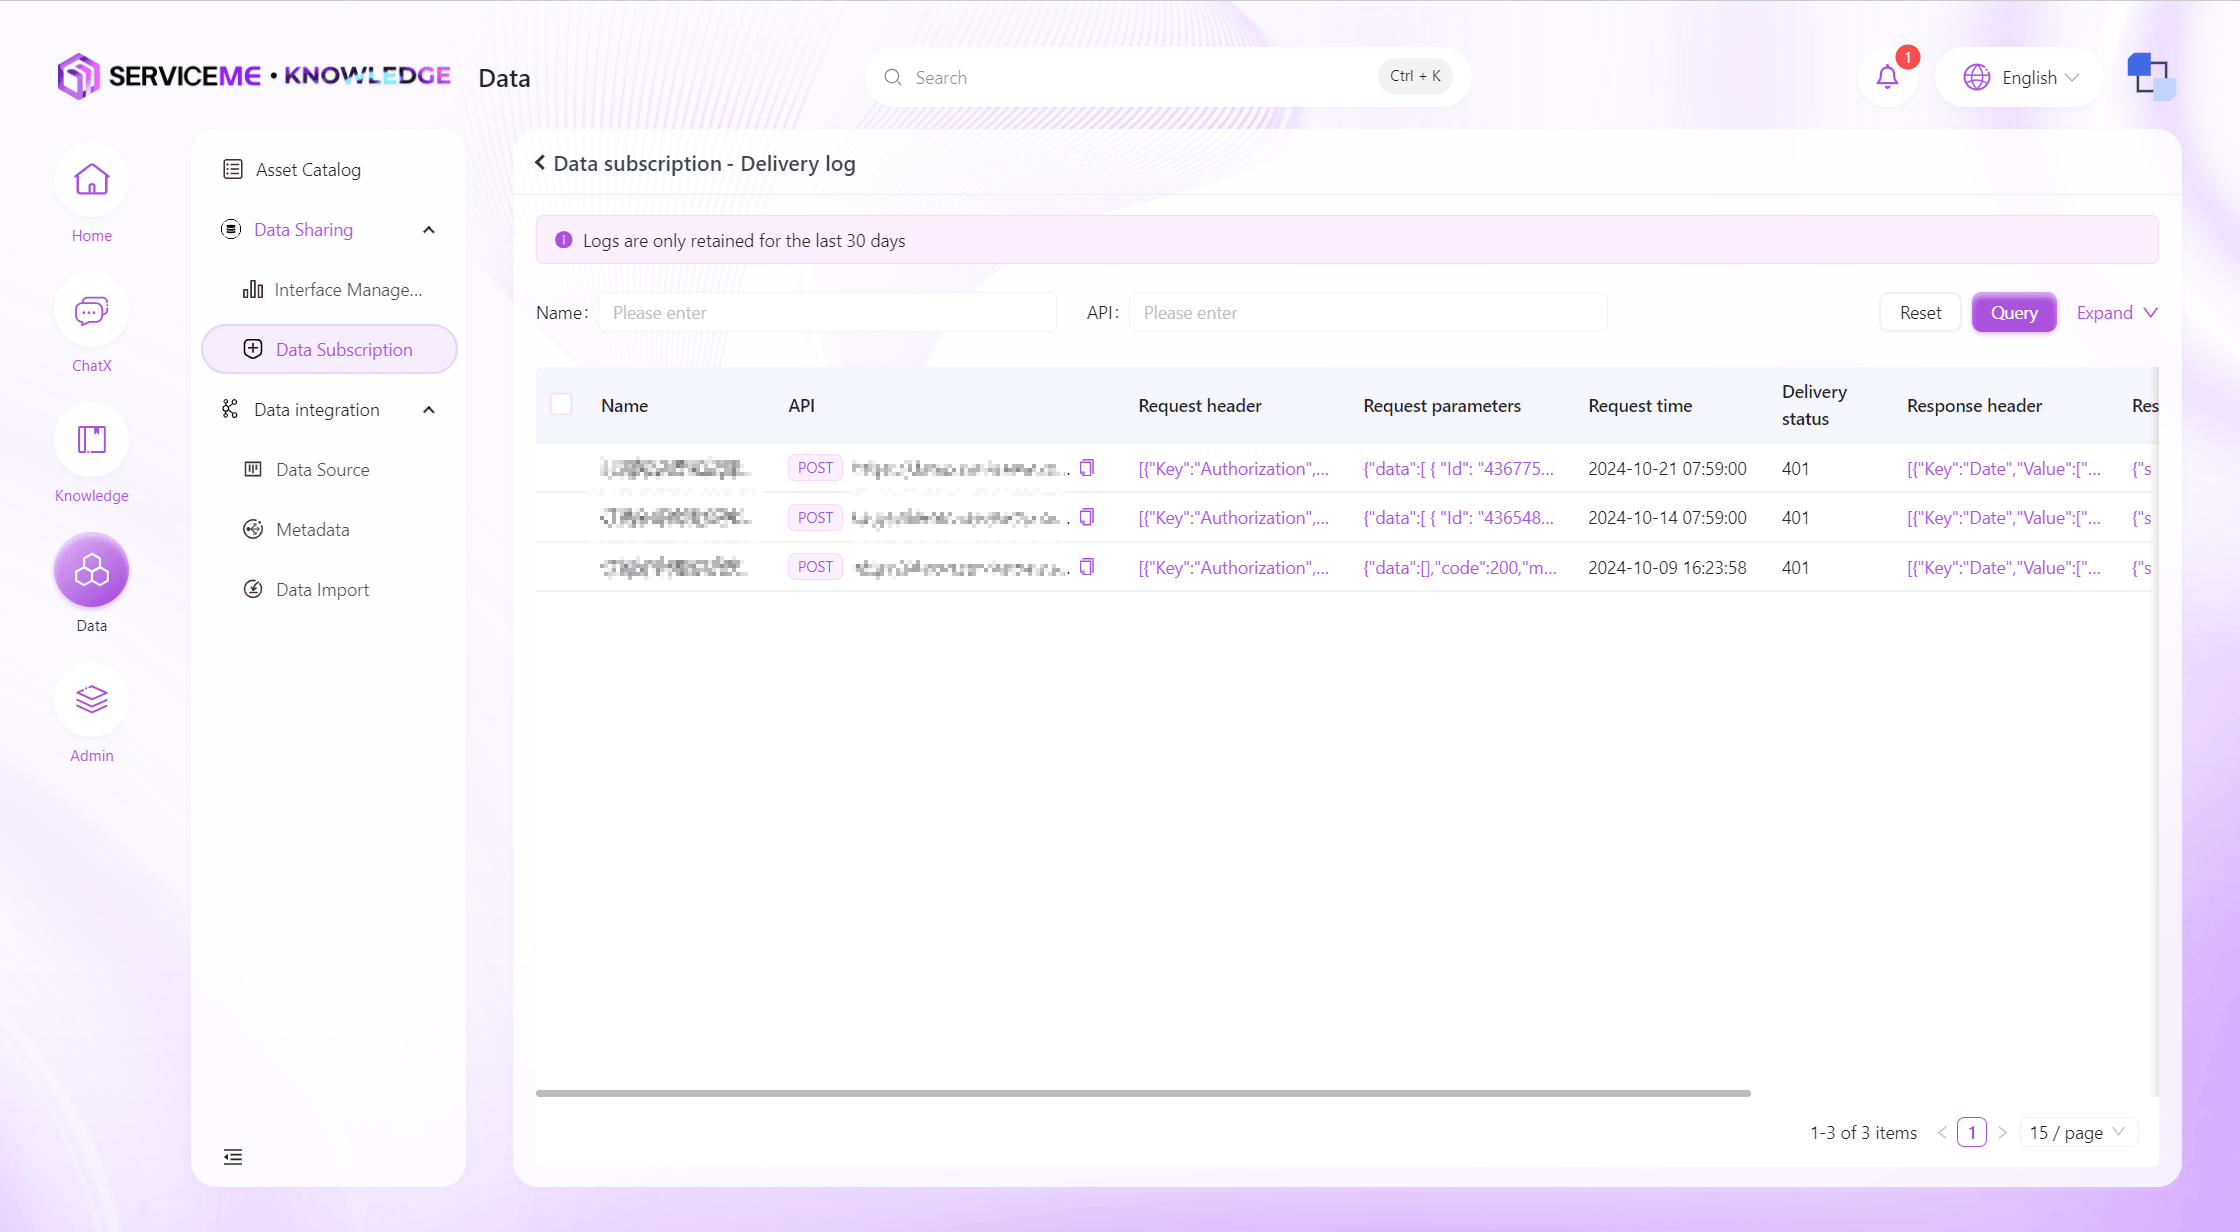
Push Log Query
You can query all push logs in the system for a recent period, allowing users to understand the operation of data subscriptions. When the data receiver reports that data was not received, you can investigate using the push logs.
Data Sources
Supports access and management of multiple types of data sources. Users can easily create and configure data source connections to ensure the reliability and flexibility of data input.
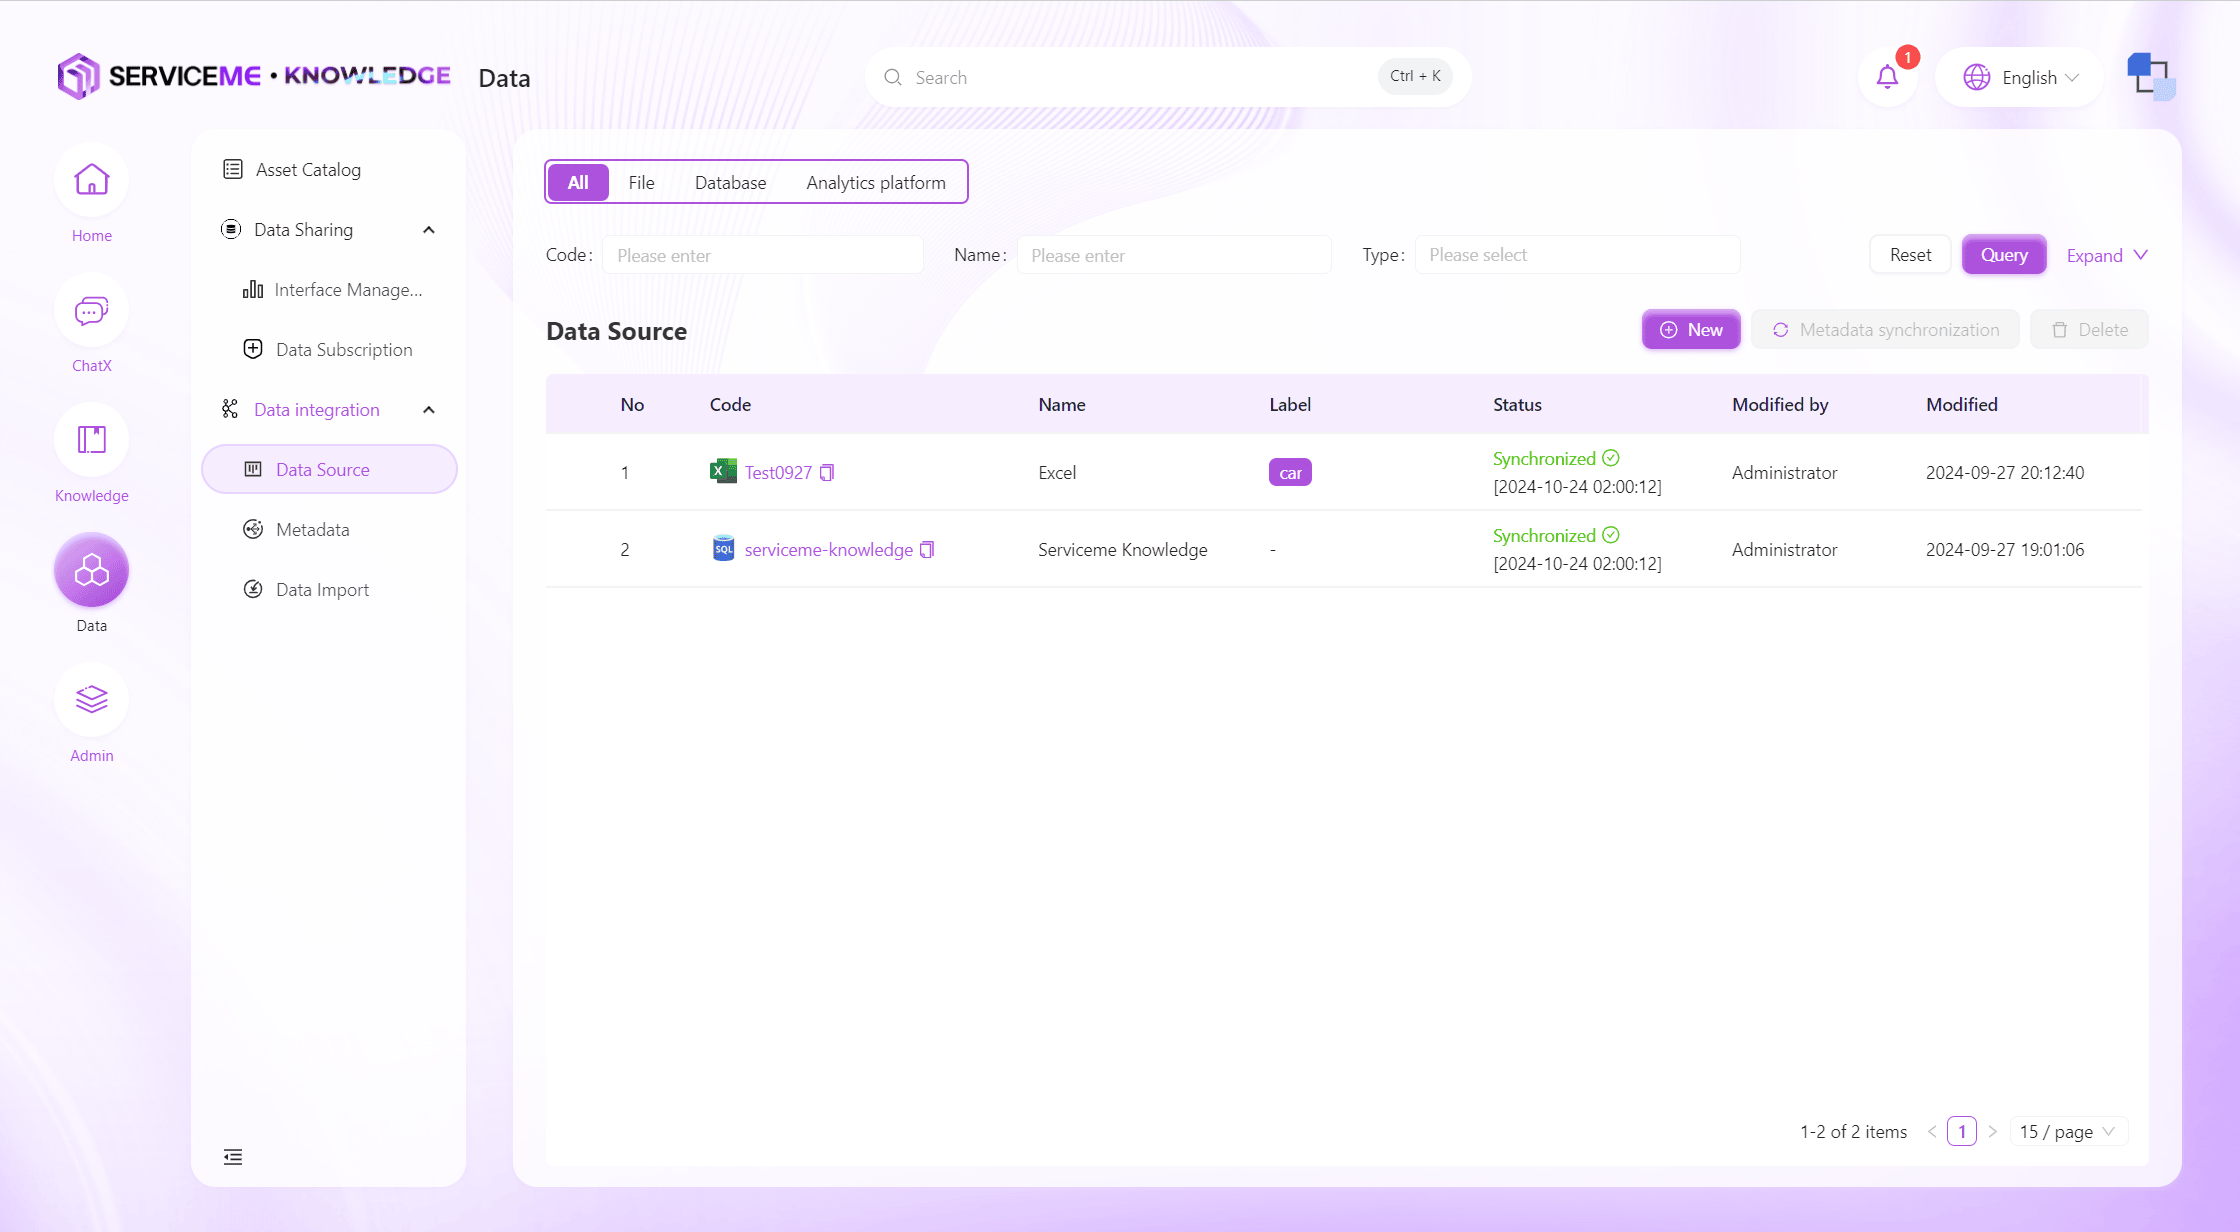
Instructions
- Query: Query data sources by number/name/type and other information
- Create New: Click to pop up the data source creation form
- Metadata Sync: Immediately synchronize all metadata in this data source
- Delete: Delete the data source, it will no longer be available, and related metadata will no longer be synchronized
- Row Operations
- Click Link: View data source information. For security reasons, database connections can only be modified, not viewed
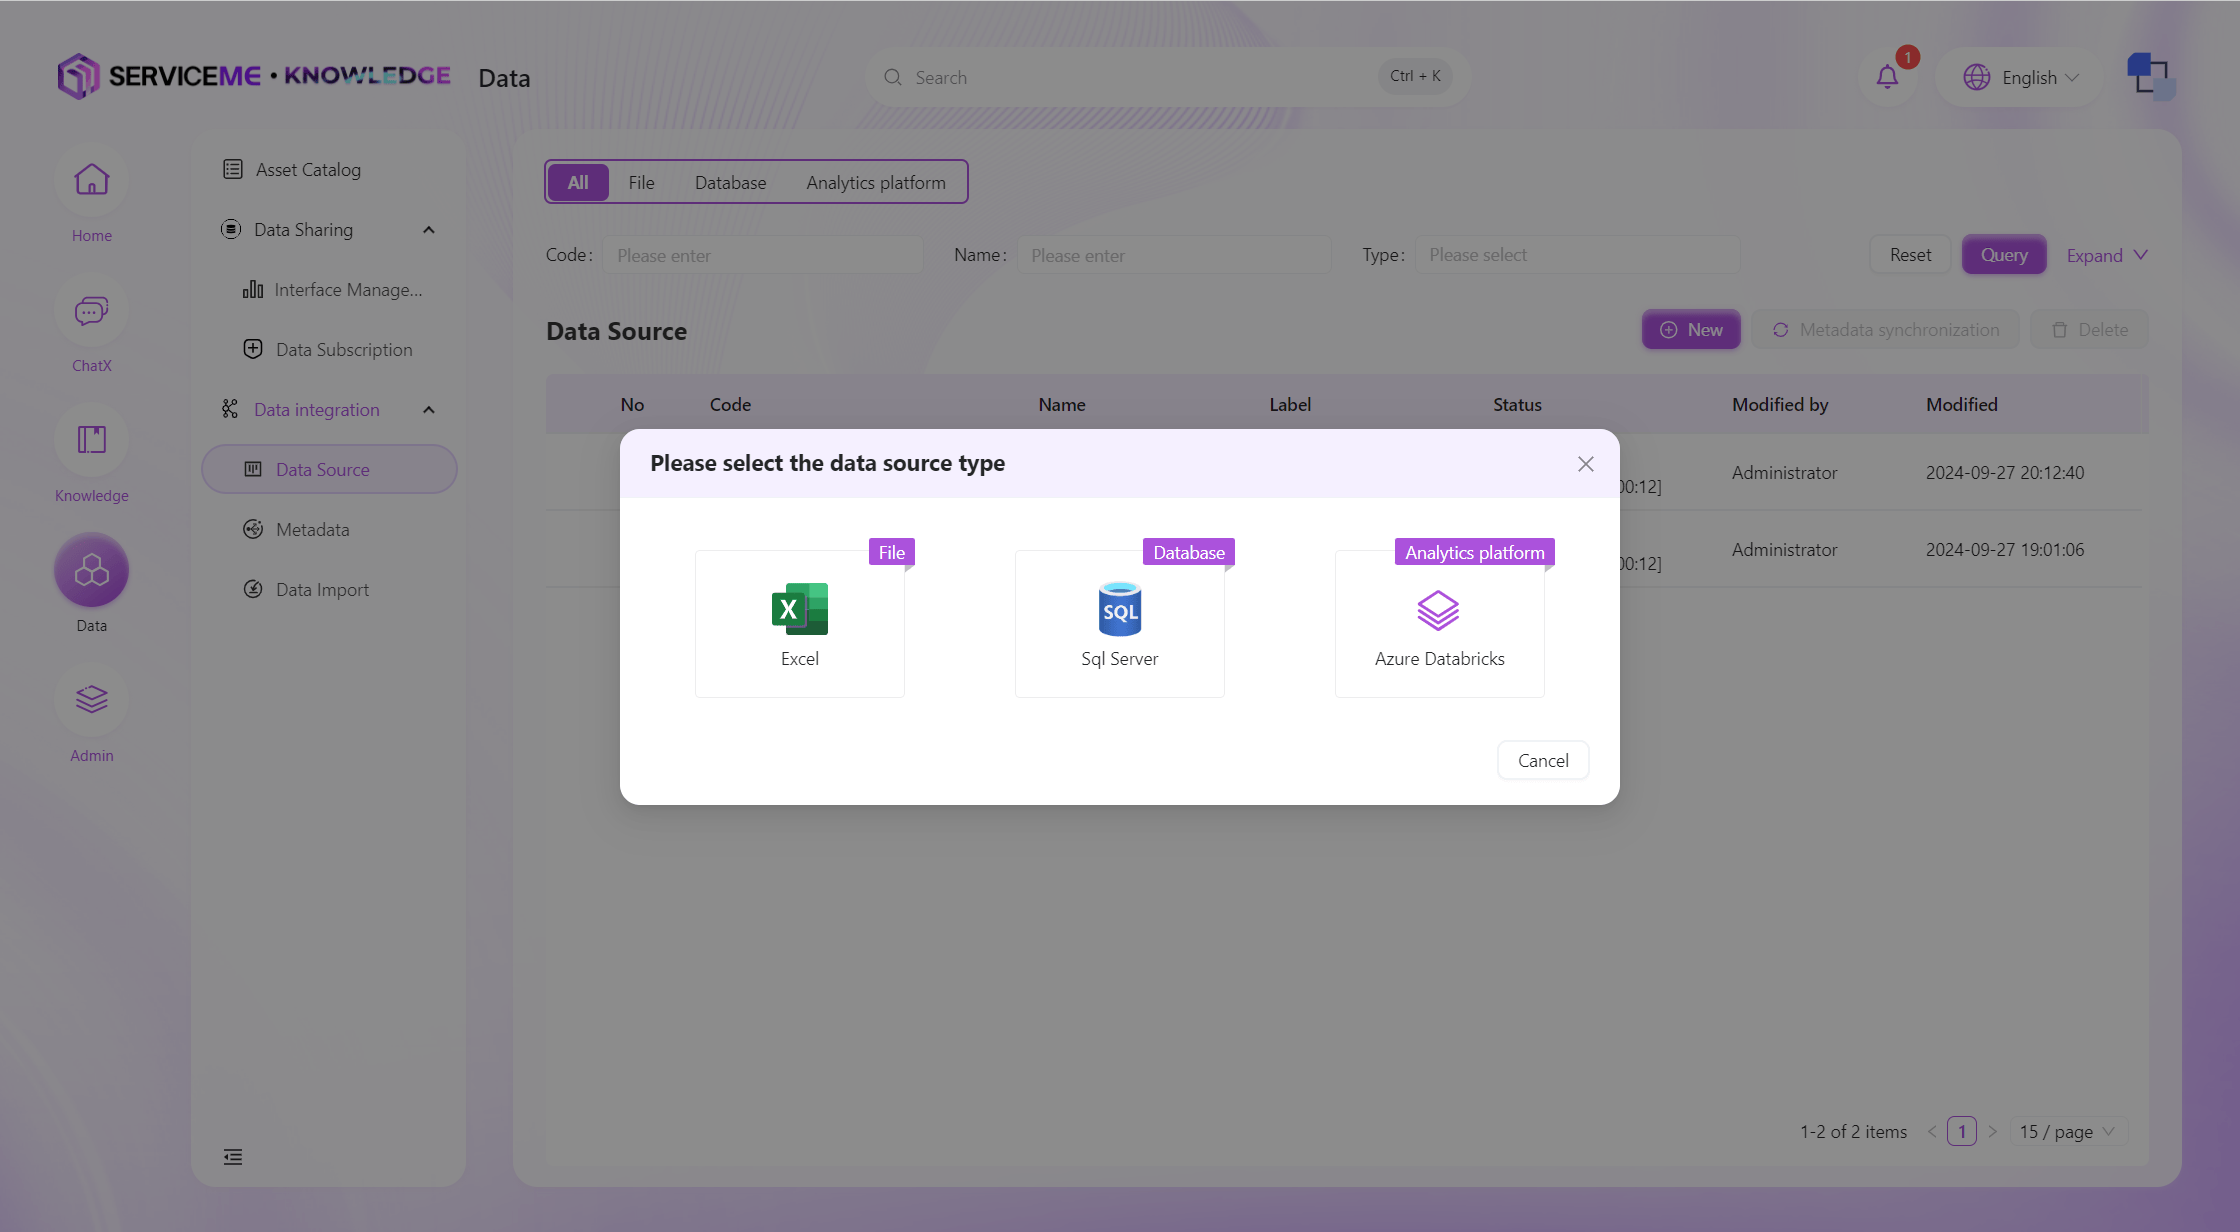
Create Data Source
First, you need to select a data source type. Currently, the platform supports three types: Excel, Azure SQL, and Azure Databricks.
Take Azure SQL as an example, the creation process is as follows:
First, fill in the basic information of the data source and the connection string.
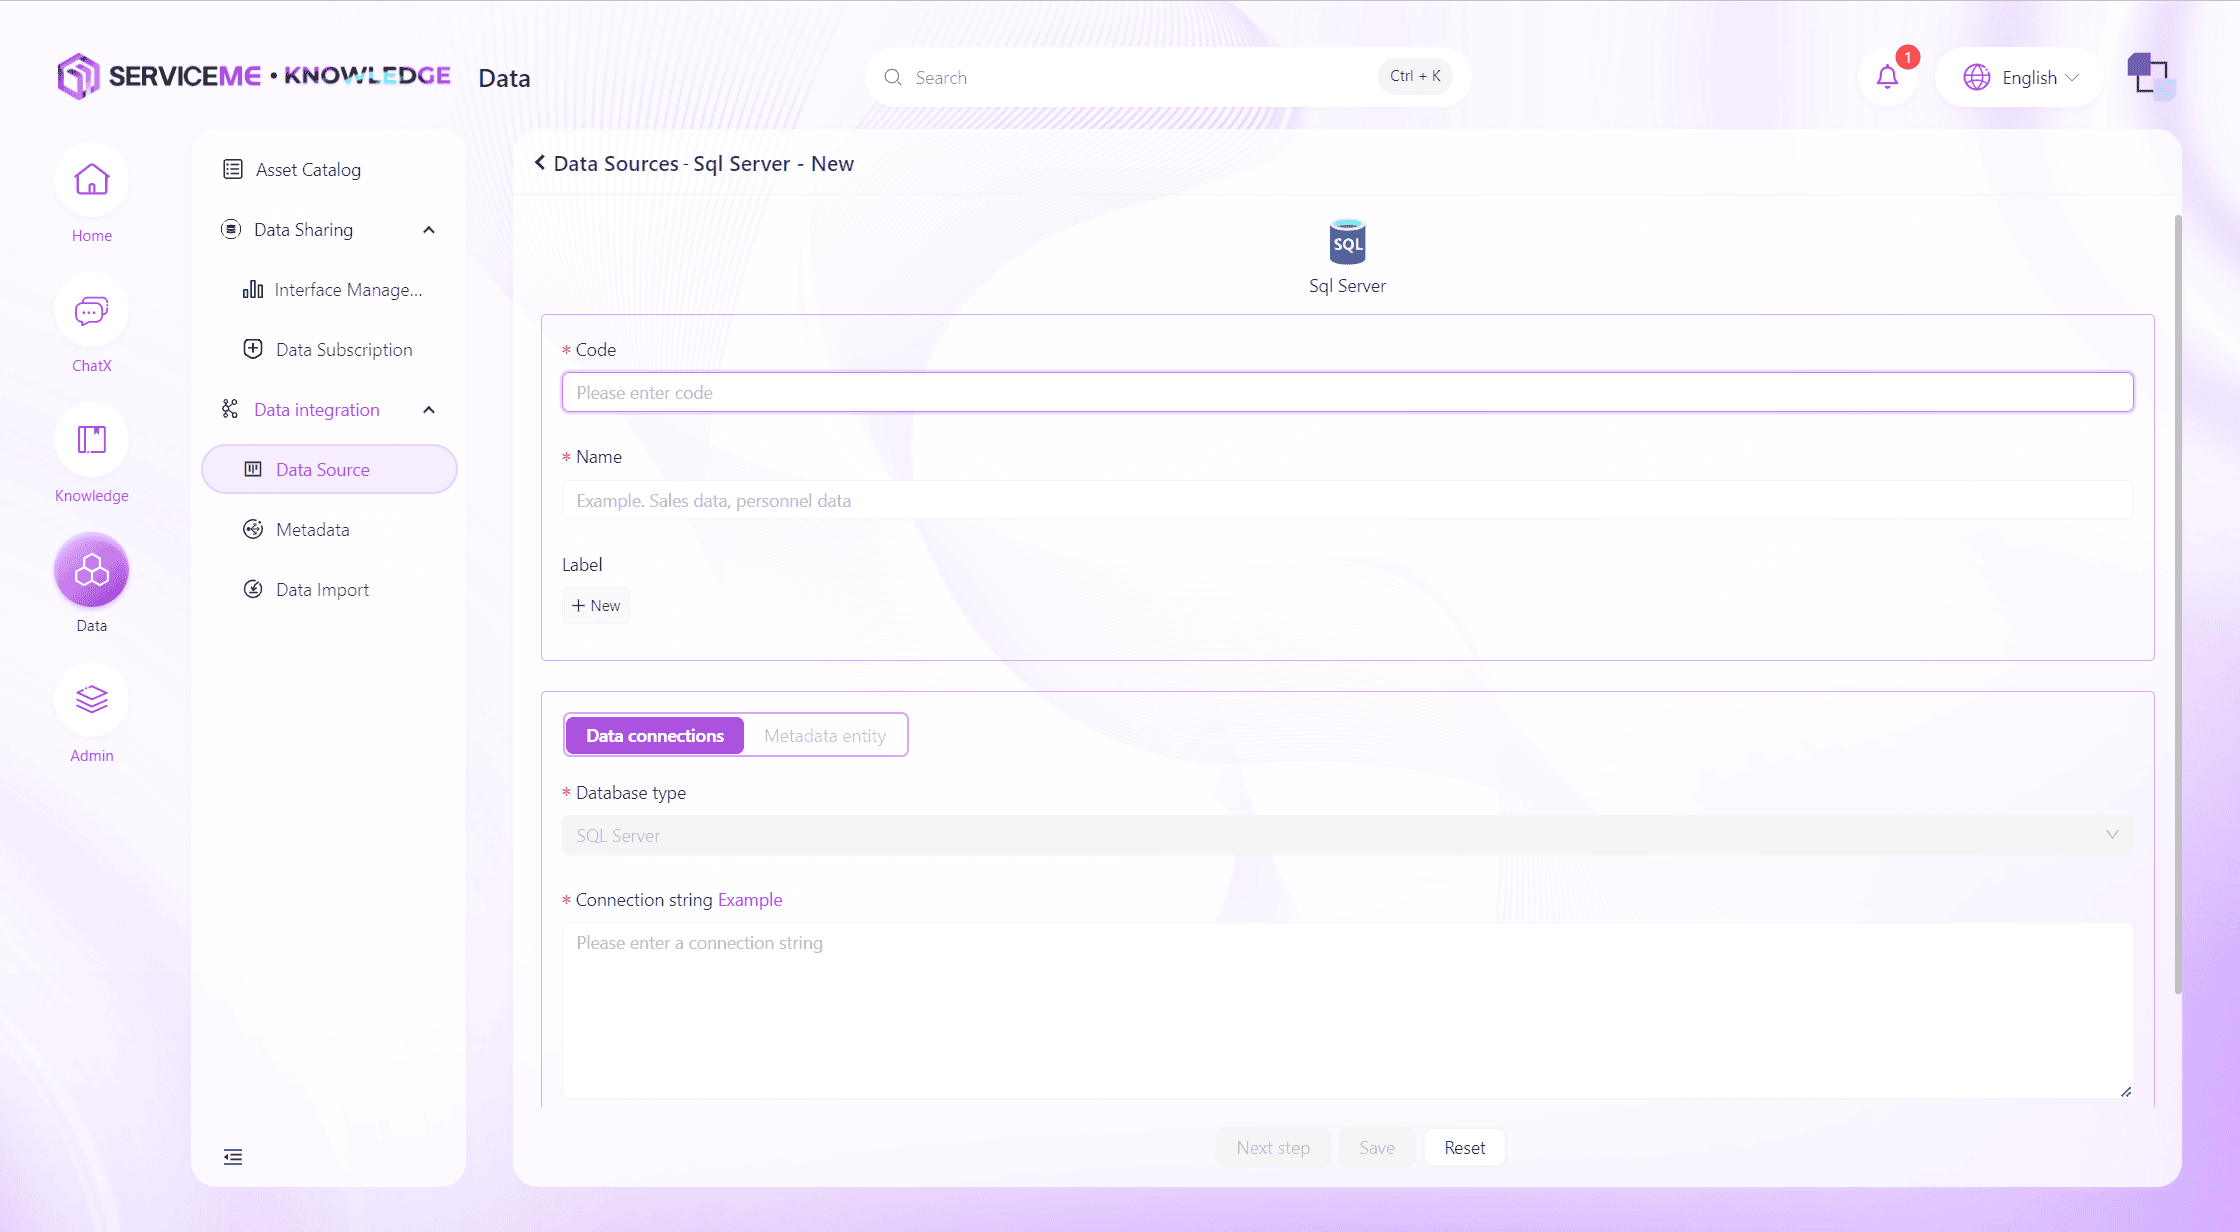
Field Descriptions
- Number: Unique identifier for the data source
- Name: Display name of the data source
- Tag: Can be used to categorize data sources
- Connection String: Enter the connection string for the corresponding data source. After filling in, use the
Connection Testbutton to verify
After the connection string passes the test, click Next to enter metadata selection.
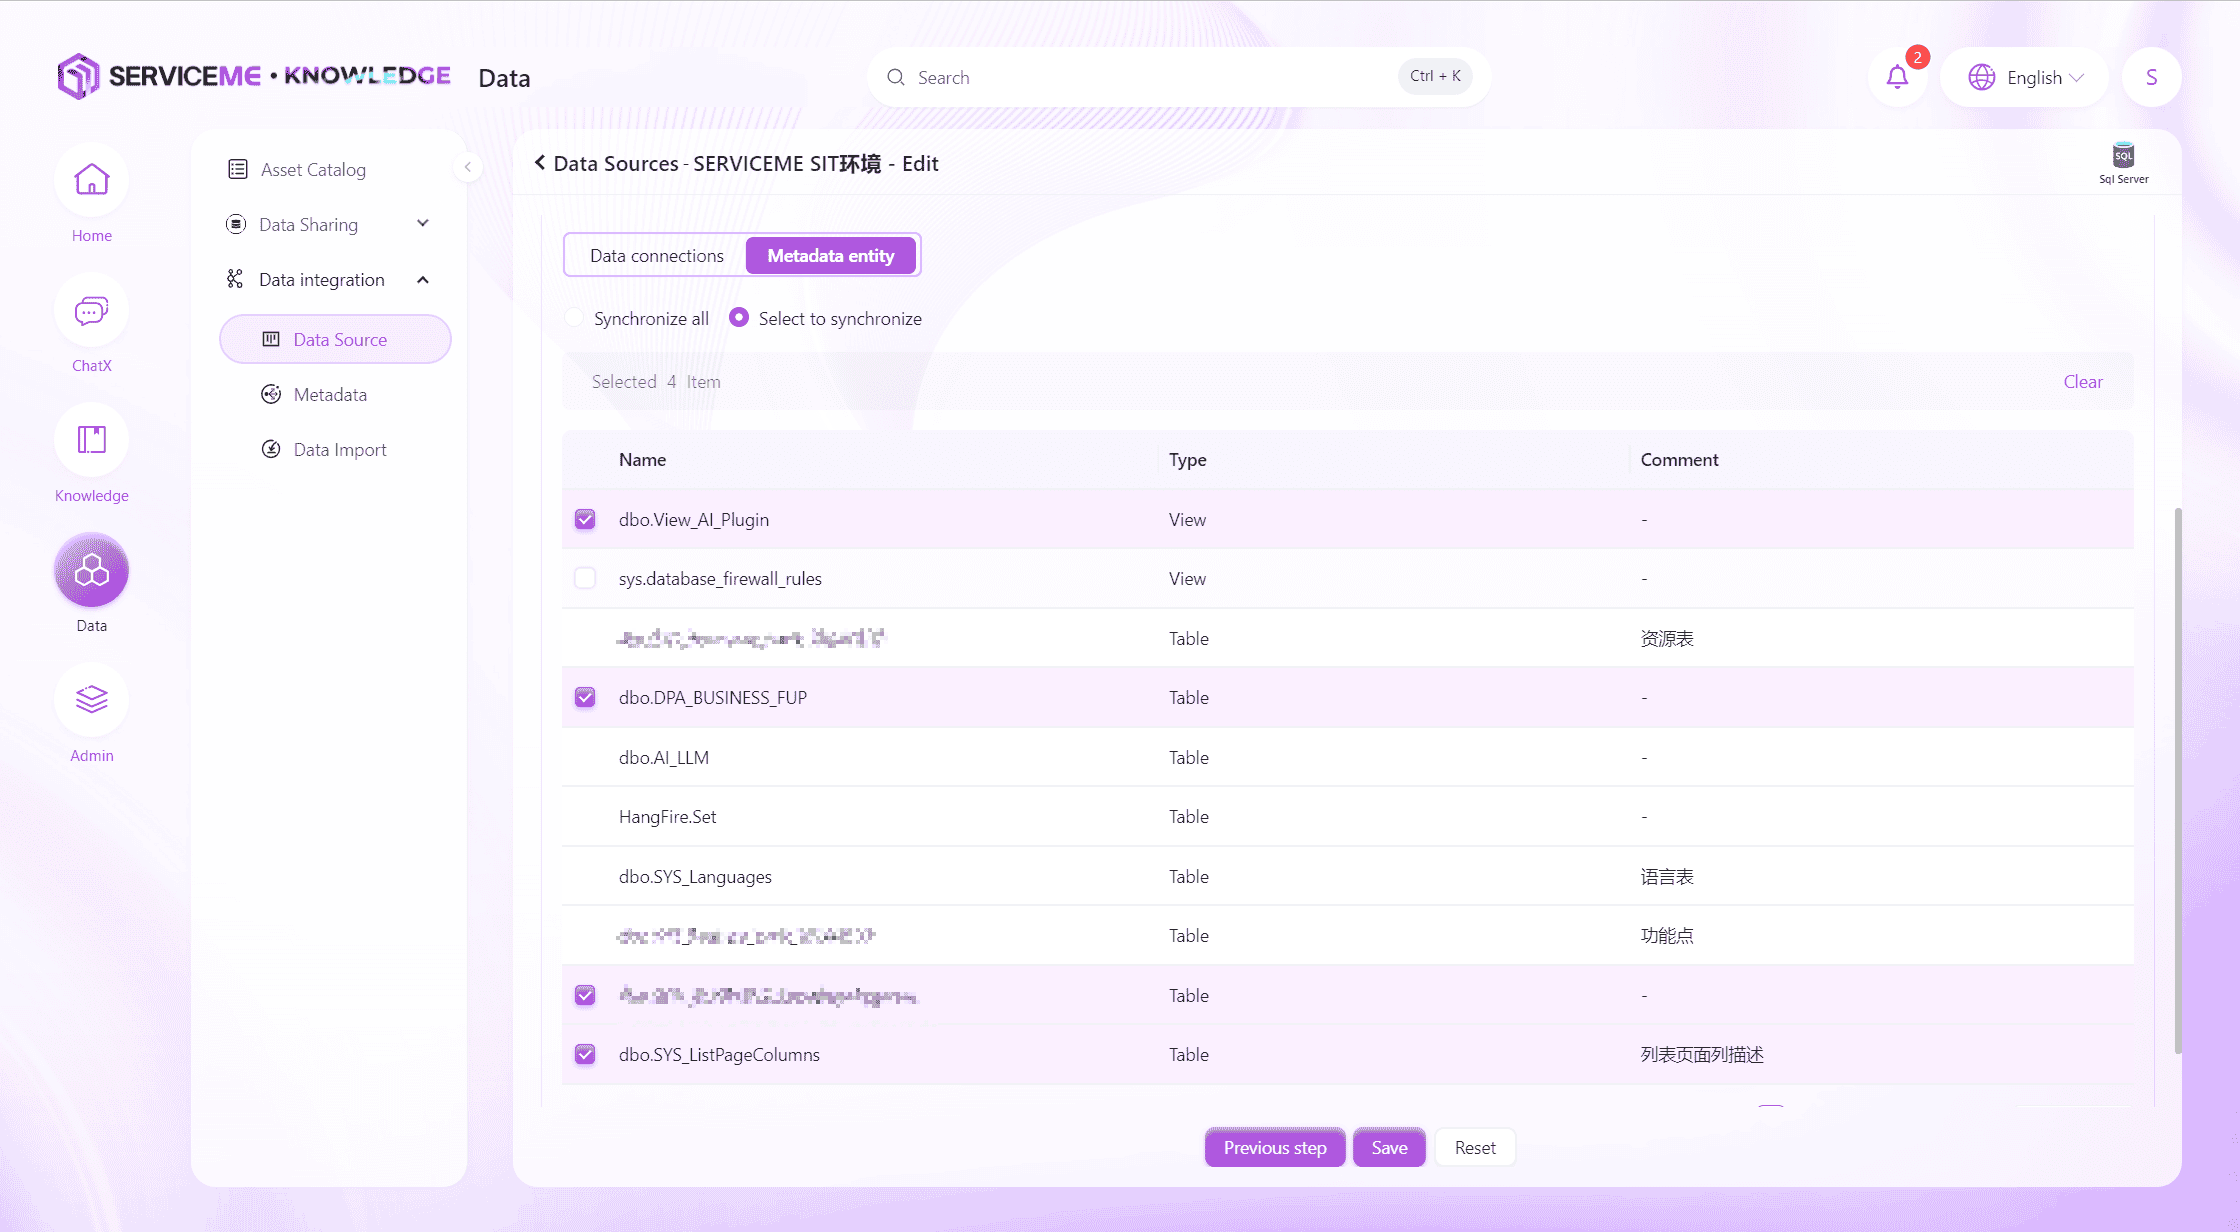
Instructions
- Sync All: Synchronize all metadata of this data source, including newly created metadata in the future
- Select Sync: Only synchronize selected metadata
Click Save to complete the creation of the data source.
Metadata
The product's built-in metadata management function supports the creation, editing, and management of data domains, helping enterprises build a clear data architecture.
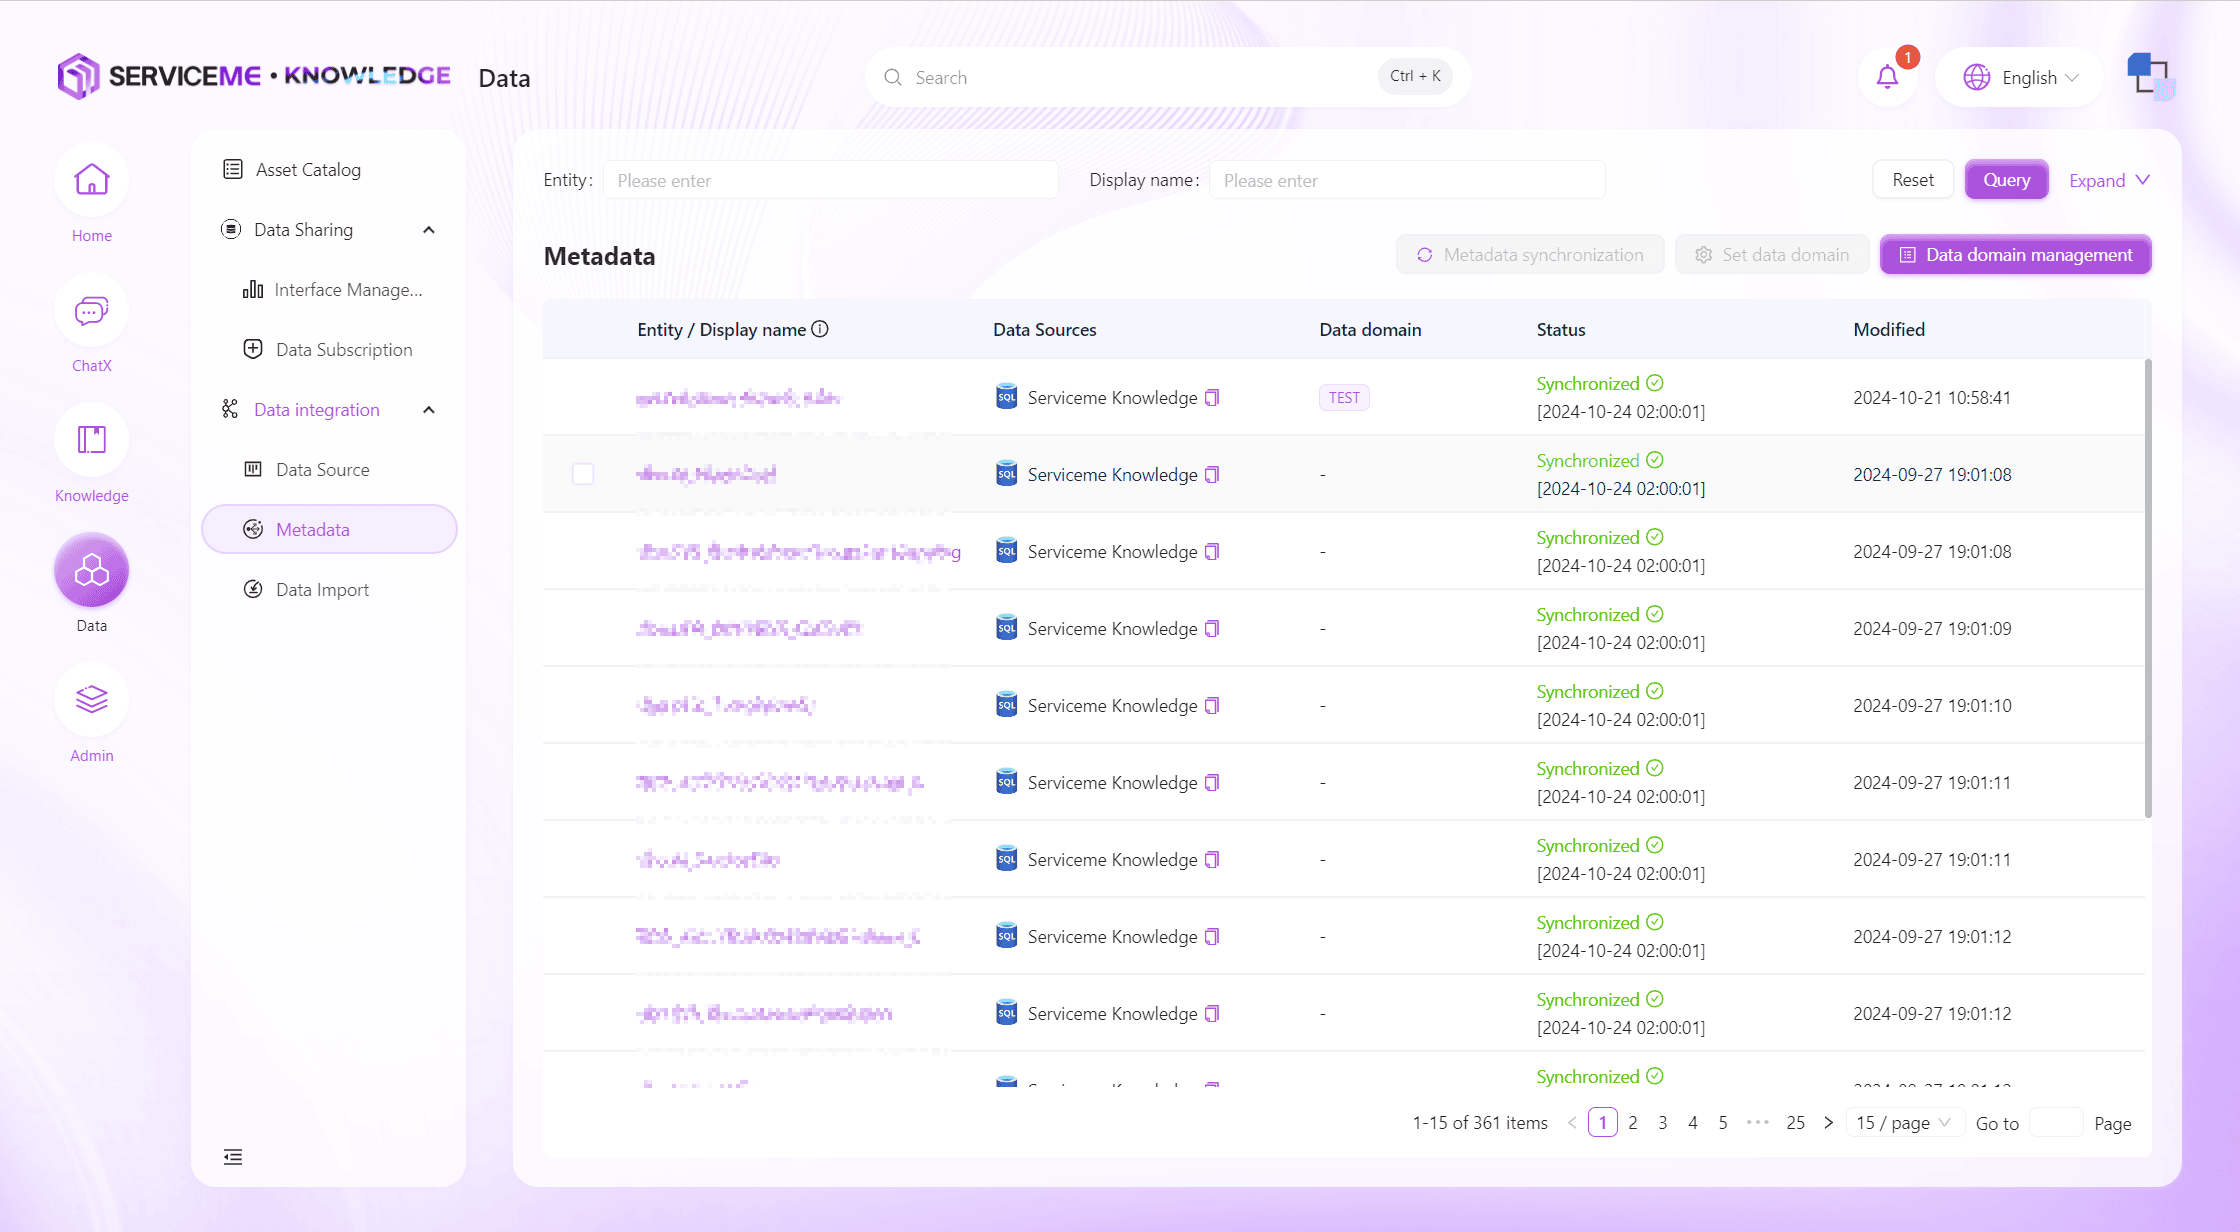
Instructions
- Query: Filter metadata by entity name/display name/data source and other fields
- Metadata Sync: Immediately synchronize the metadata entity and fields
- Set Data Domain: Assign metadata to the corresponding data domain
- Data Domain Management: Maintain data domains
- Row Operations
- Entity Name Hyperlink: Click to enter the metadata details page
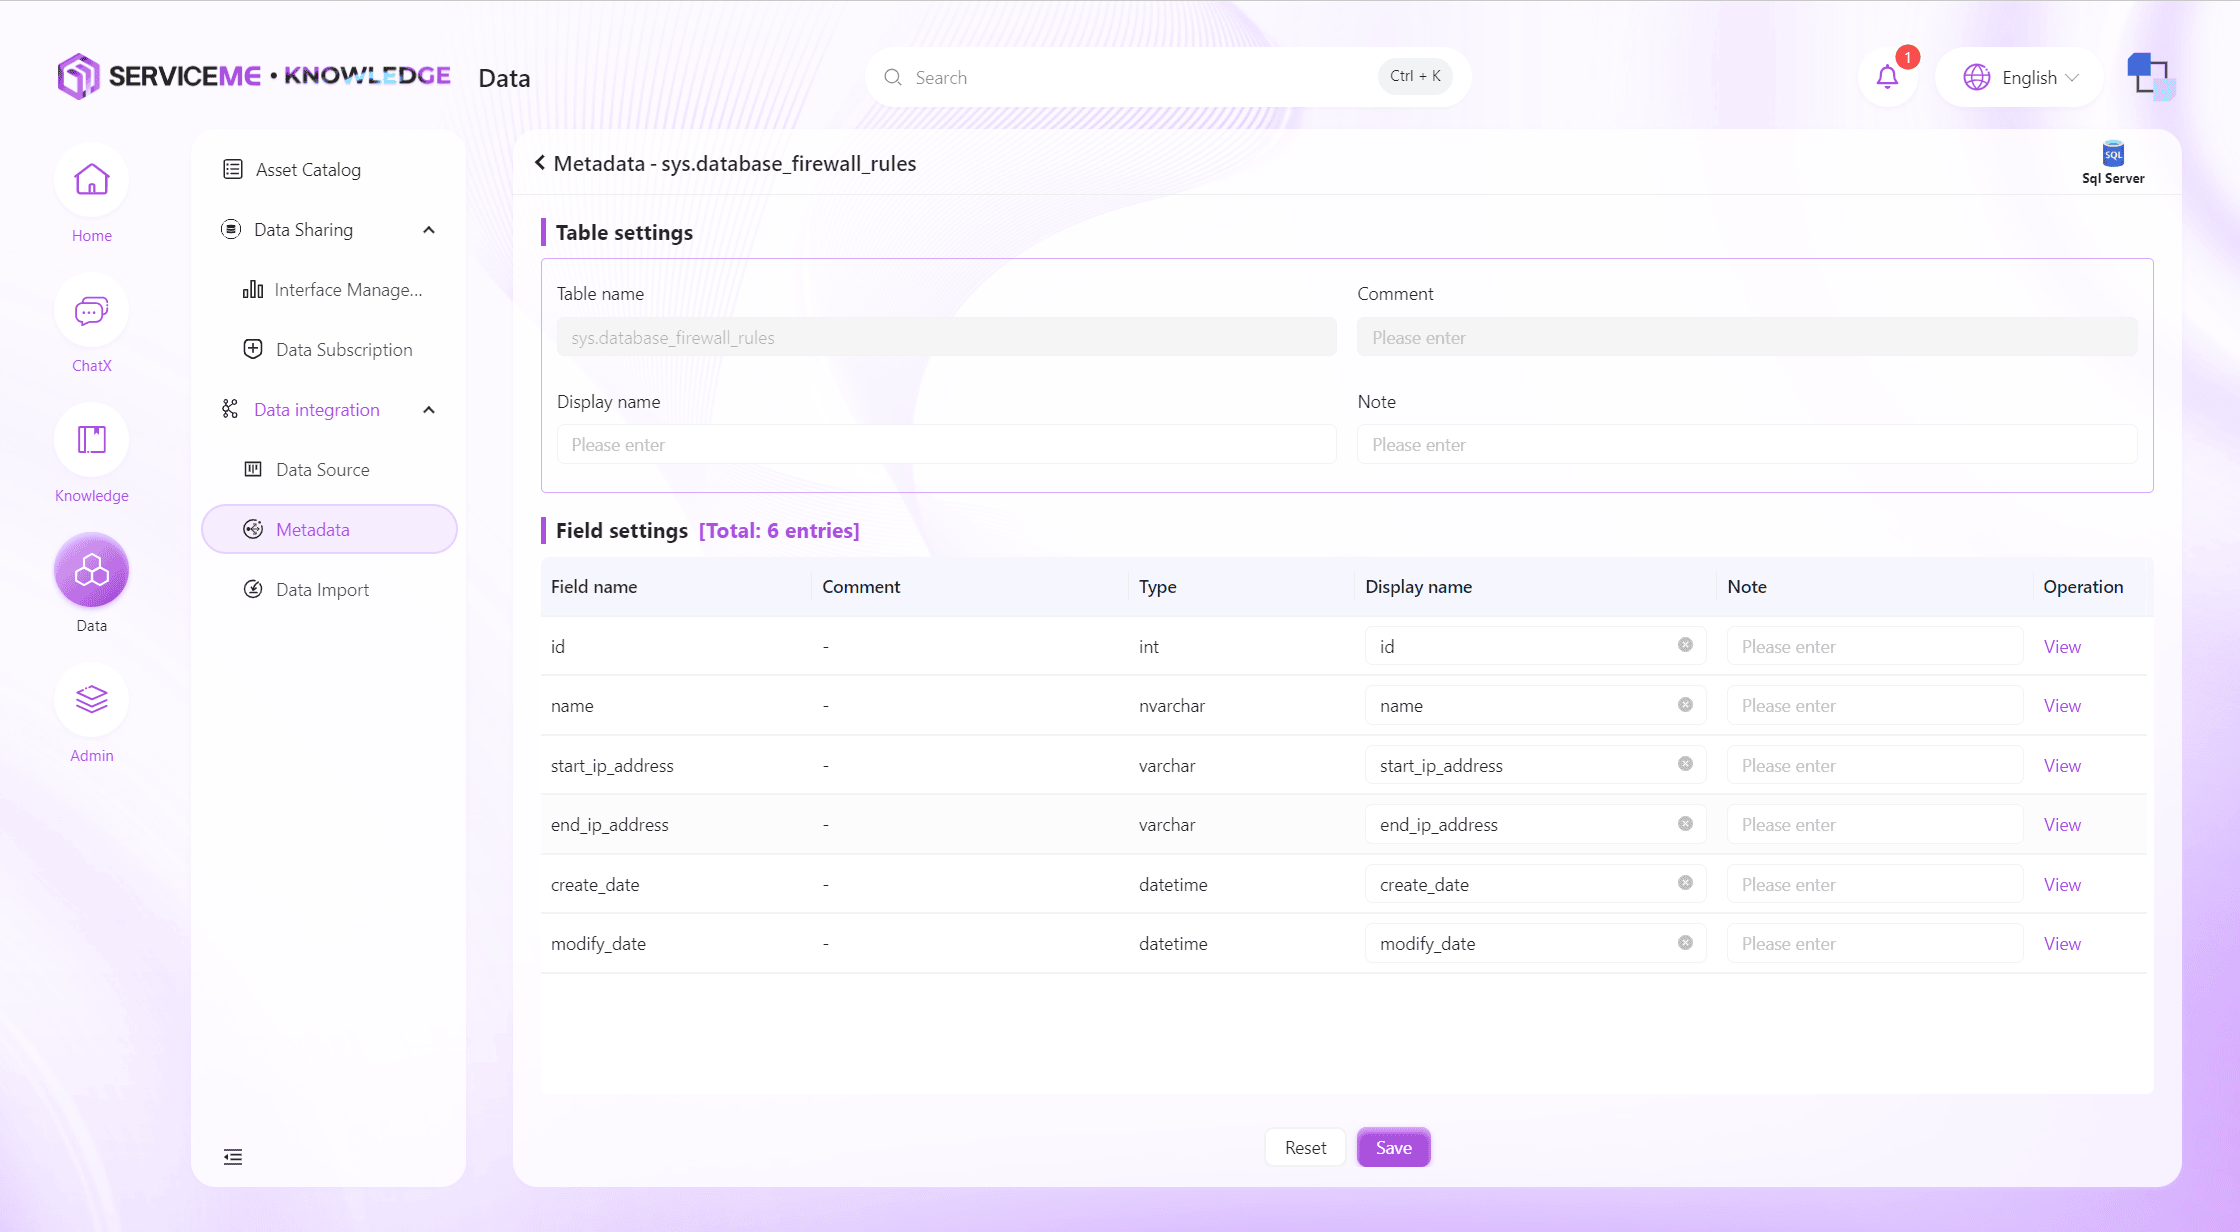
Edit Metadata
Editing metadata allows you to add meaningful names and descriptions to tables and fields. This information helps the system better understand the metadata, especially in AI-generated query scenarios. Providing accurate and complete metadata descriptions will result in better stability.
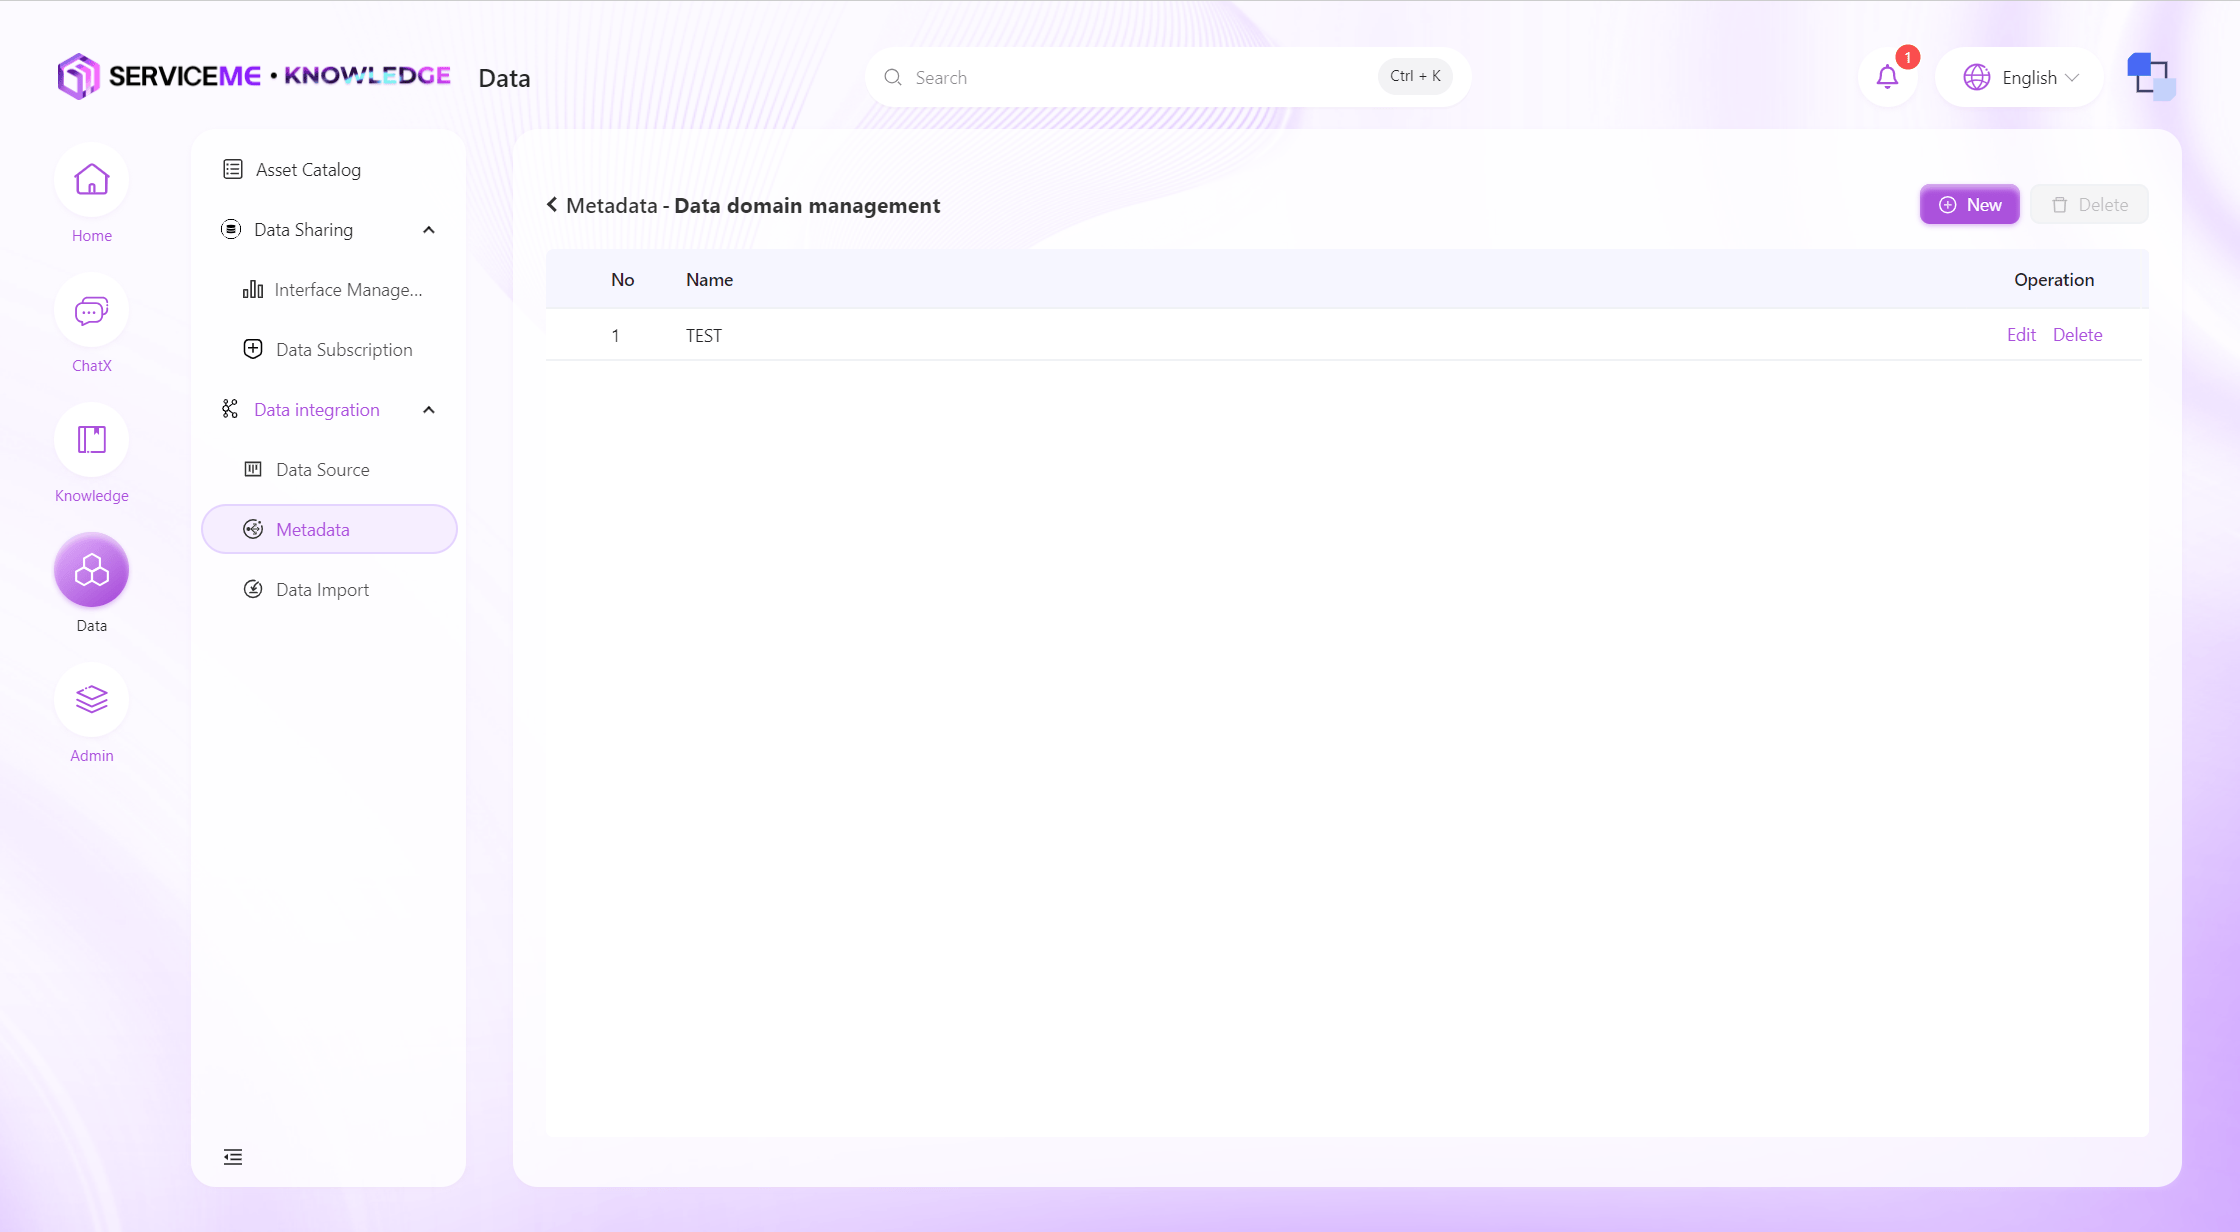
Manage Data Domains
Data domain management allows you to classify and manage data assets on the platform by creating different data domains.
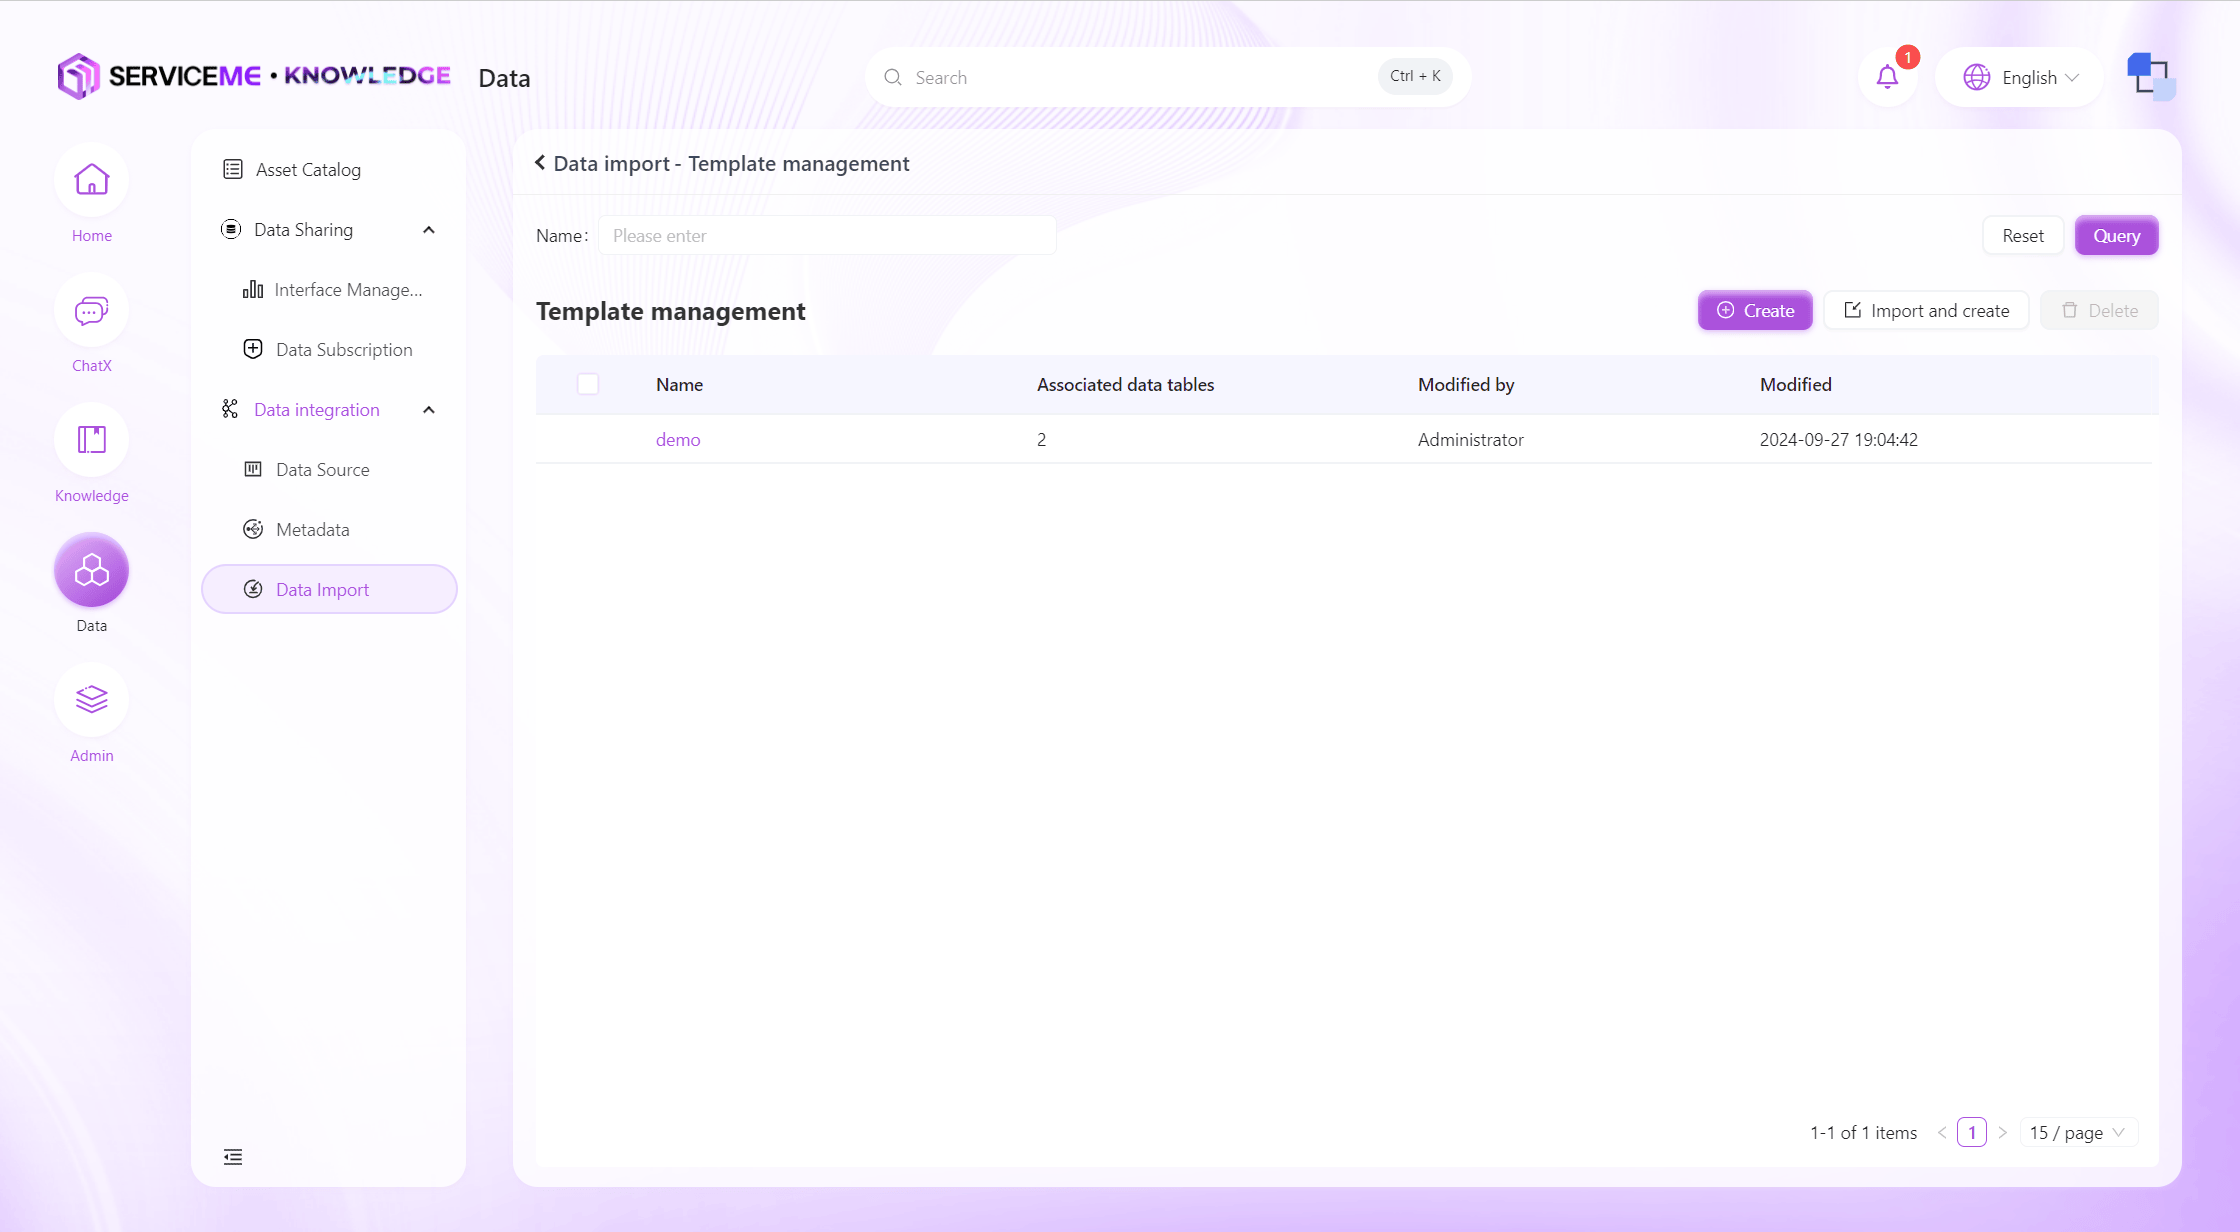
Data Import
Supports defining data validation rules through files or manually created data templates to achieve efficient data import. Supports importing new data tables or overwriting existing data, ensuring flexibility and accuracy in data processing.
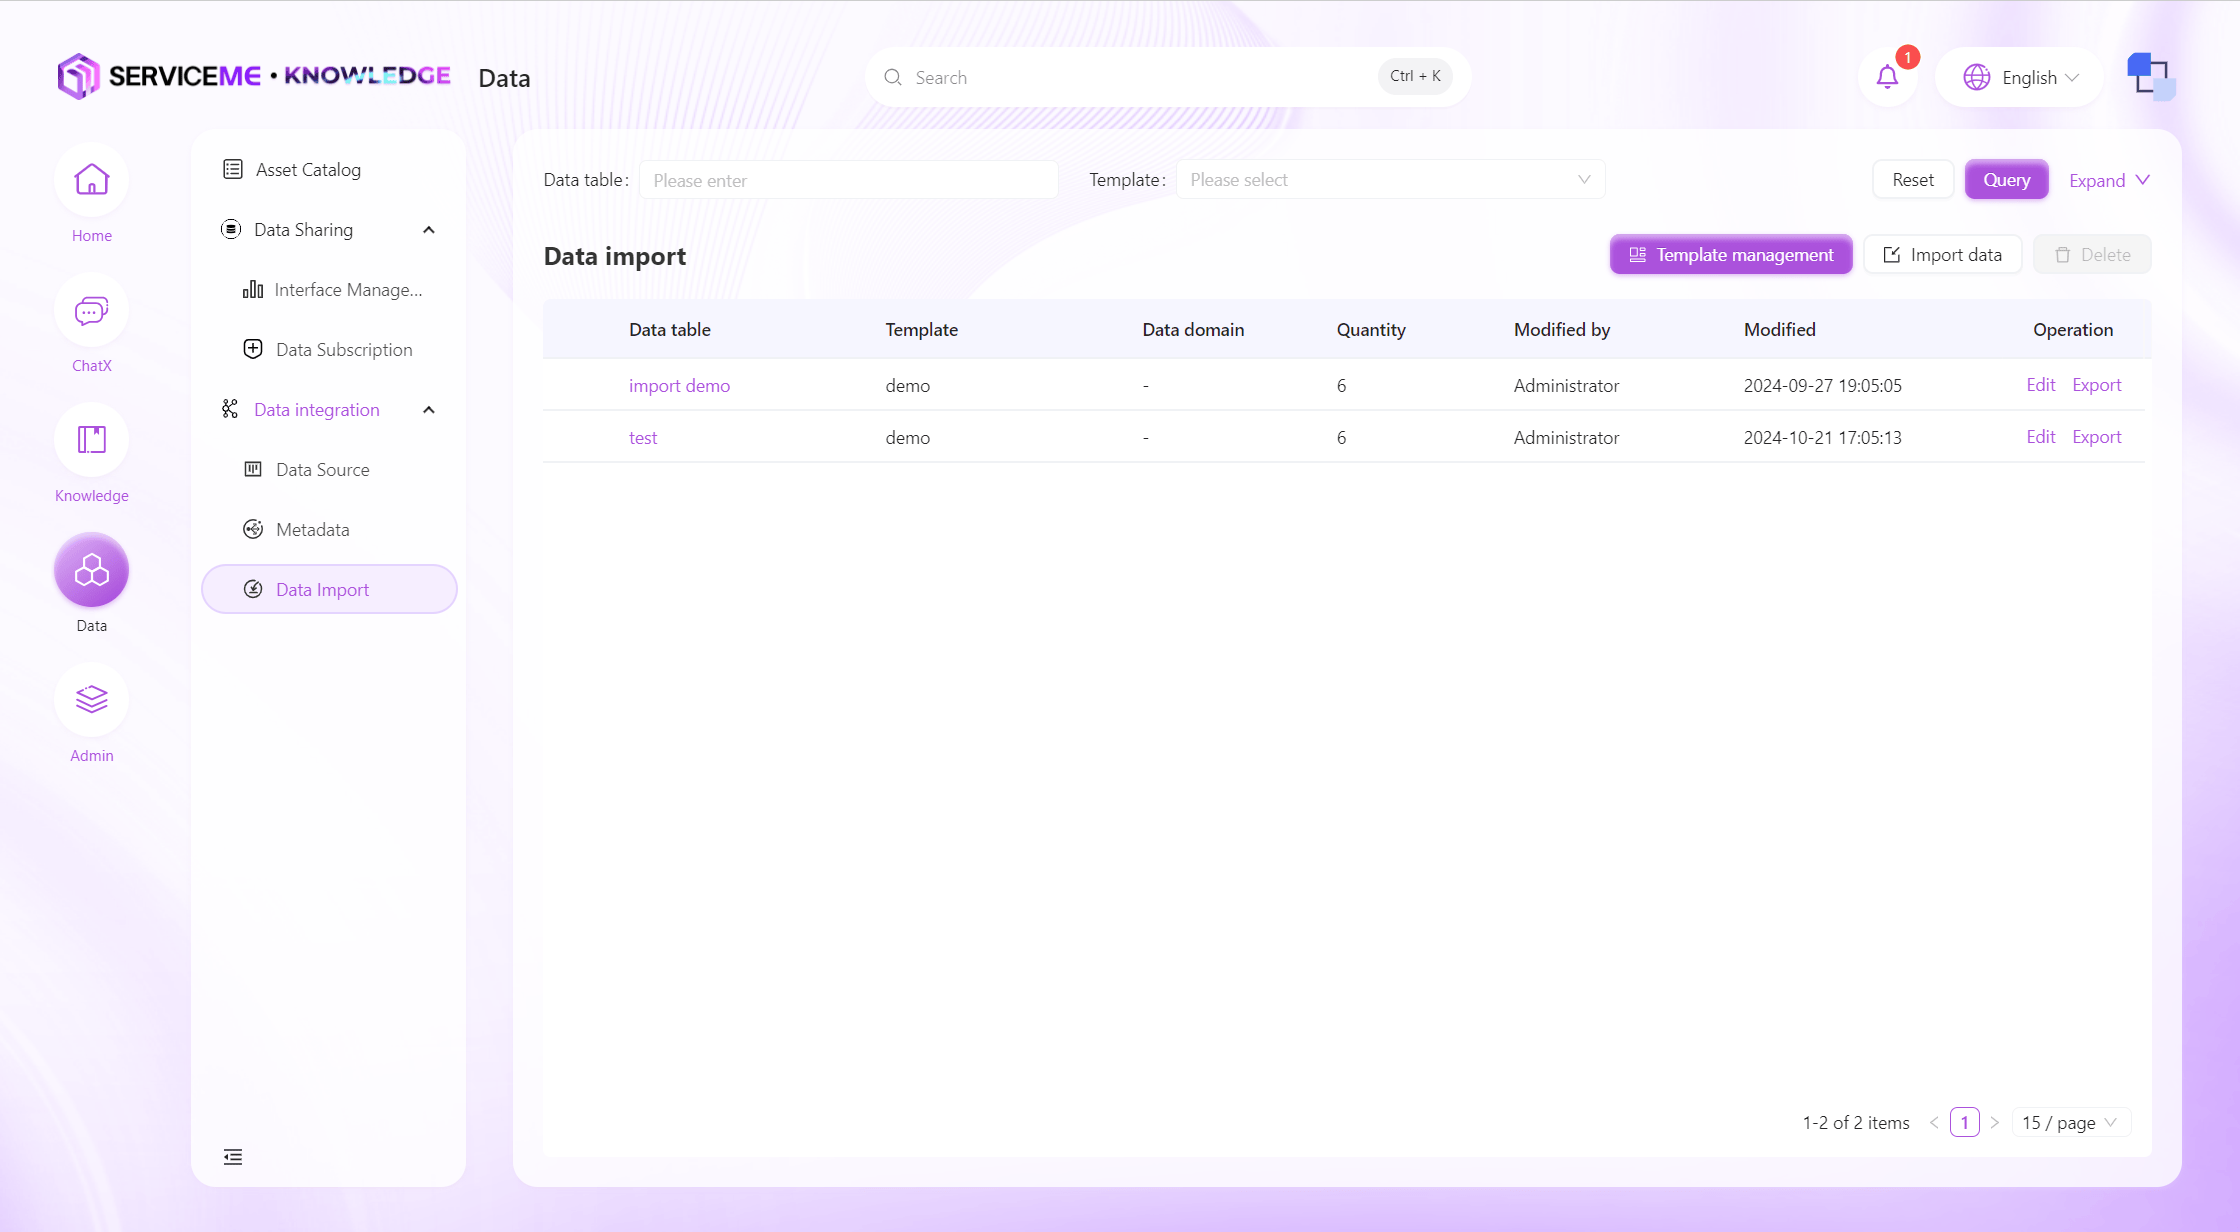
Instructions
- Query: Filter by data table name
- Template Management: Create/edit import templates. The corresponding import template must be created before importing data.
- Import Data: Perform data import operations
- Delete: Delete data tables that have already been imported into the system
- Column Operations
- Click Column Name Hyperlink: View detailed data in the data table
- Edit: Modify the data domain of the data table
- Export: Export the entire data table
Data Template Creation
The data template creation function allows users to create data templates in two ways: manually or by file.
-
Manual Creation:
- Users can directly define the structure of the data template on the interface.
- Fields can be added, edited, and deleted, and field types and other properties can be set.
-
Create by File:
- Users can upload an Excel file containing the data structure.
- The system will automatically recognize the data structure in the file and generate the corresponding template.
- Users can select a specific worksheet (Sheet) as the basis for the template.
During the template creation process, users can:
- Define field names, types, and descriptions.
- Set required fields.
- Add data validation rules, such as data format, value range, etc.
After the template is created, users can use the template for data import to ensure that the imported data conforms to the predefined structure and rules. This method can significantly improve data quality and import efficiency.
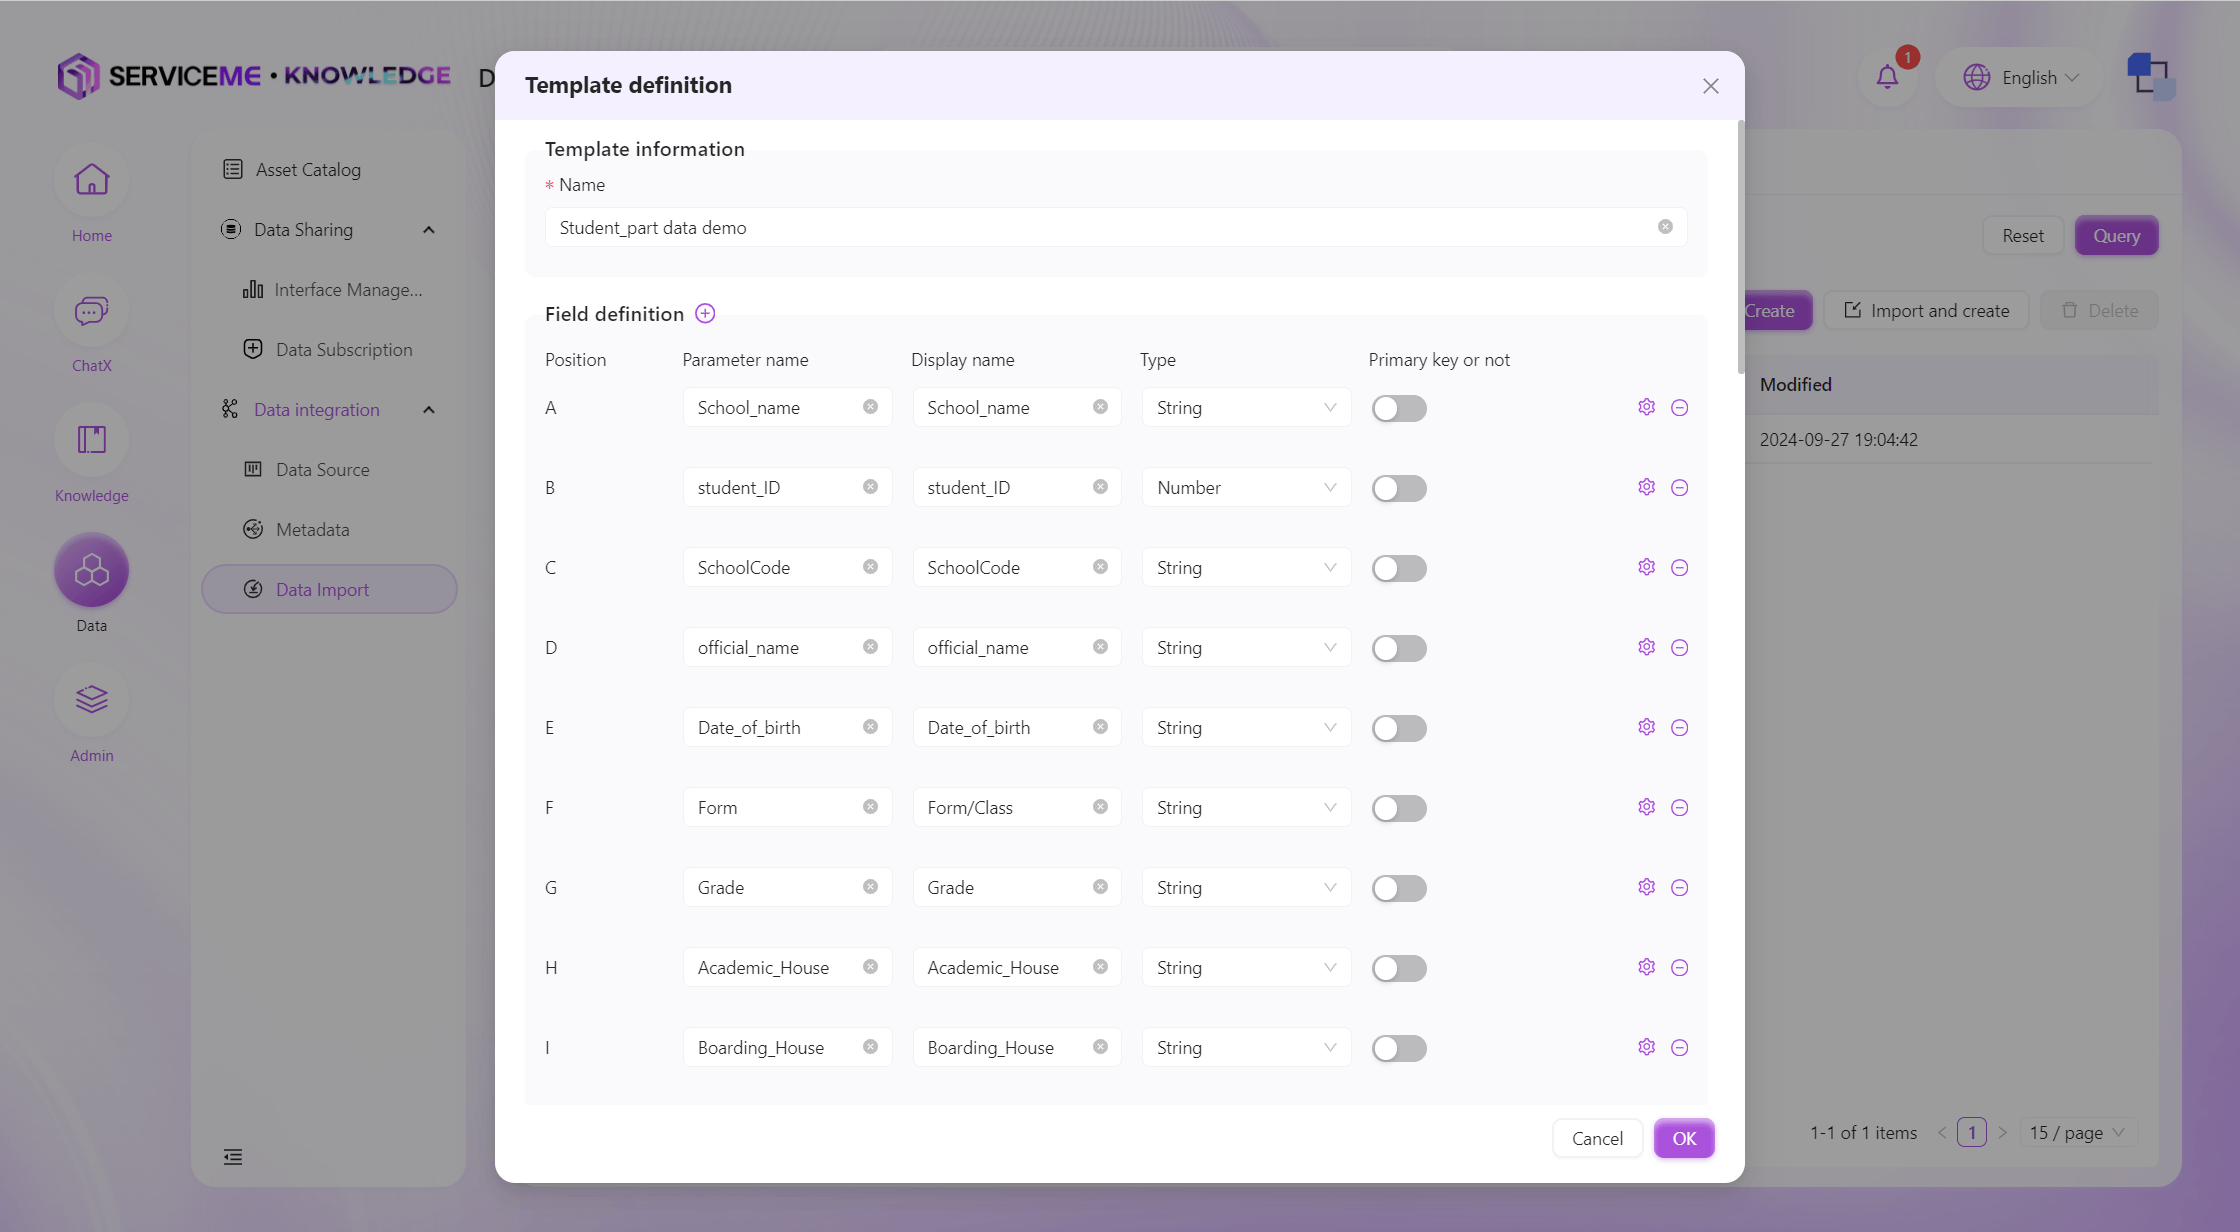
Manually Create Import Template
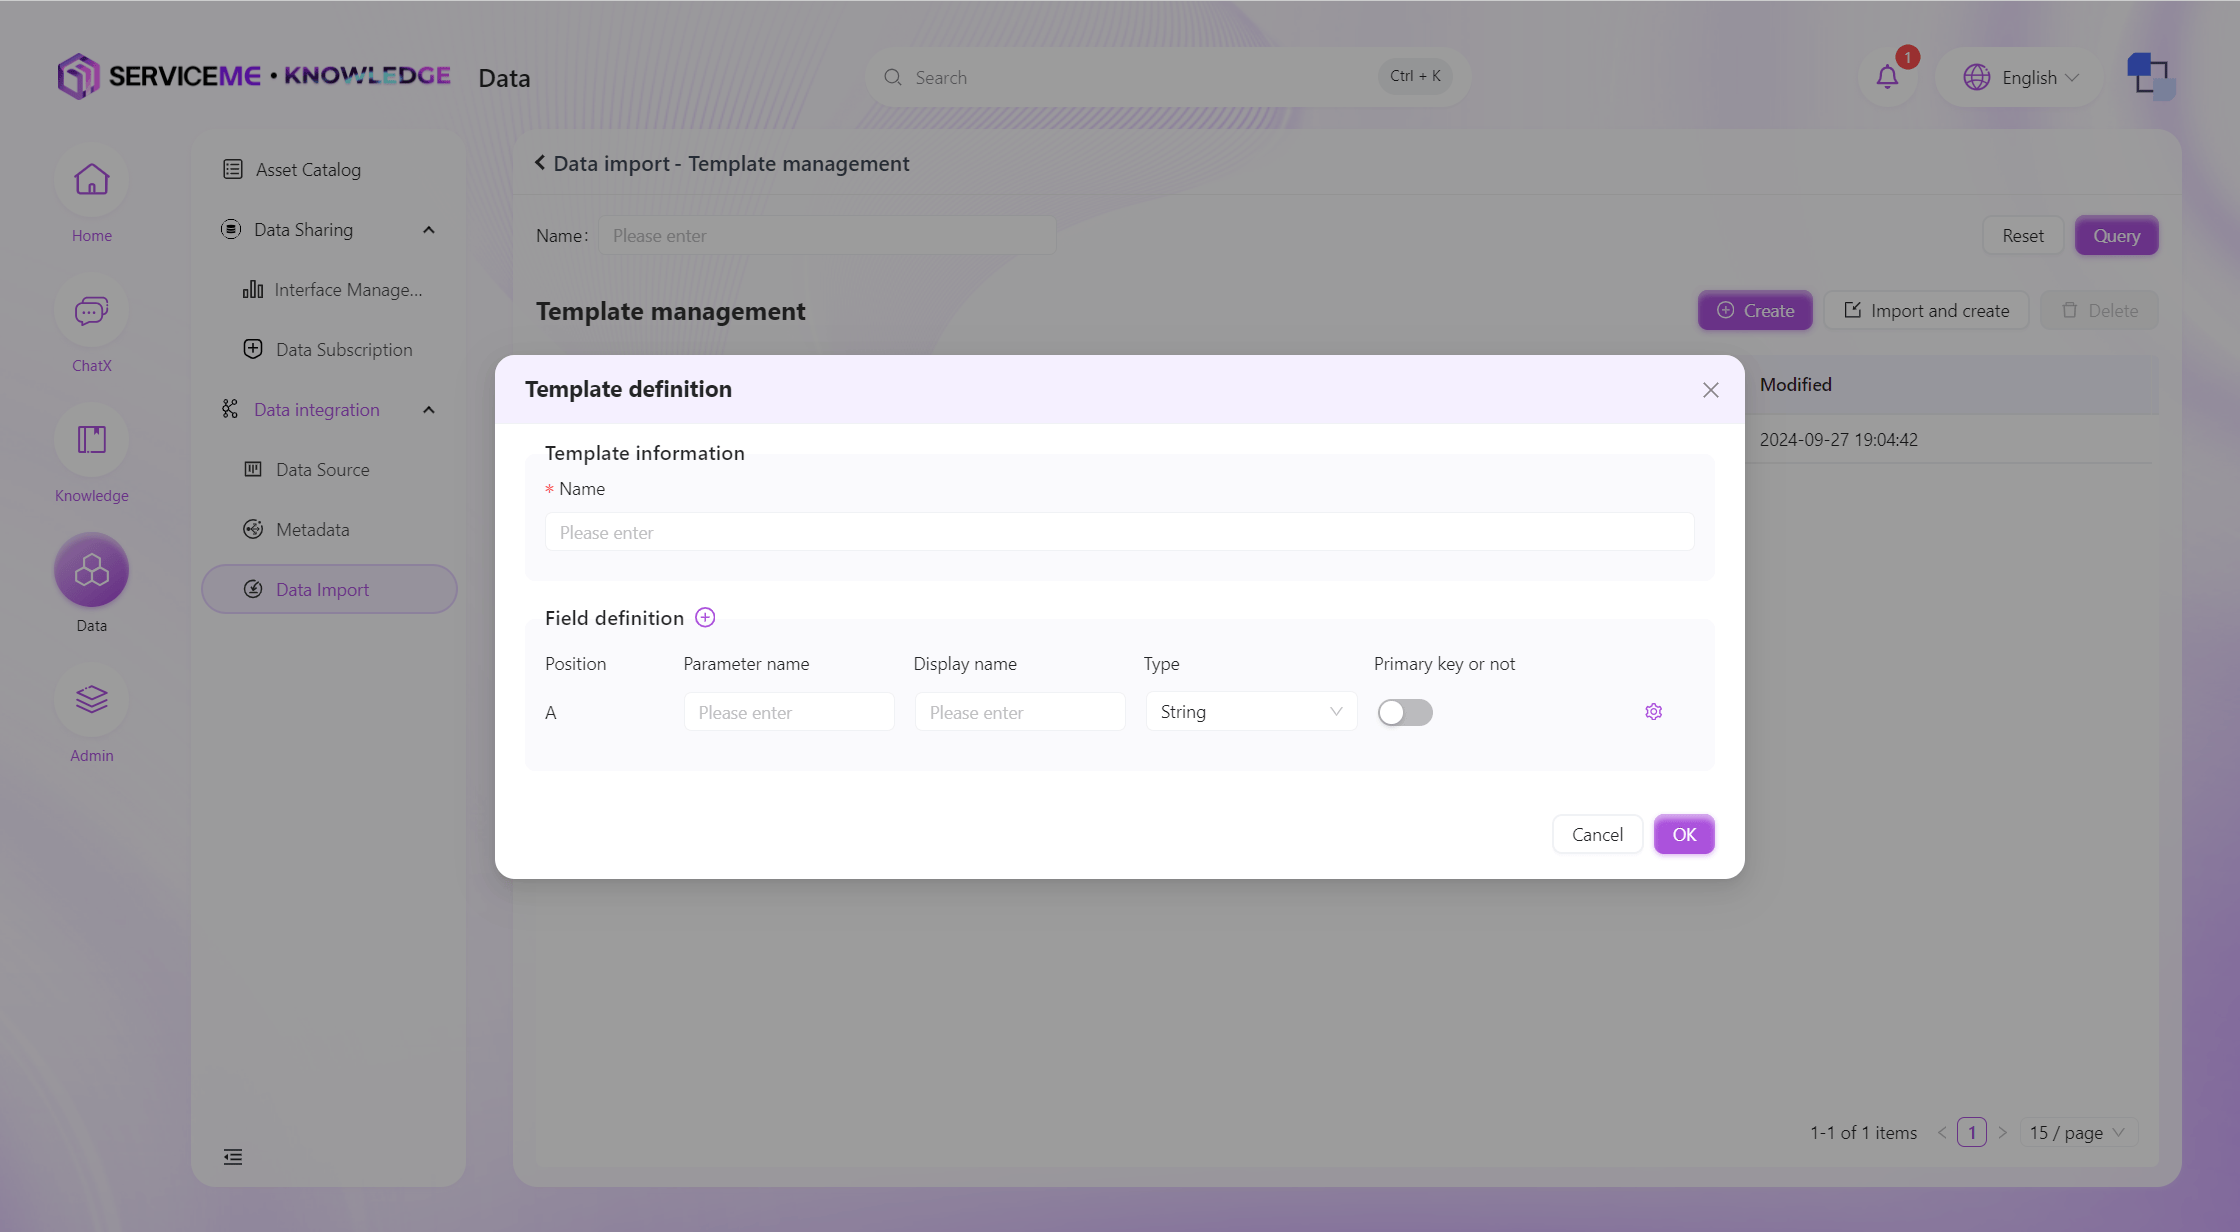
Instructions
- Template Name: The unique identifier for the template
- Add Field (plus sign): Click to add a new template column
- Field Operations
- Parameter Name: Used for the data table
- Display Name: Used for display after data import
- Type: Specifies the type of imported data (String, Number, Boolean, DateTime)
- Is Primary Key: The primary key column must be unique. If you want to update existing data instead of always adding new data during secondary imports, you need to specify a primary key column for the template
- Settings: Enter the validation rule settings for the column
Validation Rule Definition
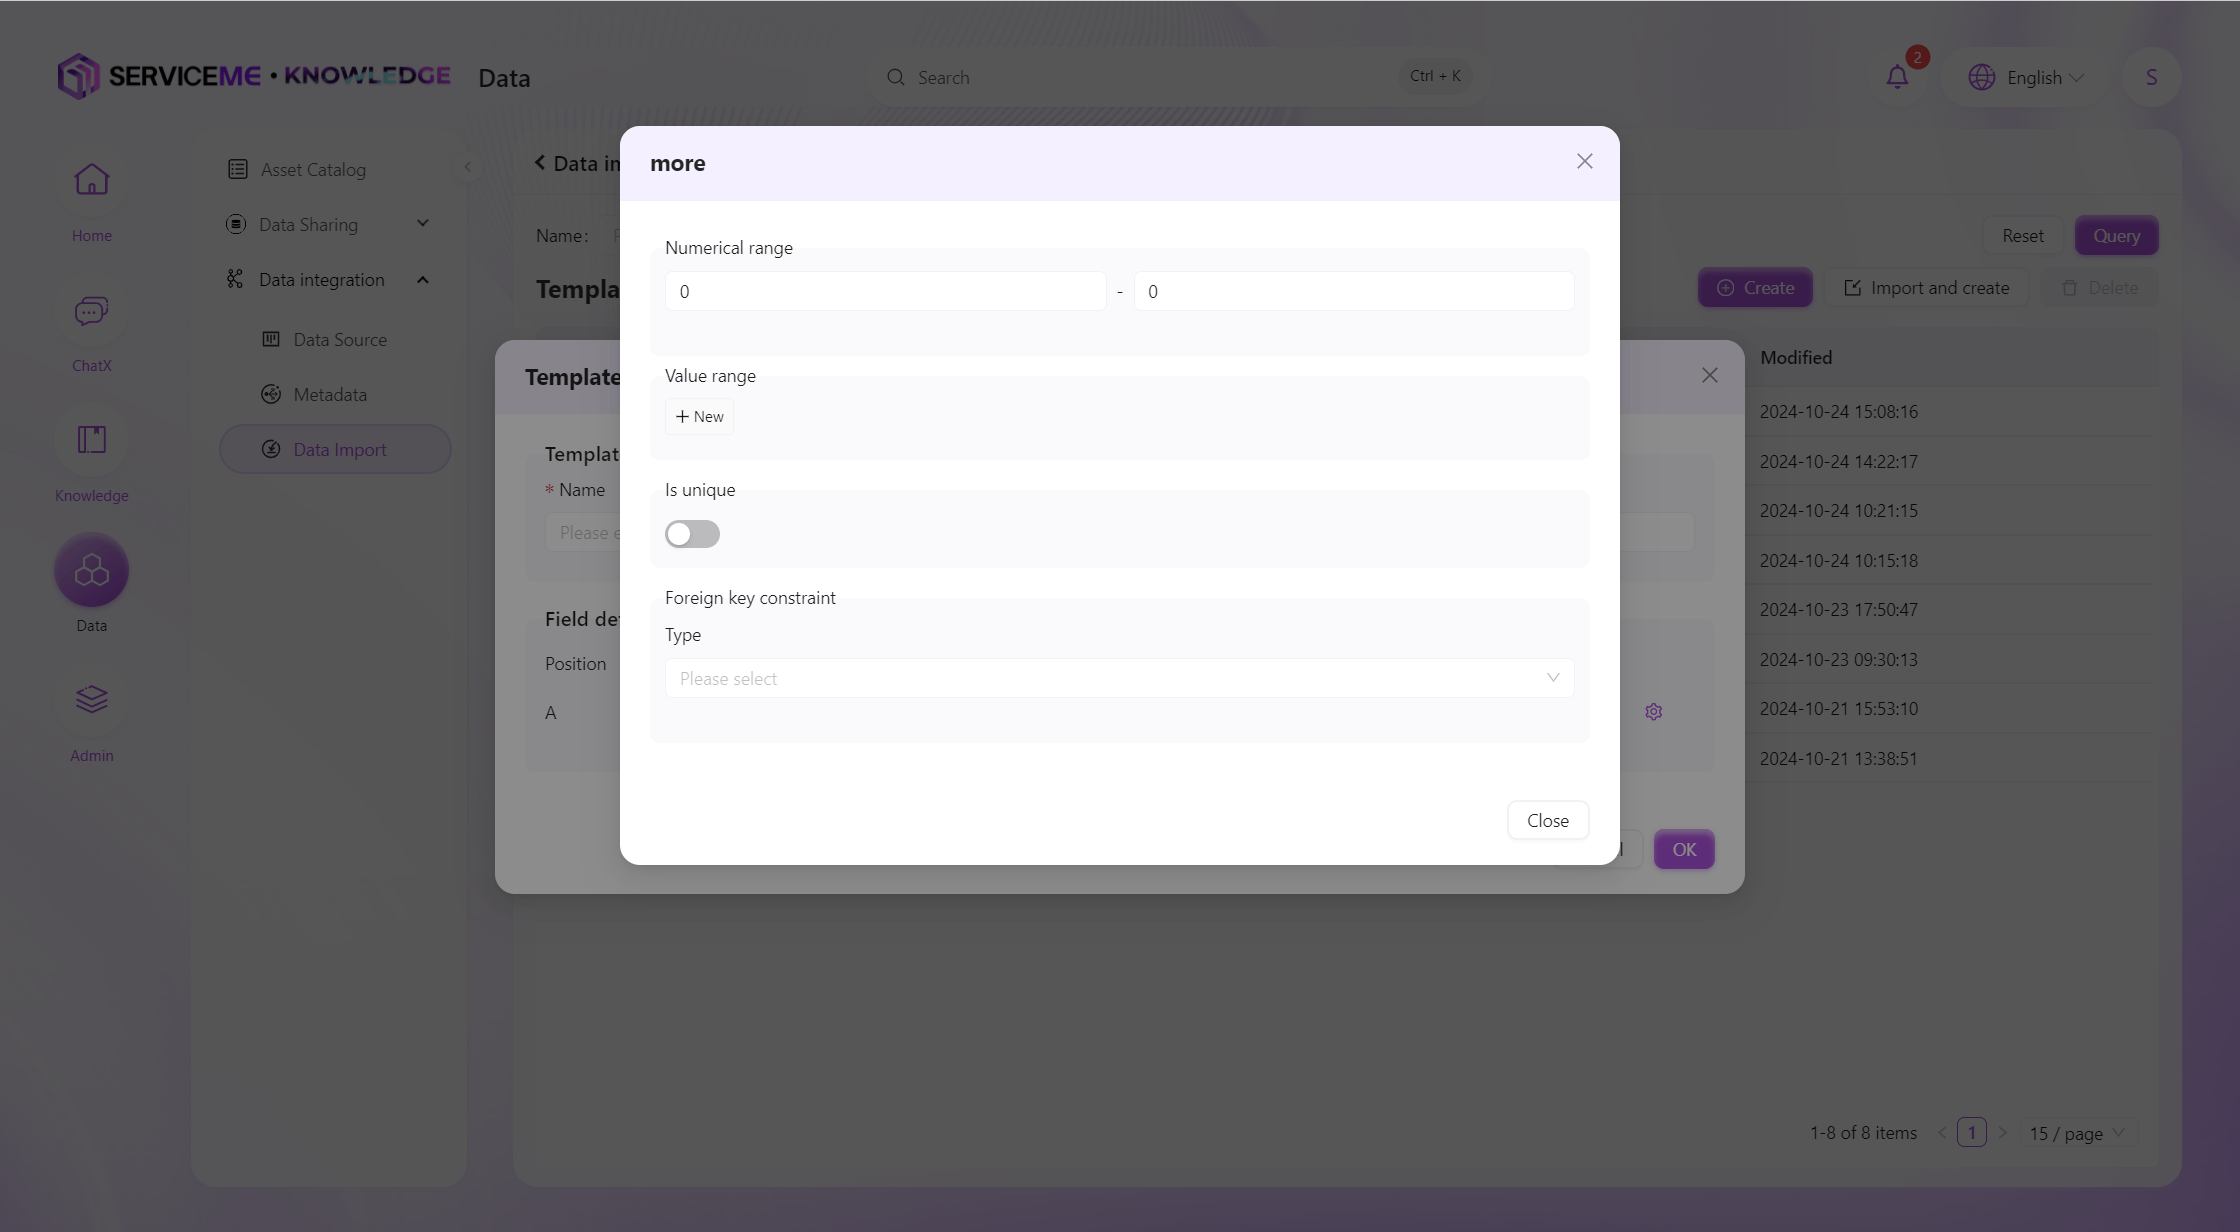
Instructions
- Value Range (Numeric): Restrict the value to be within a certain range, e.g., exam scores can be restricted to the range 0-100
- Value Range (Enum): Define enumeration values, e.g., Gender: Male/Female, Risk: High/Medium/Low
- Is Unique: If you do not want duplicate values in this column, you can enable uniqueness validation
- Foreign Key Constraint: Used for existence validation of data. For example, you can validate the existence of a school code through the school table. If the school code in the uploaded data is not defined in the school table, an error will be prompted.
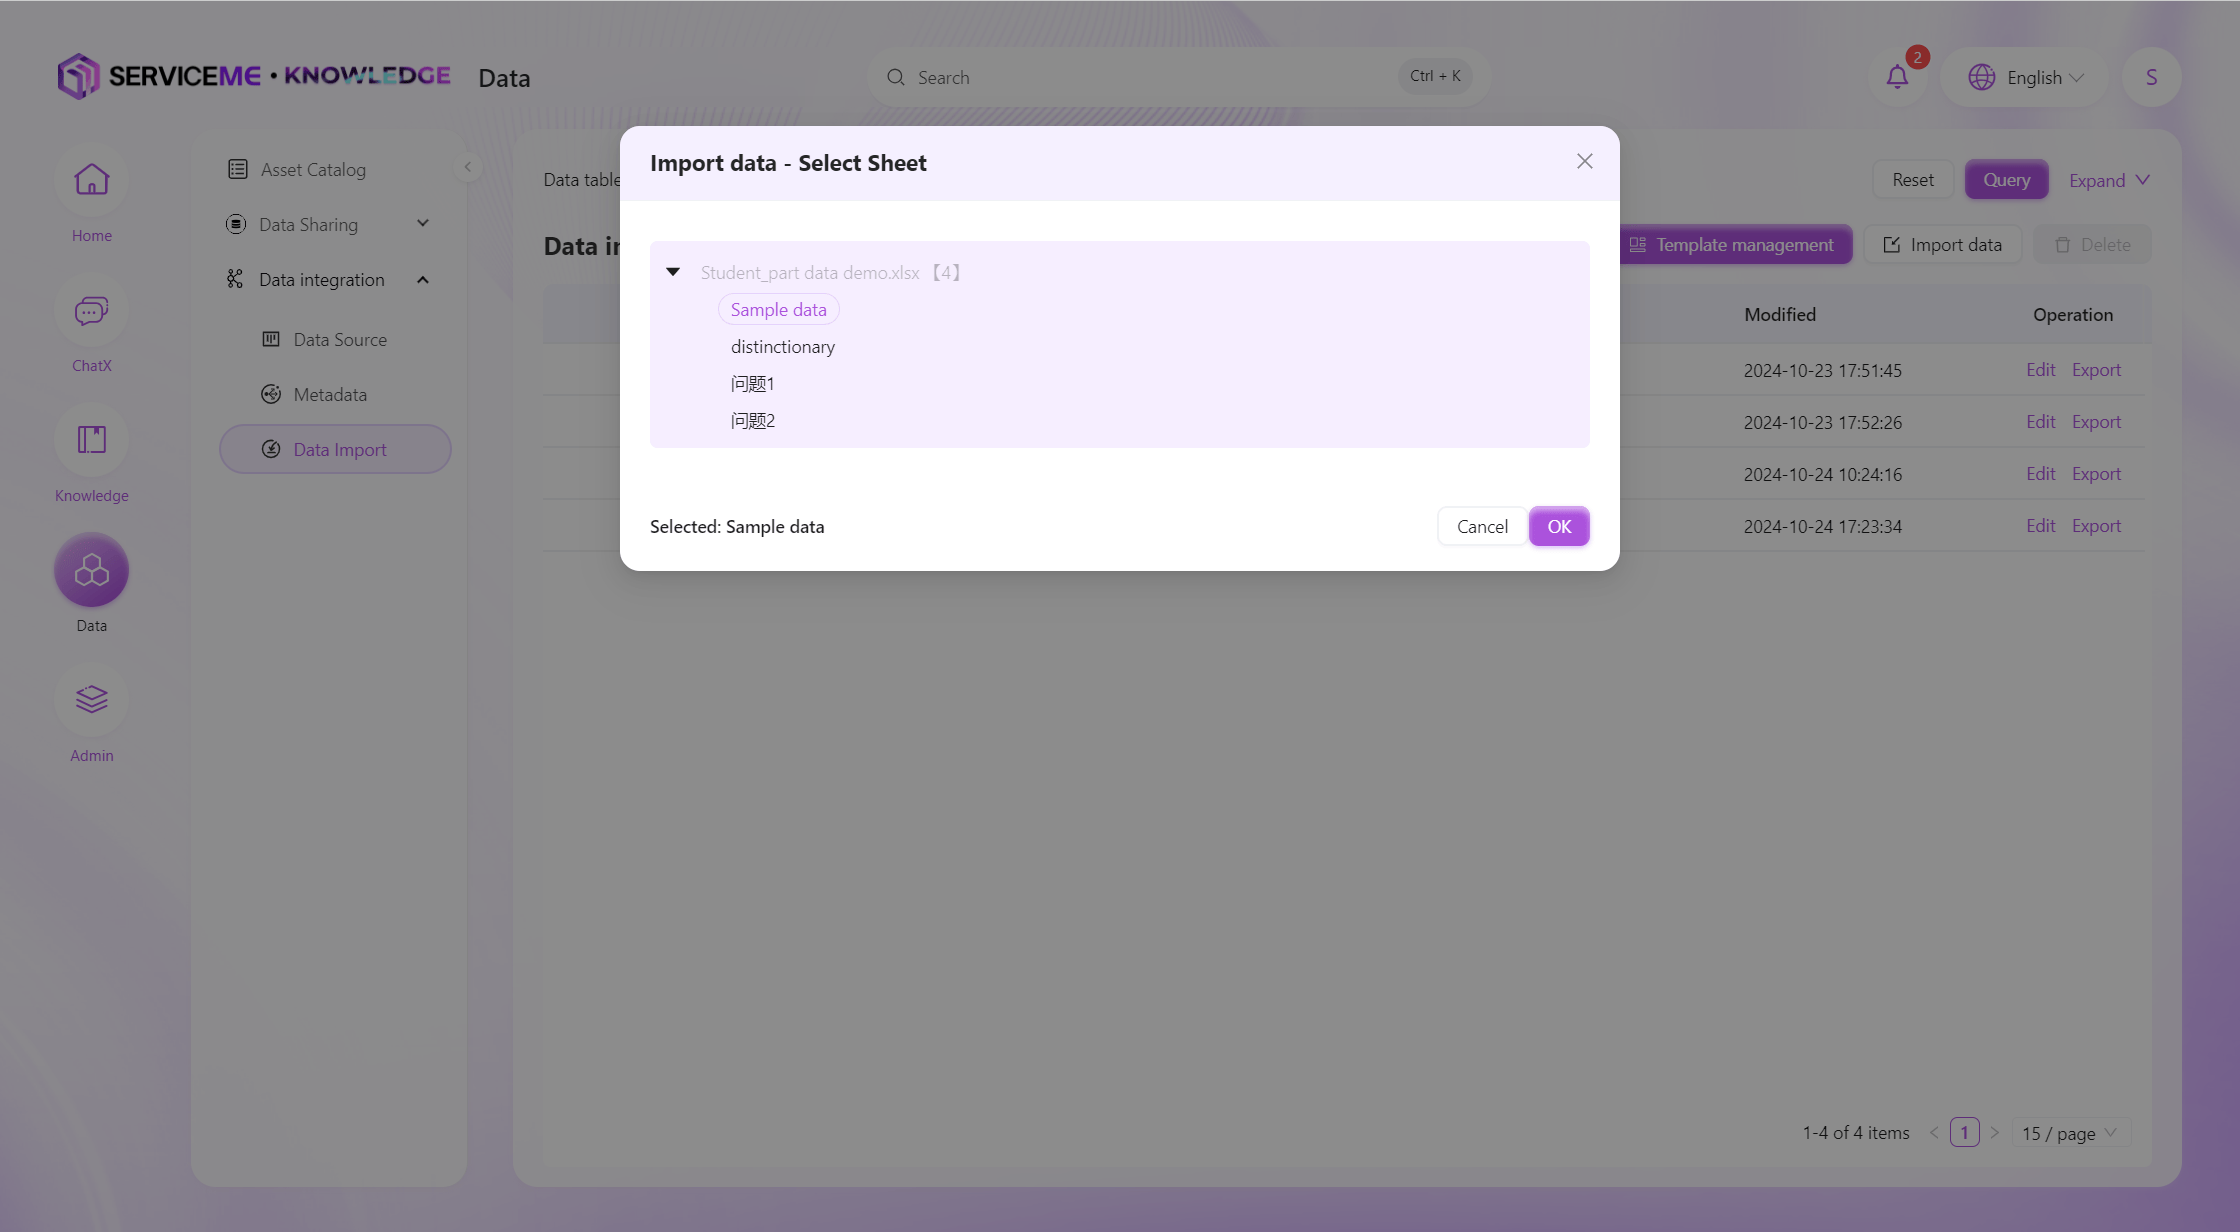
Create Import Template by File
Select Sheet
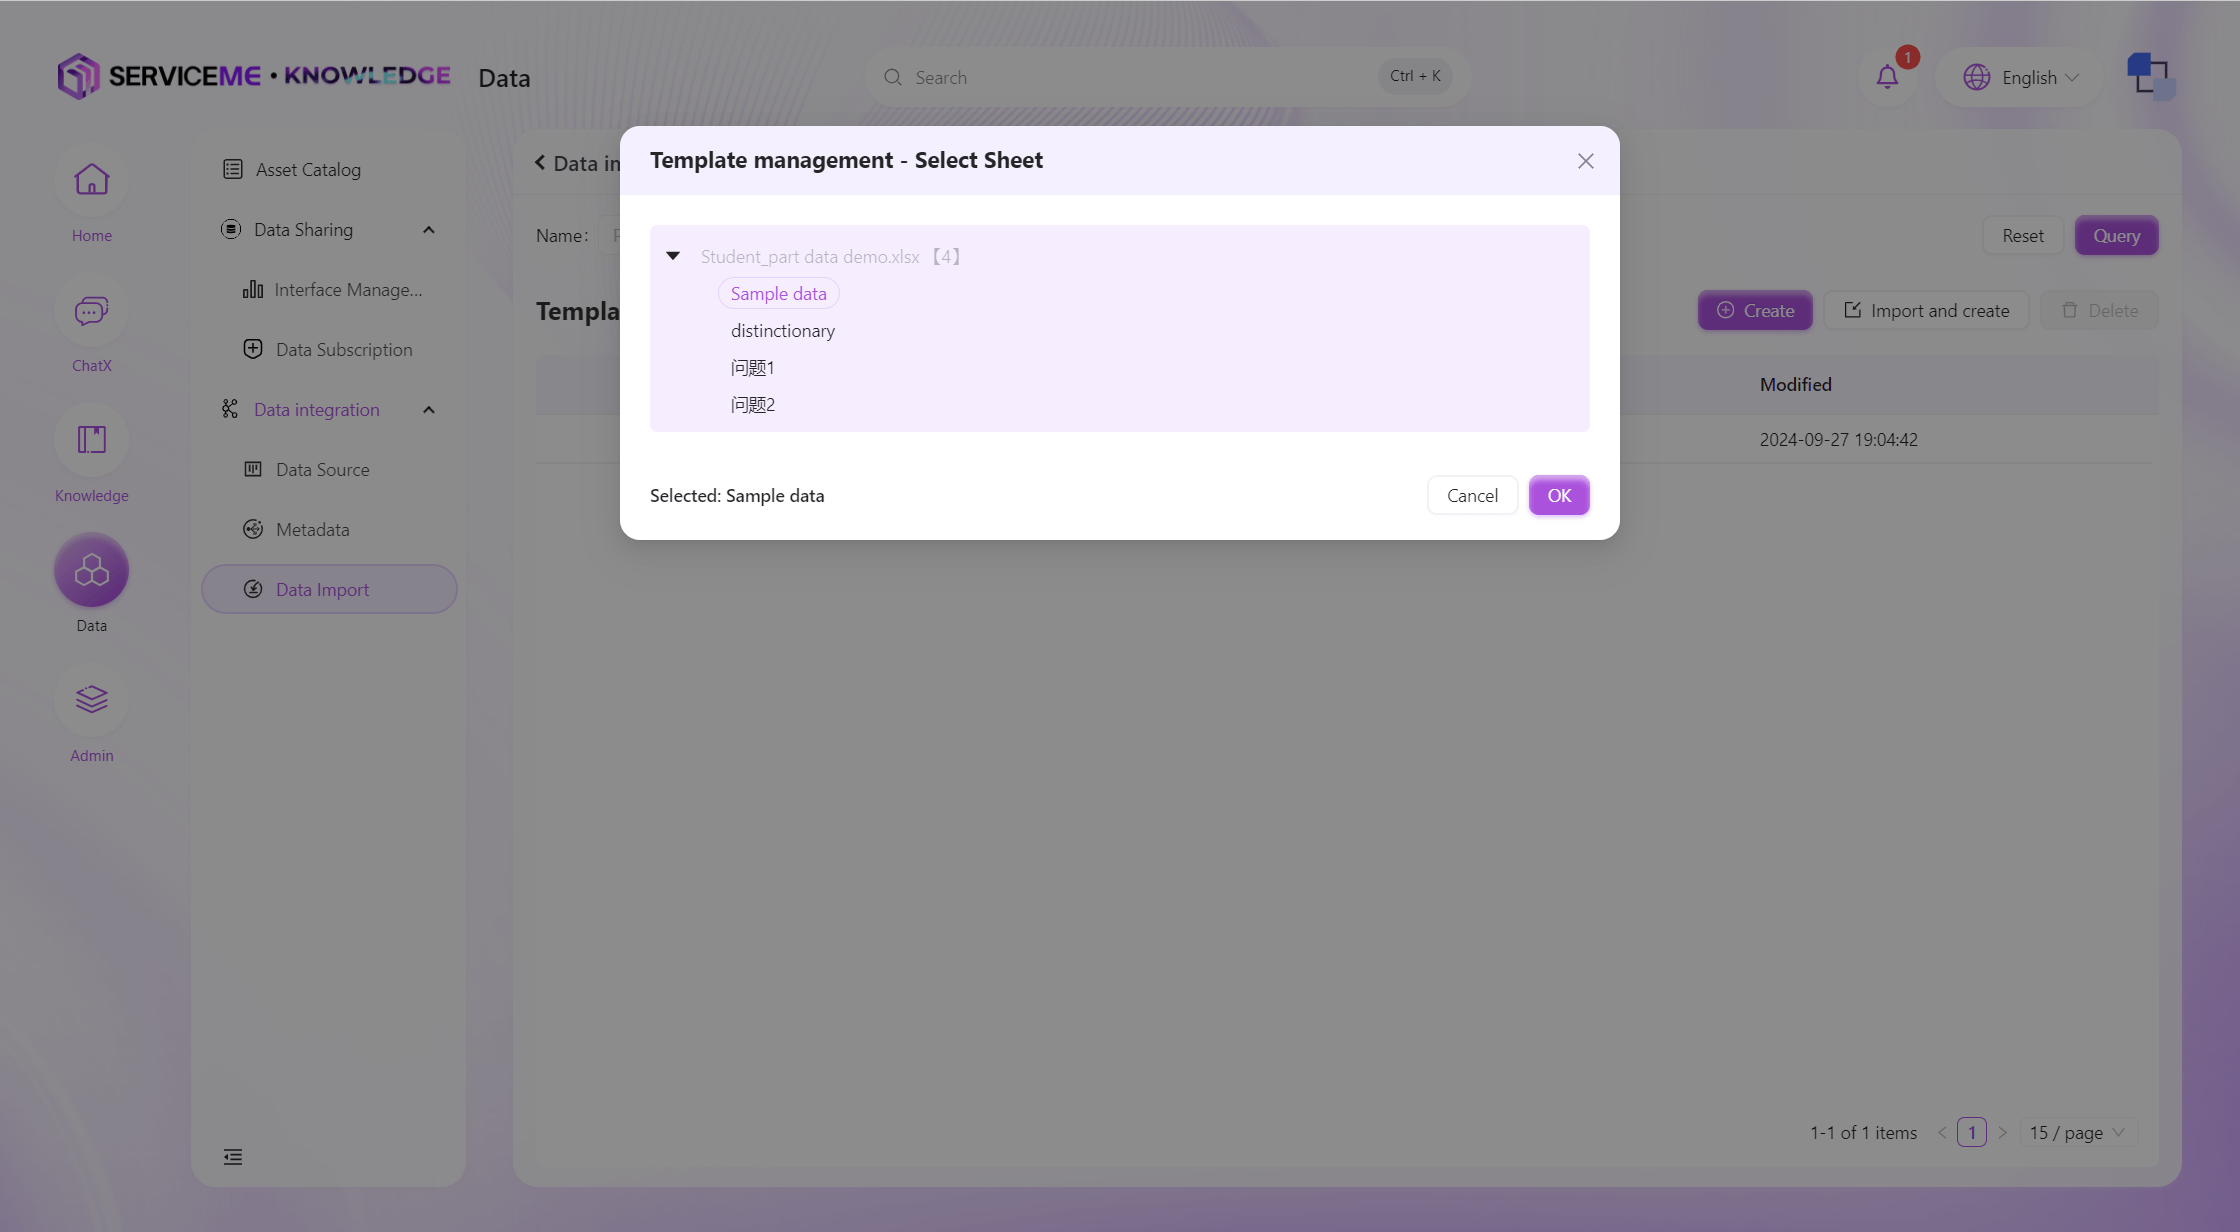
The system will determine the field information in the template based on the first row of the Sheet and will try to infer the type of each column. The operations after import are similar to manual creation.
Data Import
The data import function allows users to import prepared data files into the system. This process includes the following main steps:
-
Select Data File:
- Users can upload Excel or CSV files containing the data to be imported, and then select the Sheet to import into the system.
-
Data Preview and Validation:
- Before the official import, the system will display a data preview for users to check the correctness of the data.
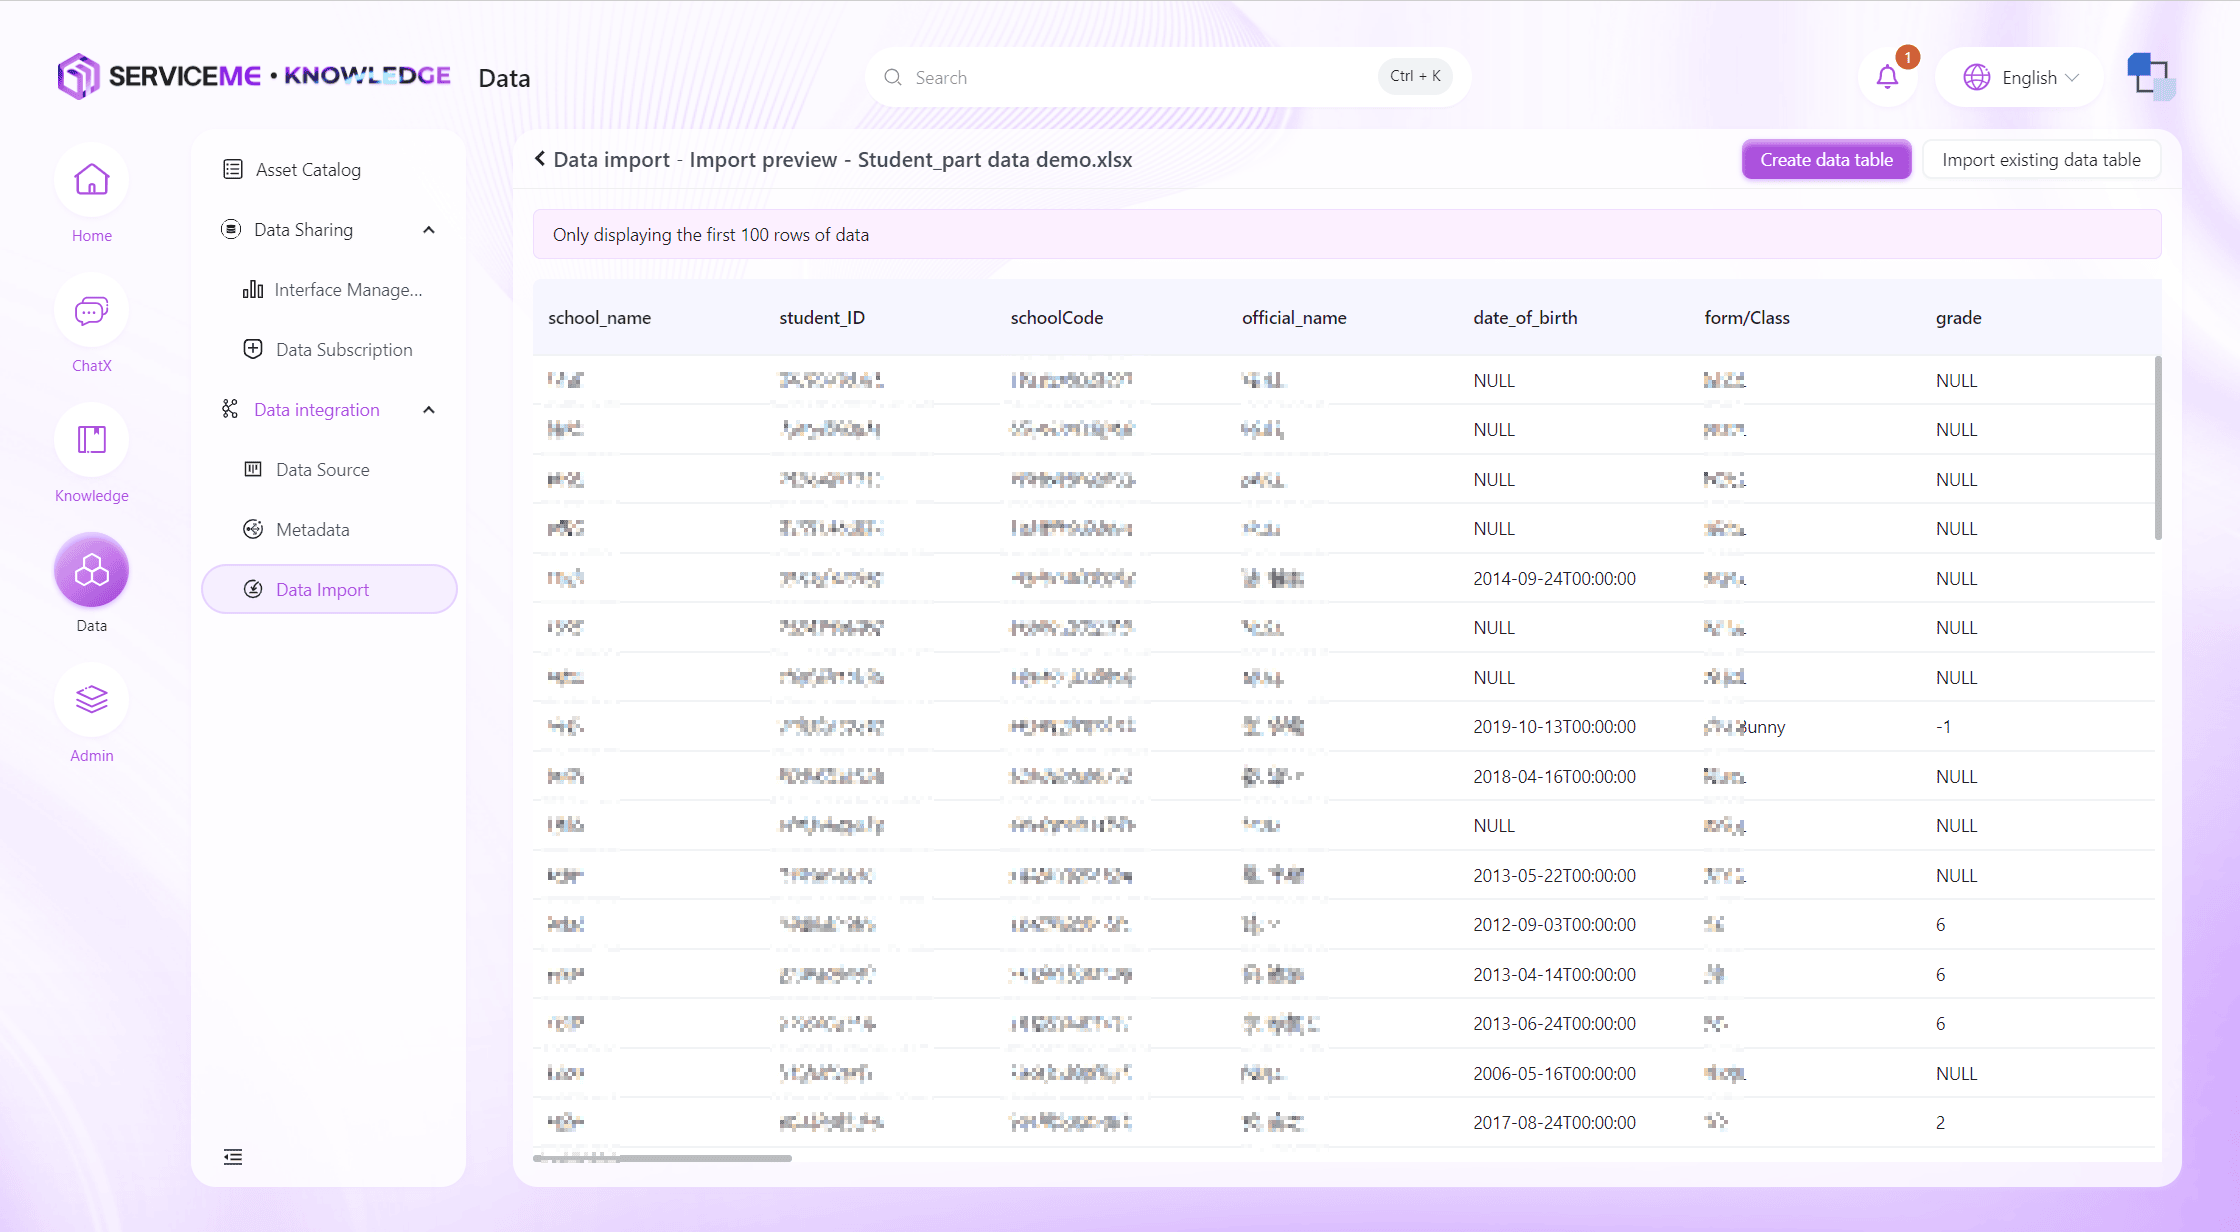
-
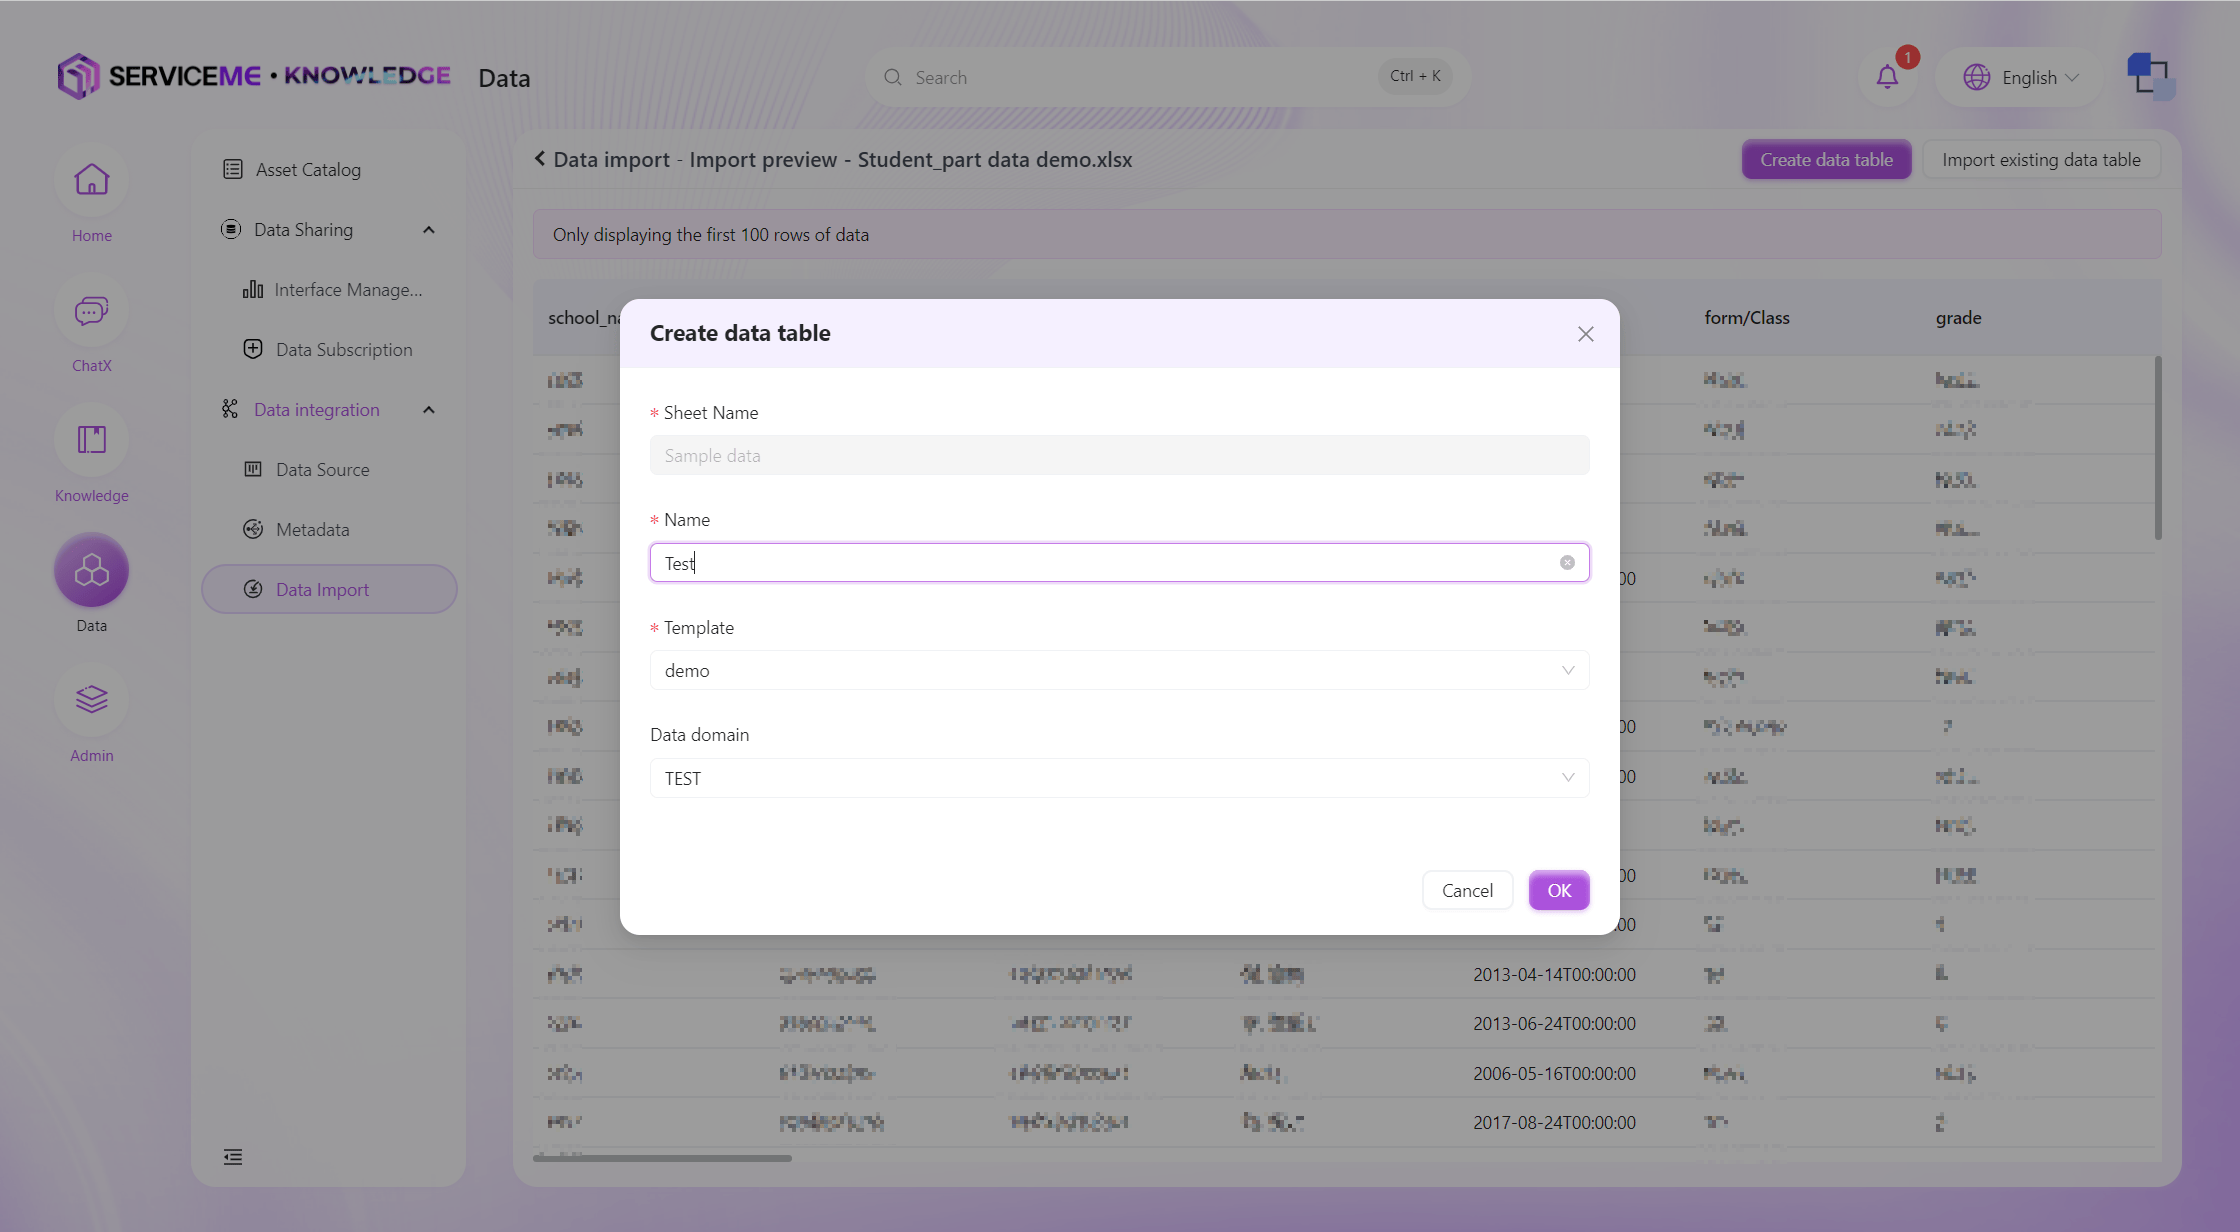
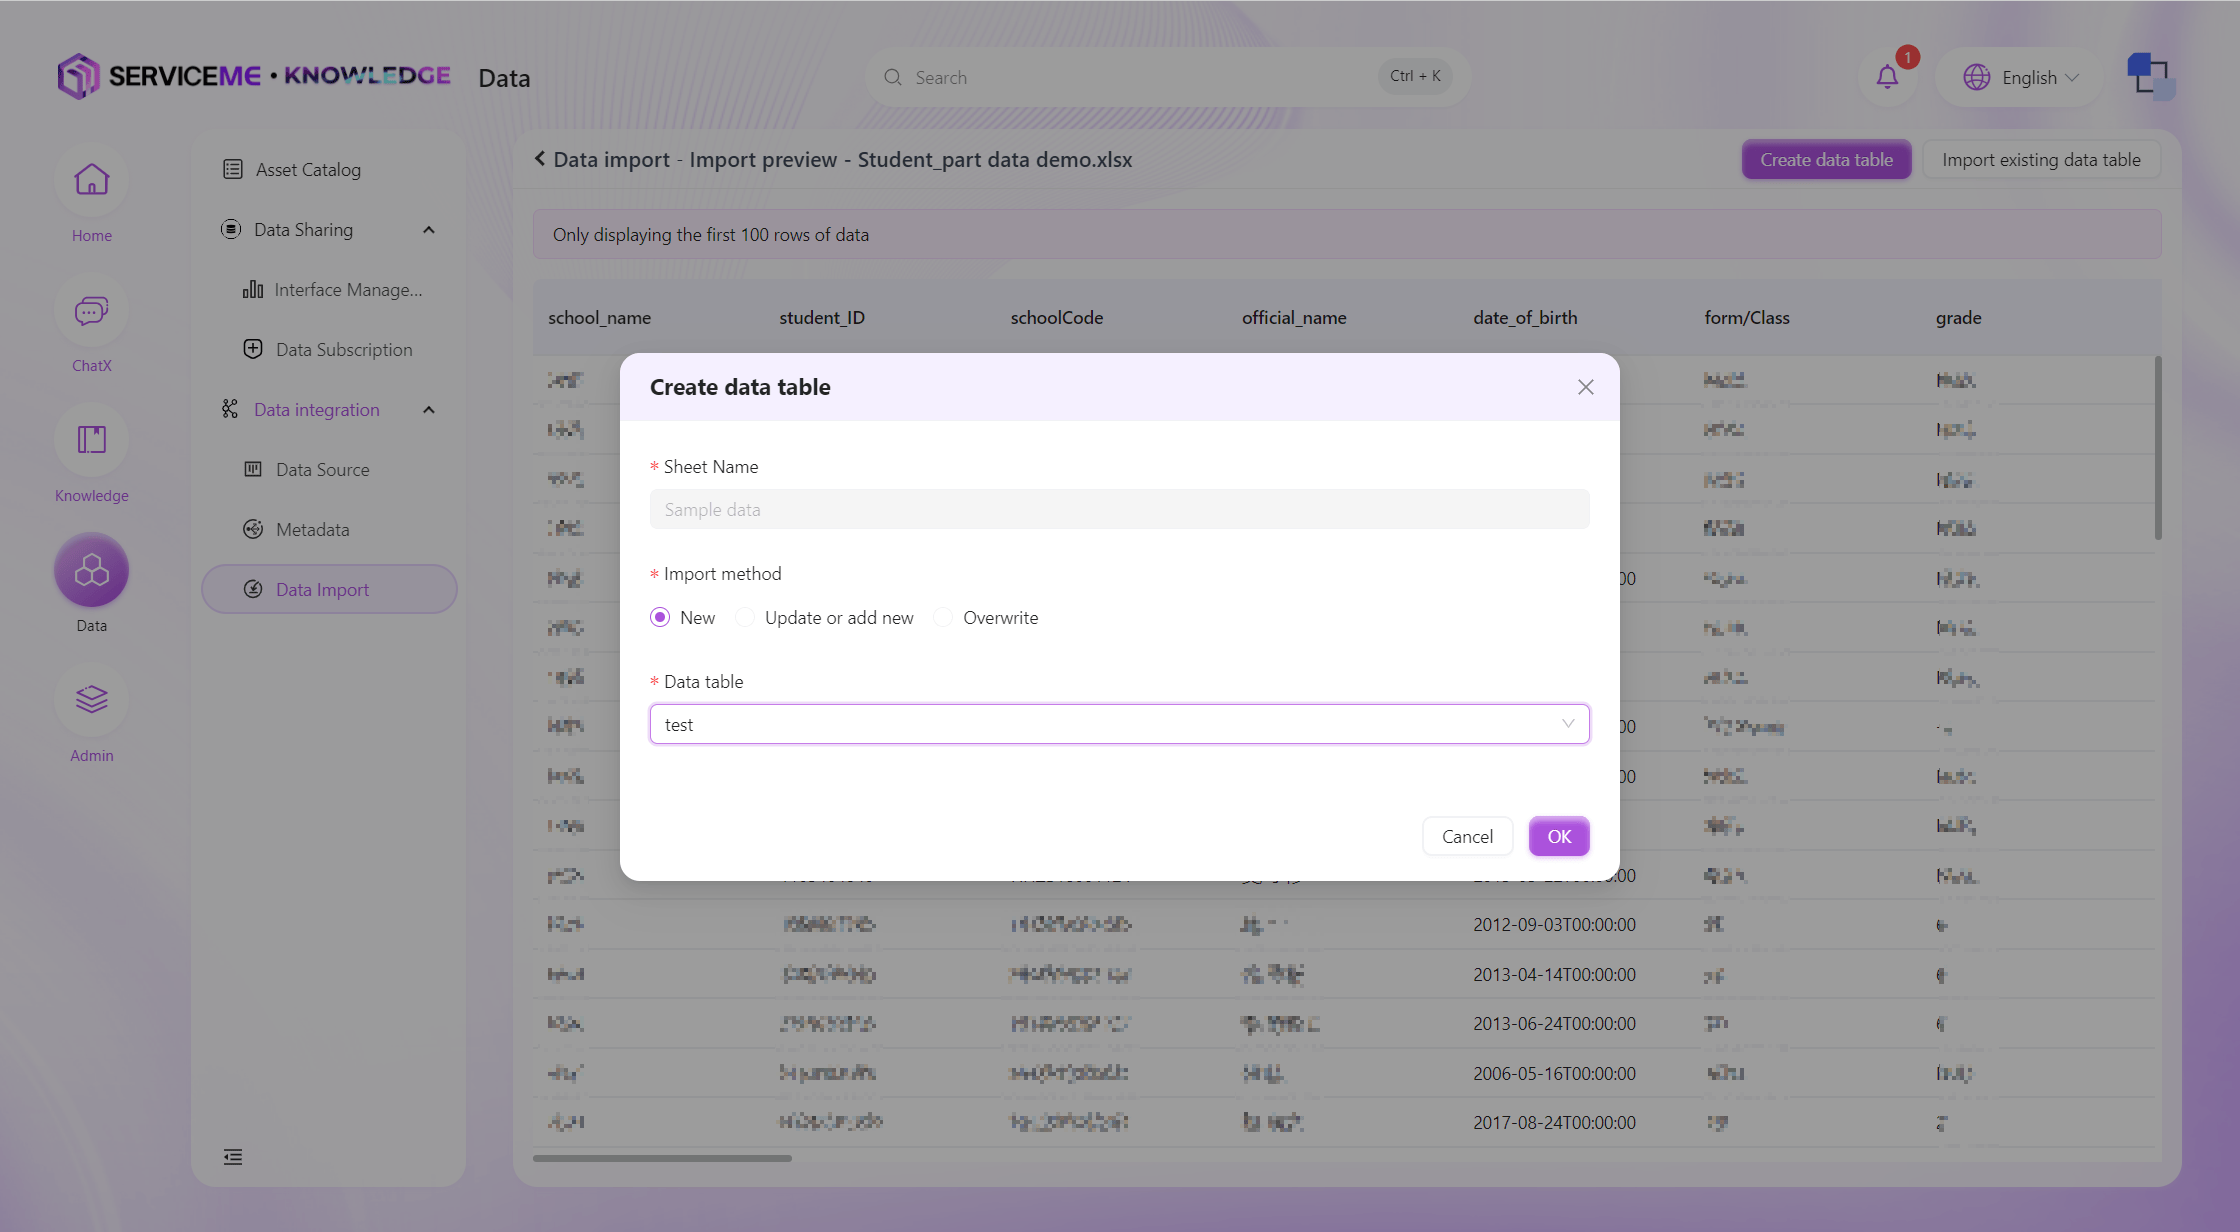
Select Import Method:
- Create New Table: Import data into a brand new data table.
- Import into Existing Data: Add or update data in an existing data table.
- Add: Always add new data
- Update or Add: Determine whether the data already exists based on the primary key. If it exists, update the data; if not, add new data
- Overwrite: Use the uploaded data to completely overwrite the data in the target data table
-
Execute Import:
- The system will match the columns in the uploaded file with the fields in the predefined template (by column order, A-Z)
- After confirming that everything is correct, users can start the data import process
-
Error Handling:
- If errors are encountered during the import process, the system will provide detailed error logs
- Users can correct the data according to the error information and then try importing again