MCP
What is MCP?
MCP (Microservice Communication Protocol) is a microservice communication protocol that allows AI Agents to interact efficiently and flexibly with external microservices. By integrating MCP, AI Agents can call various external services, such as knowledge bases, data analysis tools, or other customized functions, greatly expanding their capabilities and application scenarios. Simply put, MCP acts as a bridge, enabling AI Agents to communicate and collaborate with various external services.
How to Integrate MCP
This section will provide a detailed introduction on how to add and configure MCP in your system.
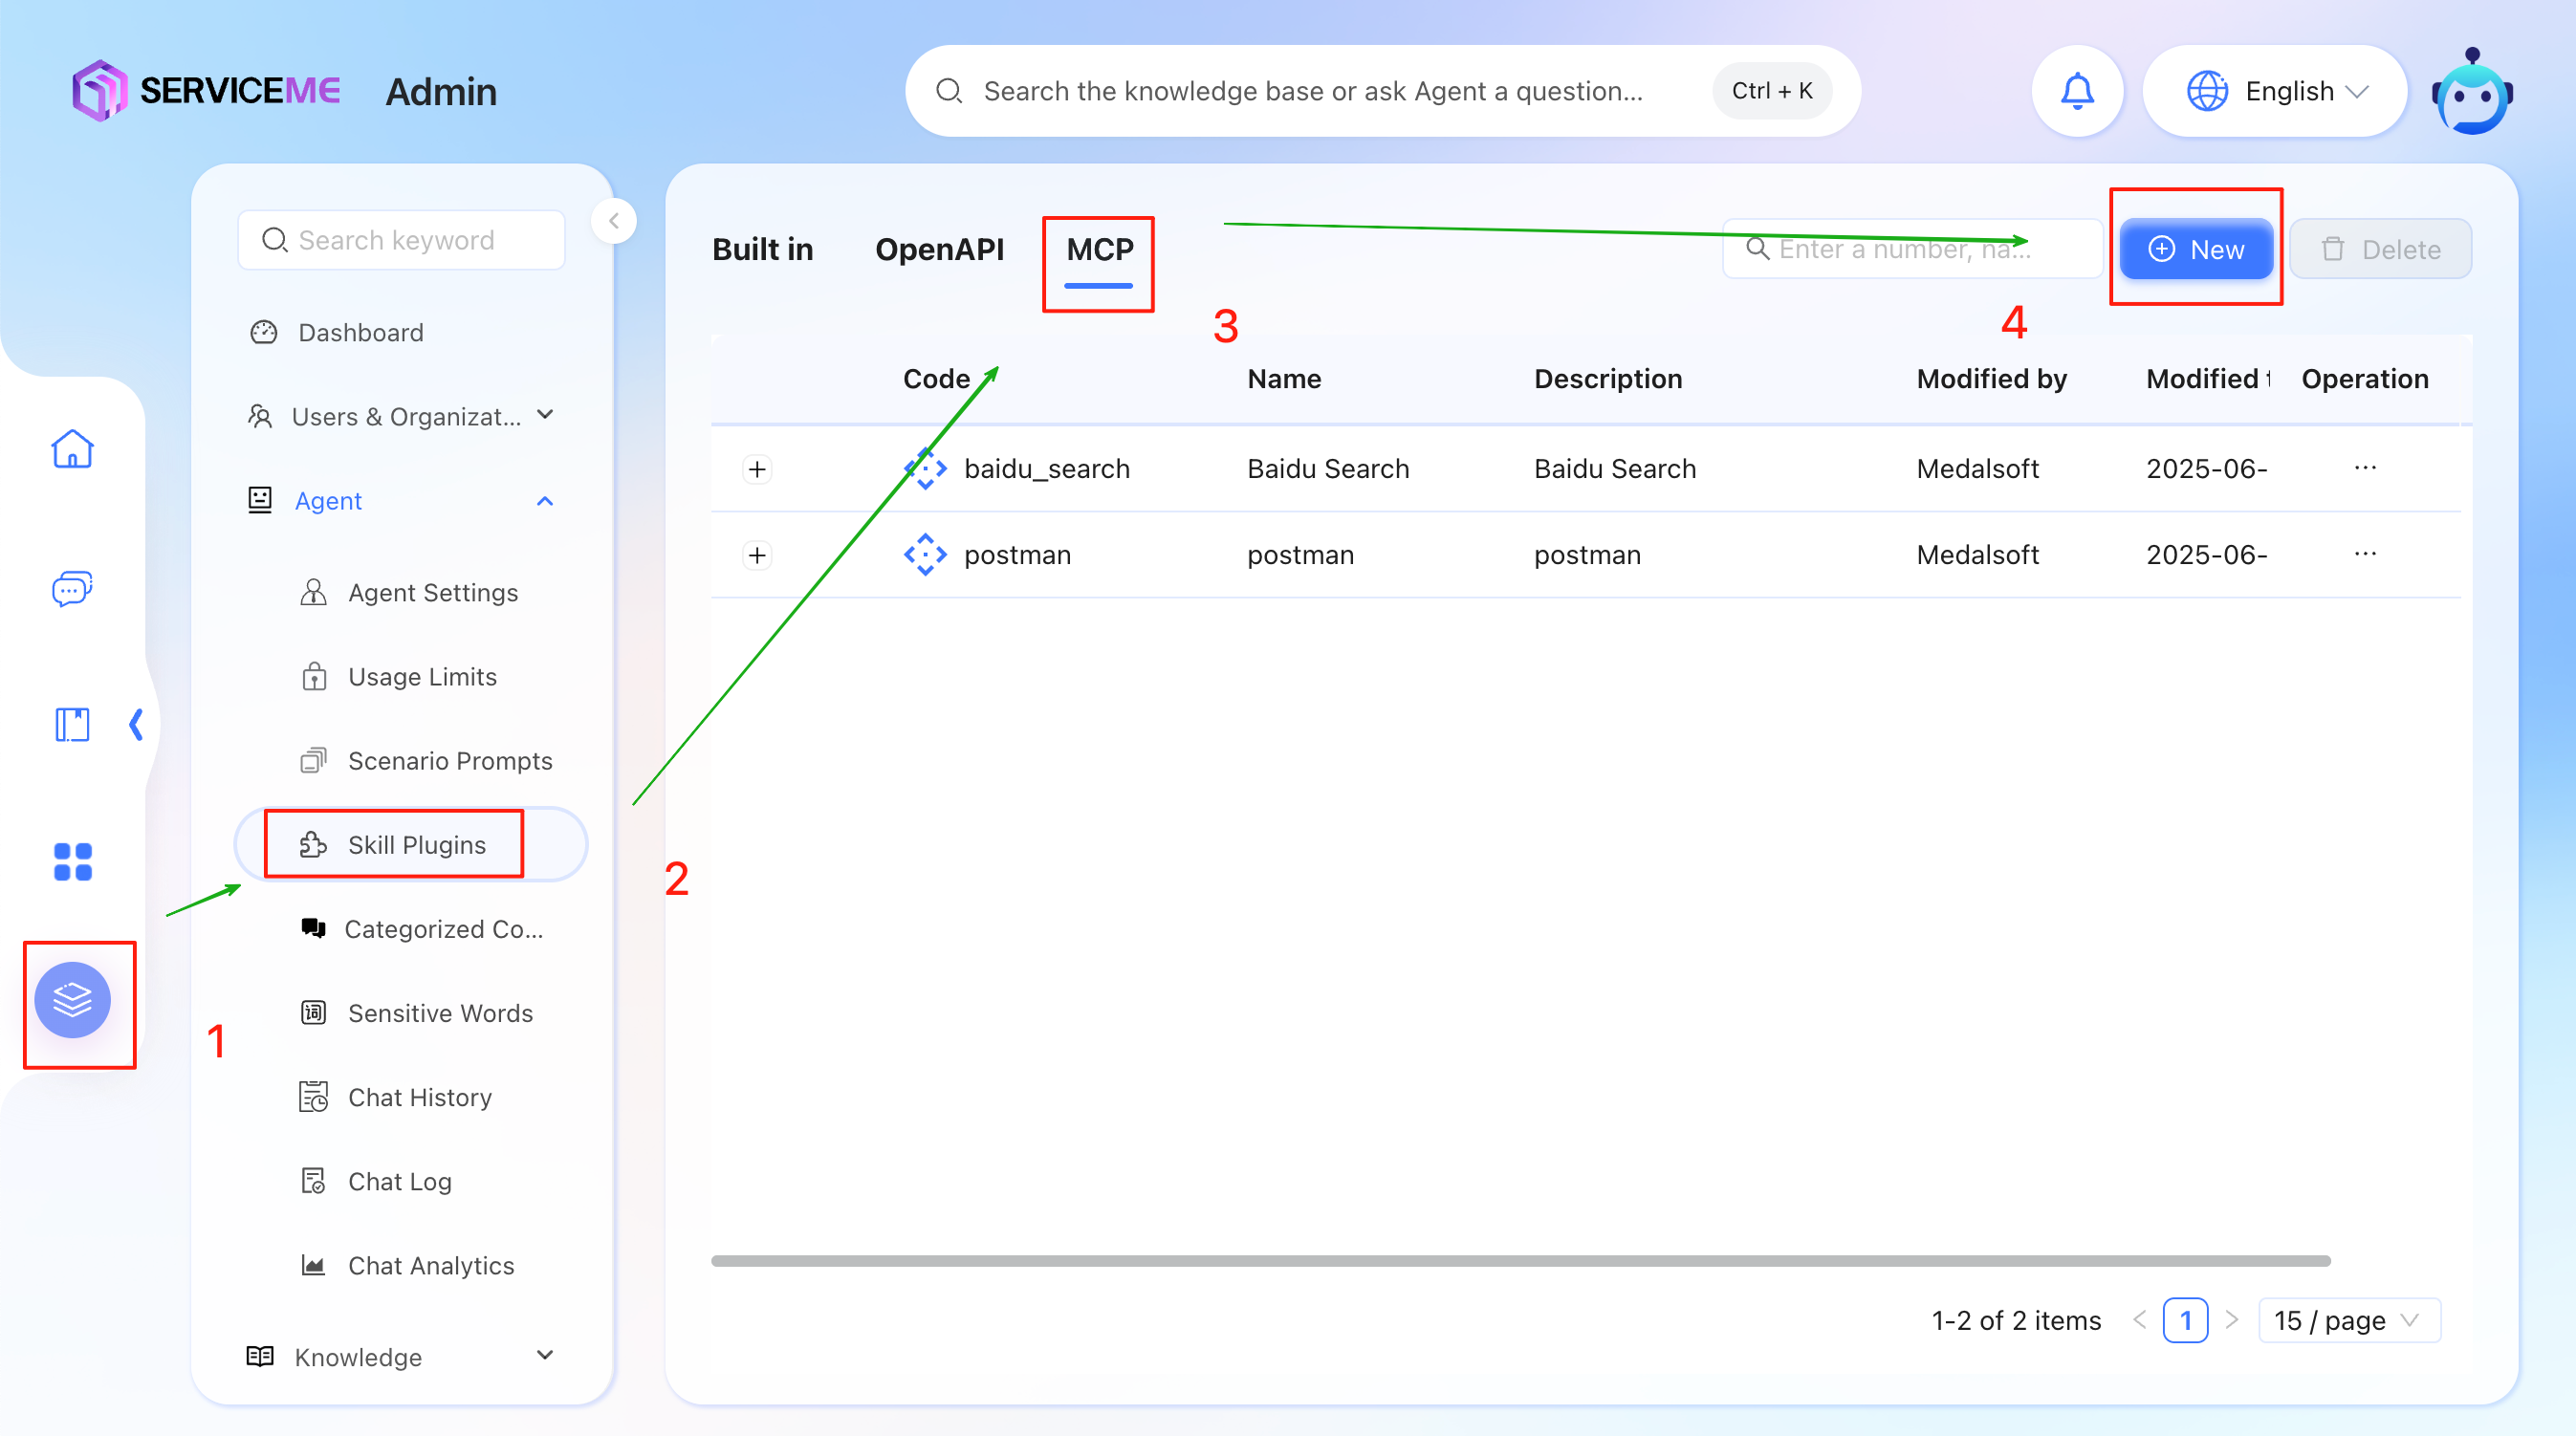
1. Enter the MCP Addition Page
As shown in the figure below, follow the guided steps: first, click the icon (1) in the left navigation bar, then select "Skill Plugins" (2). In the right content area, click the "MCP" tab at the top (3), and finally click the "New" button (4) to enter the MCP configuration page.
2. Fill in MCP Configuration Information
After entering the MCP configuration page, you need to fill in the relevant form information as shown below.
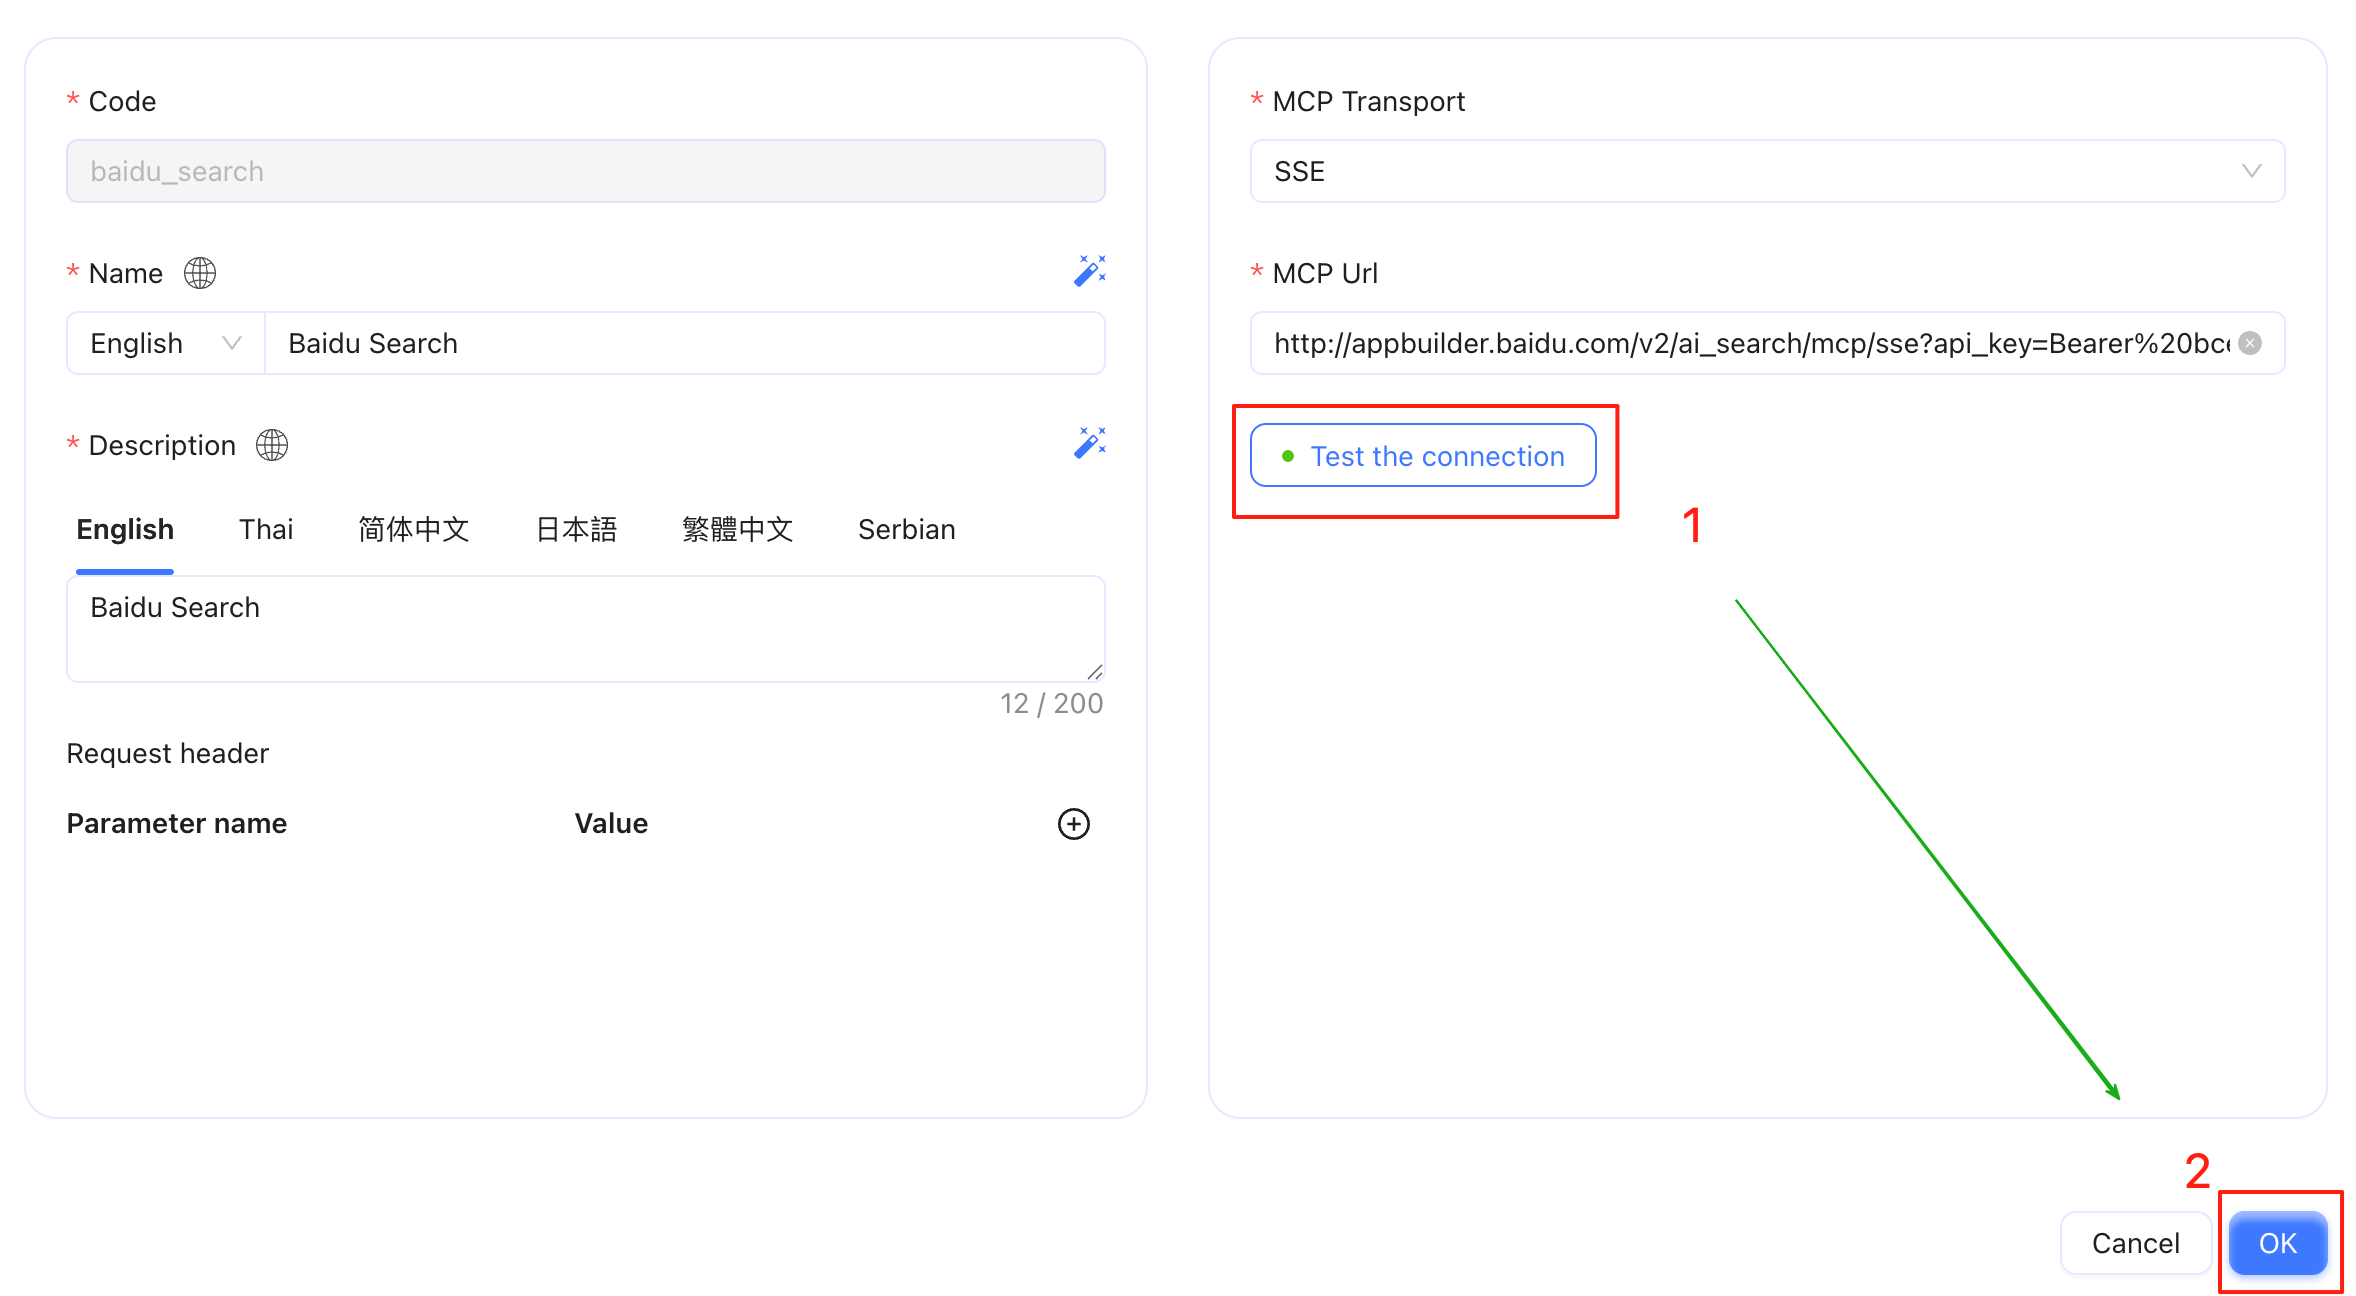
- Code: A globally unique identifier. It is recommended to specify a meaningful name, such as baidu_search.
- Name: The display name of the MCP.
- Description: A brief description of the MCP's functionality.
- Request header: If your MCP Server requires authentication information to be transmitted in the request header, please configure the corresponding token here.
- MCP Transport: Specify the transport protocol for MCP. Currently, only Streamable-HTTP or SSE (Server-Sent Events) are supported.
- Streamable-HTTP: A streaming protocol based on HTTP, suitable for scenarios requiring continuous data streams.
- SSE: Allows the server to push data updates to the client unidirectionally, typically used for real-time notifications or data streams.
- MCP URL: The HTTP address of the MCP Server.
After filling in all the information, click the "Test Connection" button (1). This operation will test the connectivity of your configured MCP Server. If the connection test fails, it may be due to an incorrect MCP URL configuration or missing authentication information. Please check and correct as needed. Once the connection test passes, click the "Confirm" button (2) to save the MCP configuration information.
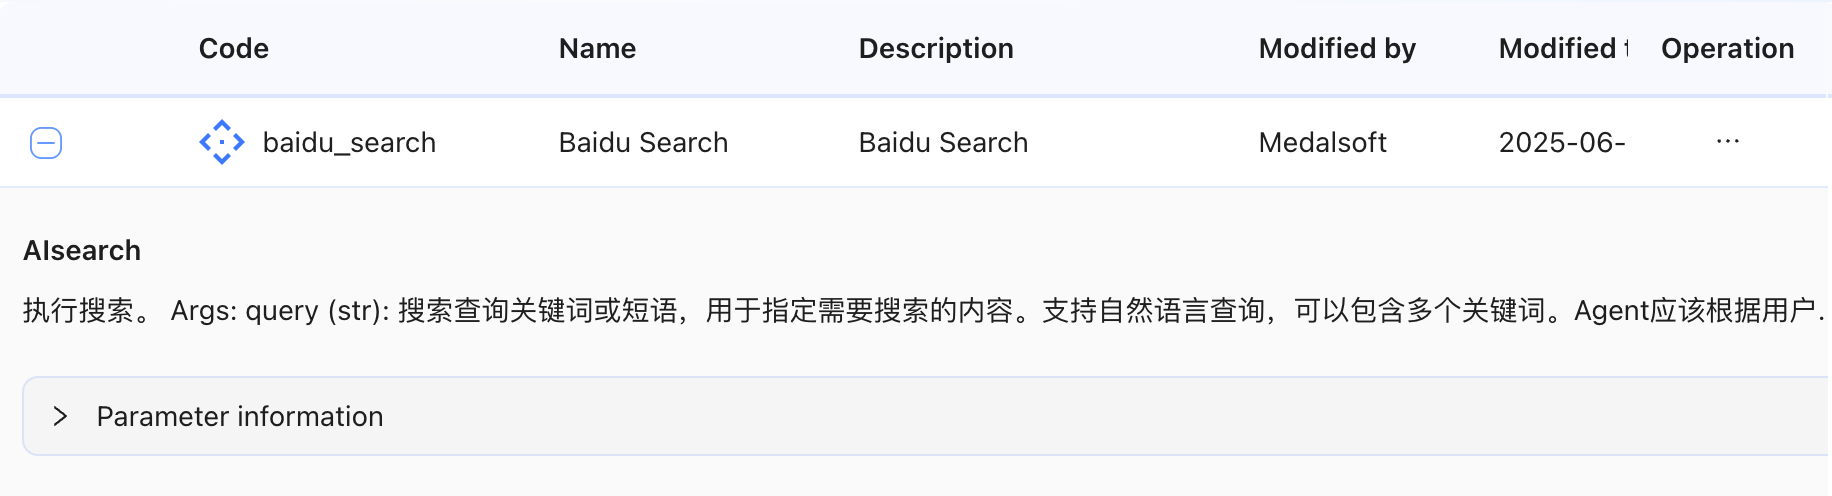
3. View Added MCPs
After successfully adding an MCP, you can see the newly added entry in the MCP list, as shown below. The newly added MCP will usually appear in the first row of the list.
Click the "+" button on the far left of the MCP entry to expand and view the detailed information of the MCP.
 As shown below. This mainly displays the Tool description of the MCP.