Knowledge Management
How to Create Org Workspaces and Knowledge Bases?
In the Knowledge module, users can create "Org Workspaces" and "Knowledge Bases" to support multi-level knowledge management. Before starting creation, it is recommended to understand the following core concepts for more efficient use of related features.
- In My Workspace, additional workspaces cannot be created; only Knowledge Bases can be created. There is a built-in Default Knowledge Base.
- Under Org Workspace, different Workspaces can be created, and only under these created workspaces can Knowledge Bases be created further.
The following table compares "My Workspace" and "Org Workspace" regarding the creation of workspaces and knowledge bases:
| My Workspace | Org Workspace | |
|---|---|---|
| Workspace | ✅ | |
| Knowledge Base | ✅ | ✅ |
| Folder | ✅ | ✅ |
How to Create a New Org Workspace?
After fully understanding the above concepts, you can proceed to create an Org Workspace, embarking on an efficient knowledge management journey.
💡 Tip: Creating an org workspace requires relevant workspace creation permissions. Please ensure you have this permission before creation.
Steps to Create an Org Workspace:
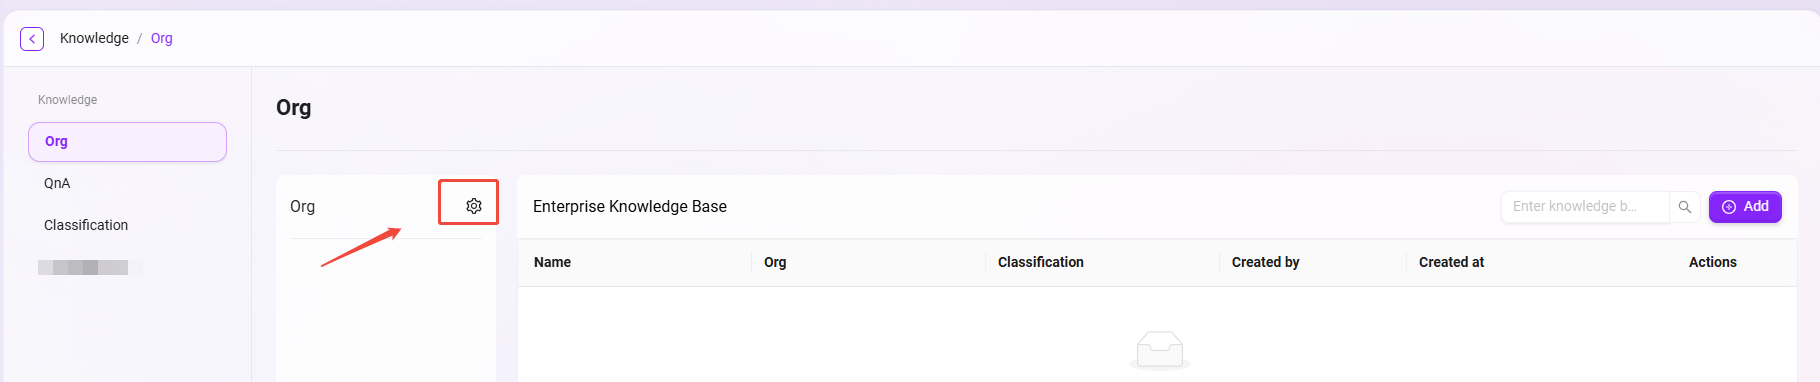
- First, navigate to "Admin -> Knowledge -> Org Workspace", and click the "⚙️" next to Org Workspace.
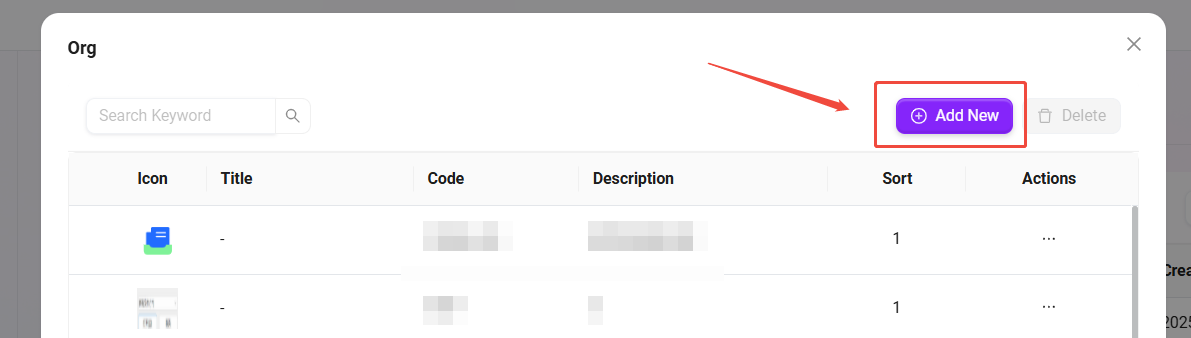
- On the popped-up org workspace page, click "New".
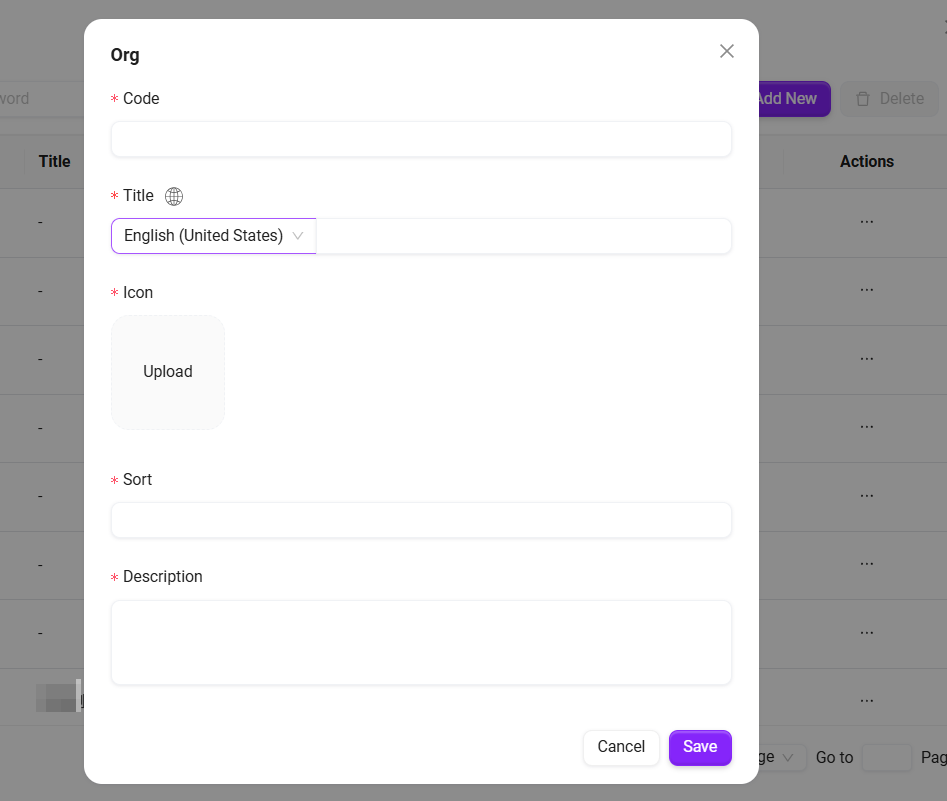
- Enter information such as the org workspace's Code, Title, Icon, Description, Sort, etc., then click "Save" to successfully create the org workspace. (The example in the image is creating "Test Org Workspace New")
How to Create a New Knowledge Base?
💡 Tip: Creating a knowledge base in personal workspace does not require related permissions.
Creating a Knowledge Base in My Workspace
Steps to create a knowledge base in My Workspace are as follows:
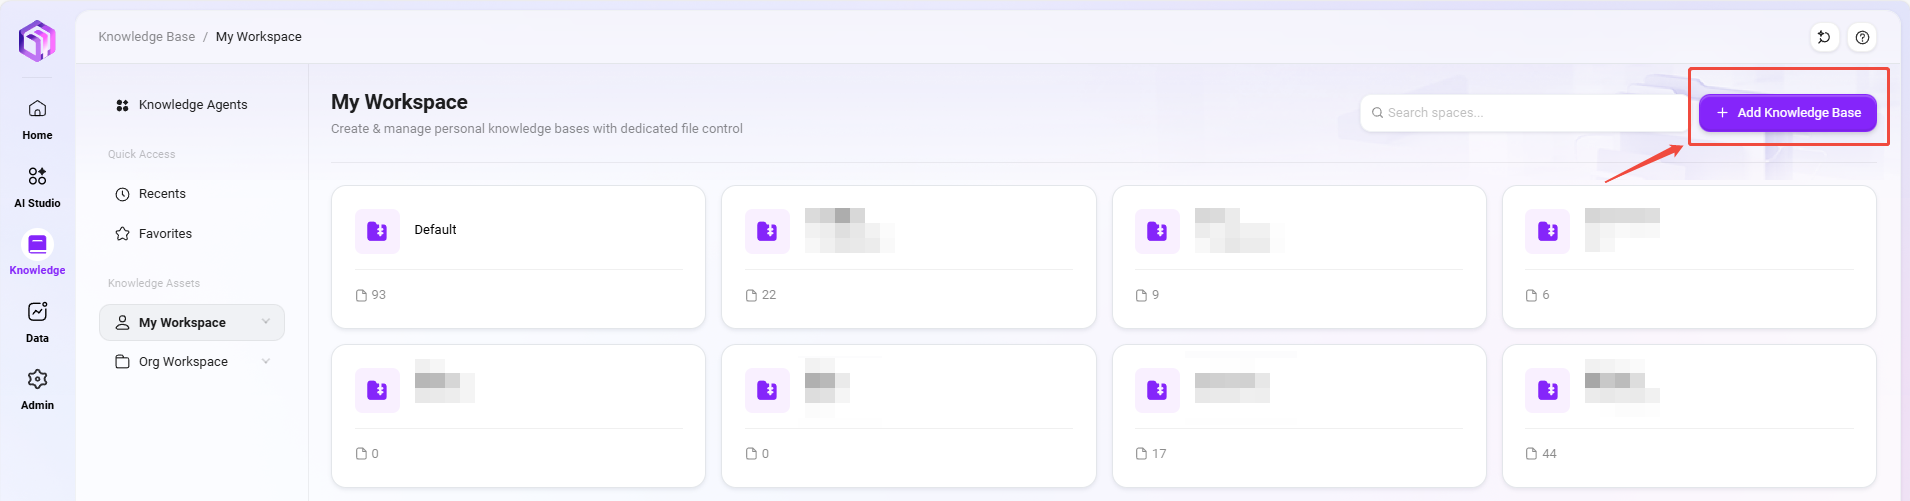
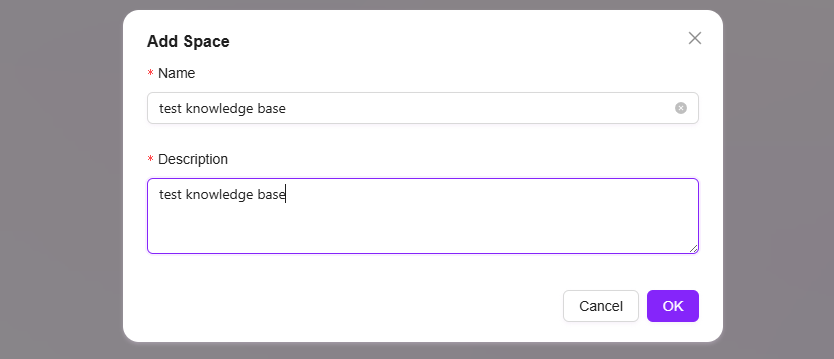
- First, navigate to the My Workspace Overview page and click "New Knowledge Base".
- Fill in the knowledge base Name and Description, then click "Confirm" to successfully create a knowledge base in personal workspace. (The example in the image is creating "Test Knowledge Base")
Creating a Knowledge Base in Org Workspace
💡 Tip: Creating a knowledge base in an org workspace requires relevant permissions. Please ensure you have creation permissions before proceeding.
Steps to create a knowledge base in Org Workspace are as follows:
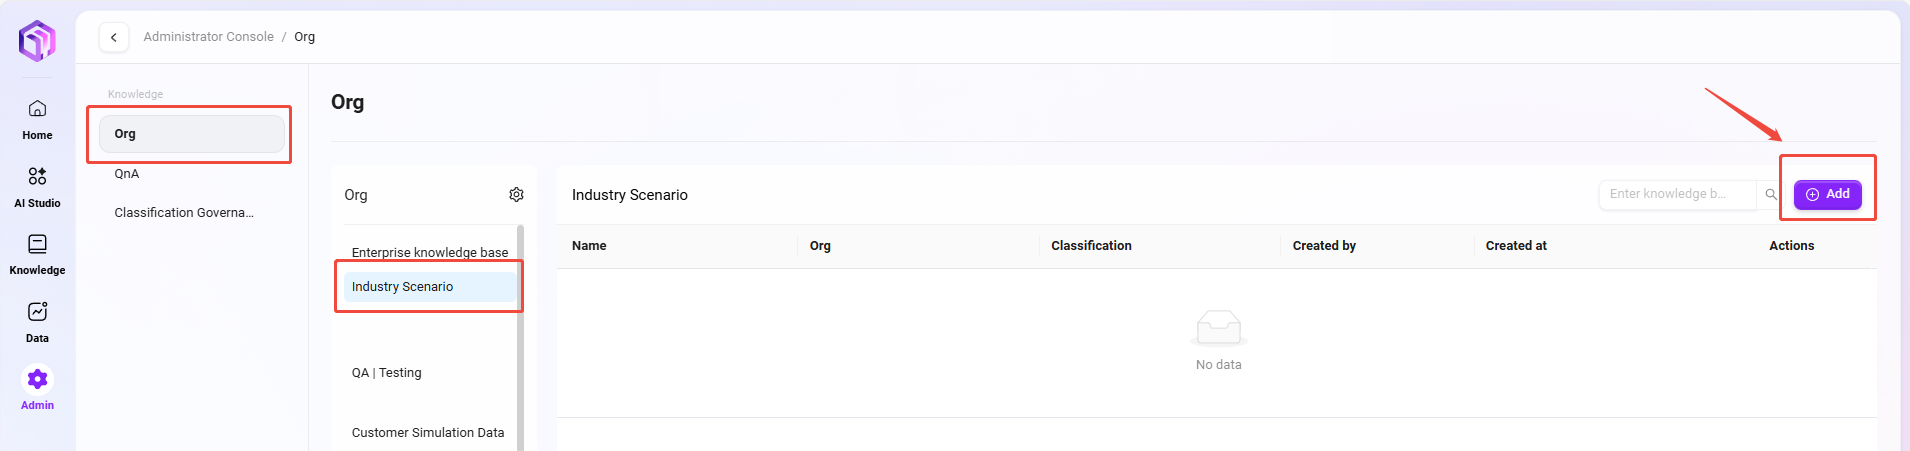
- First, navigate to "Admin -> Knowledge -> Org Workspace" and enter the org workspace where the new knowledge will be located.
- Click "Add New" on the right side of the knowledge base section.
- On the popped-up create knowledge base page, enter information such as the knowledge base's Name, Security Level, Description, etc., then click "Confirm" to create successfully.
- Security Level: There are three default levels, e.g., Public, Internal, Highly Confidential.
- Storage Quota: 0-1GB.
- File Size Limit: Supports files within 100MB.
- Supported File Formats: Include .ppt, .pptx, .doc, .docx, .xls, .xlsx, .csv, .md, .txt, .png, .jpeg, .jpg, .pdf, .mp3, .flac, .np4, .xmind, .json, .xml, etc. (Please refer to the options in the dropdown list for specific formats).
💡 Tip: After customizing upload file size and formats, if an uploaded file does not meet the restrictions, the system will provide a prompt.

How to Configure Knowledge Base Workspace Settings?
💡 Tip: Configuring knowledge base workspace settings requires org workspace management permissions. Please ensure you have this permission before modifying knowledge base settings.
Knowledge Base Workspace Settings can be accessed from multiple entry points:
- On the knowledge base overview page of an org workspace, click the "✏️" on the knowledge base card to open.
- After entering a knowledge base, click the ⚙️ button in the upper left corner of the page to open.
- In "Admin -> Knowledge -> Org Workspace", select the knowledge base to edit, click the "···" on the right, and choose "Manage" to open.
General Settings
Knowledge Base General Settings refer to the information filled in when creating the knowledge base, including Name, Type, Classification, Description, Sort, Storage Quota, Supported File Formats.
File Settings
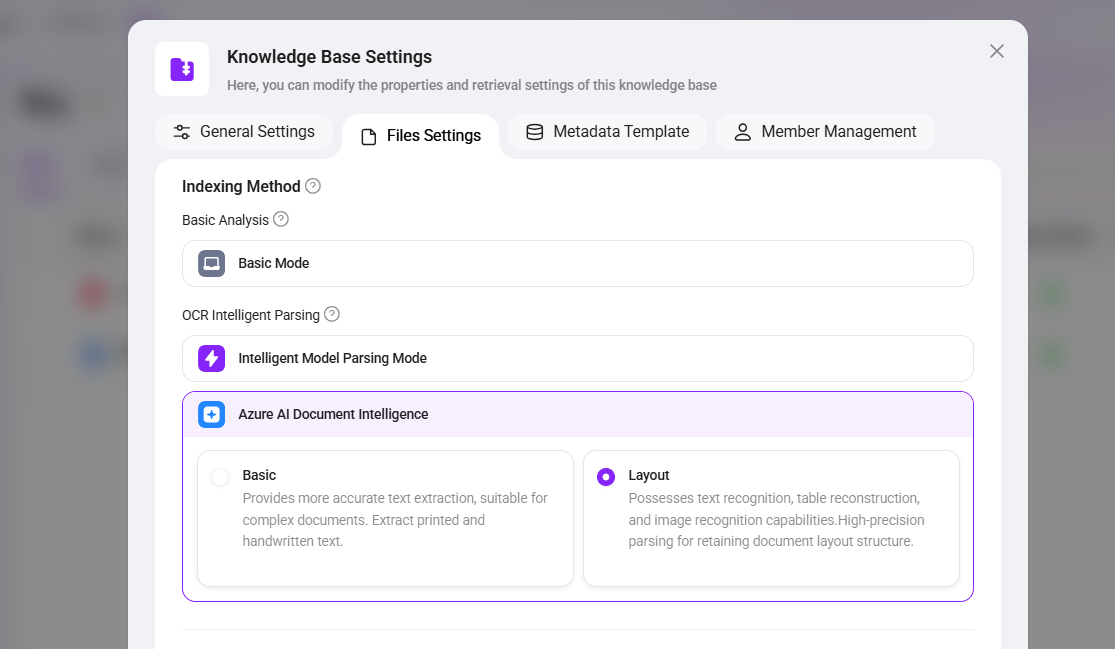
Indexing Method:
- Basic Analysis: Suitable for general text recognition, supports only text extraction, excluding table and image parsing.
- OCR Intelligent Parsing: Calls integrated models to generate documents. Note that quality may be affected in low-resolution or complex scenarios. Helps LLM generate high-quality answers, suitable for documents containing many tables.
- Intelligent Model Parsing Mode: Uses system-built models for semantic recognition and structured extraction, suitable for documents containing tables or complex layouts.
- Azure AI Document Intelligence:
- Basic: Provides more accurate text extraction, suitable for complex documents. Extracts printed and handwritten text.
- Layout: Possesses text recognition, table reconstruction, and image recognition capabilities. High-precision parsing to preserve document layout structure.
- 💡 This feature is only supported in V4.1.2 and later versions.
- OCR Intelligent Parsing supports integration with TextIn, which can further enhance recognition accuracy and effectiveness for special layouts, multilingual, or high-difficulty documents.
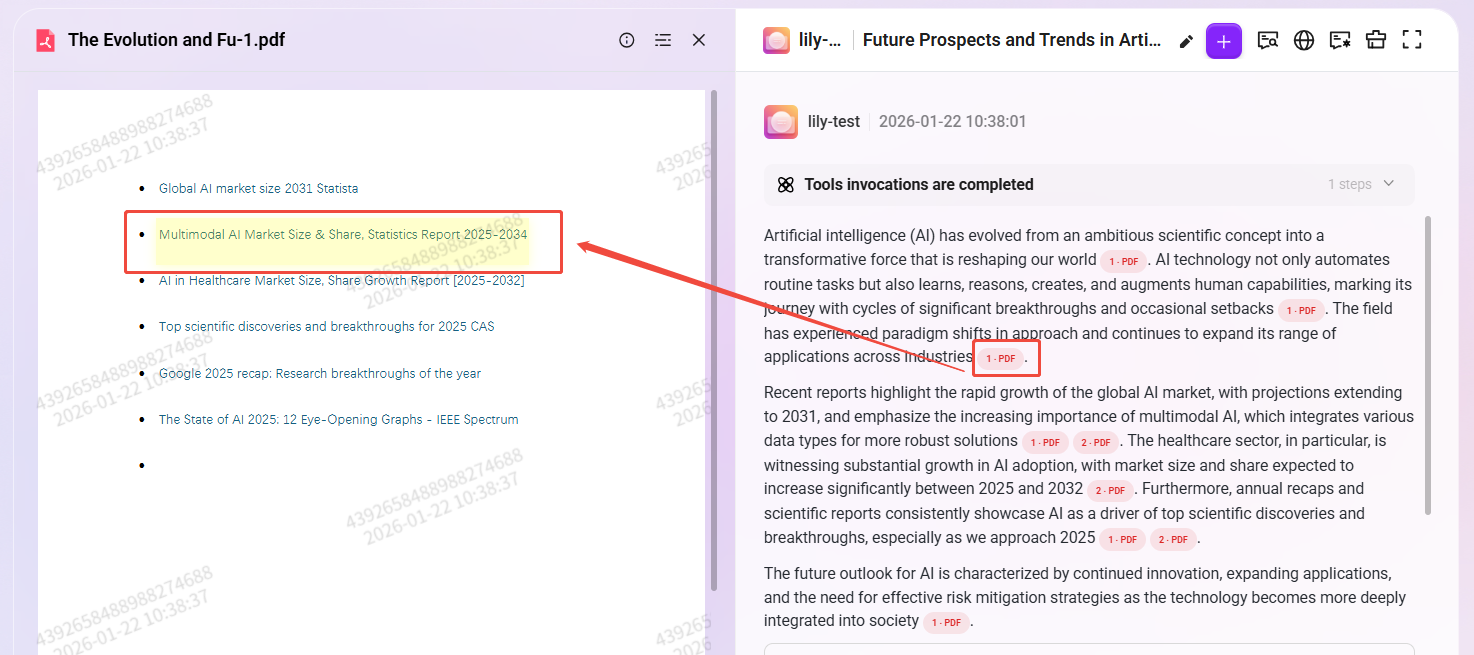
- The system automatically recognizes and parses hyperlinks in PDF, Word, and Excel documents, and restores them as clickable dynamic links in the preview interface.
Extended Capabilities
-
Hyperlink Parsing
- Description: The system supports parsing embedded hyperlinks in PDF, Word, Excel, and PPT documents. These links will be rendered as clickable links in RAG Q&A responses, allowing users to directly access the original content or referenced sources.
- Usage Instructions: This feature must be used in Basic Parsing mode. When parsing PDF and Excel documents, there may be slight deviations in link positioning. A maximum of 20 links can be extracted per PDF page; any links beyond this limit will not be processed.
💡 Note: This feature is only supported in version V4.1.2 and above.
-
OCR Capability Extension (TextIn)
- Description: OCR intelligent parsing supports integration with the TextIn service, providing a high-quality OCR alternative for users who are not using the Microsoft ecosystem. It can significantly improve recognition accuracy for special layouts, multilingual content, or complex documents.
💡 Note: This feature is only supported in version V4.1.2 and above.
-
OCR Capability Extension (Alibaba Cloud OCR)
- Description: OCR intelligent parsing supports integration with the Alibaba Cloud OCR service, providing cloud-based document recognition capabilities. It can perform high-accuracy recognition for images, scanned documents, tables, certificates, and multilingual text, further enhancing the parsing capability and stability for complex documents.
- Usage Instructions: This capability can only be used after completing the configuration and integration of the Alibaba Cloud OCR service on the platform.
💡 Note: This feature is only supported in version V4.1.3 and above.
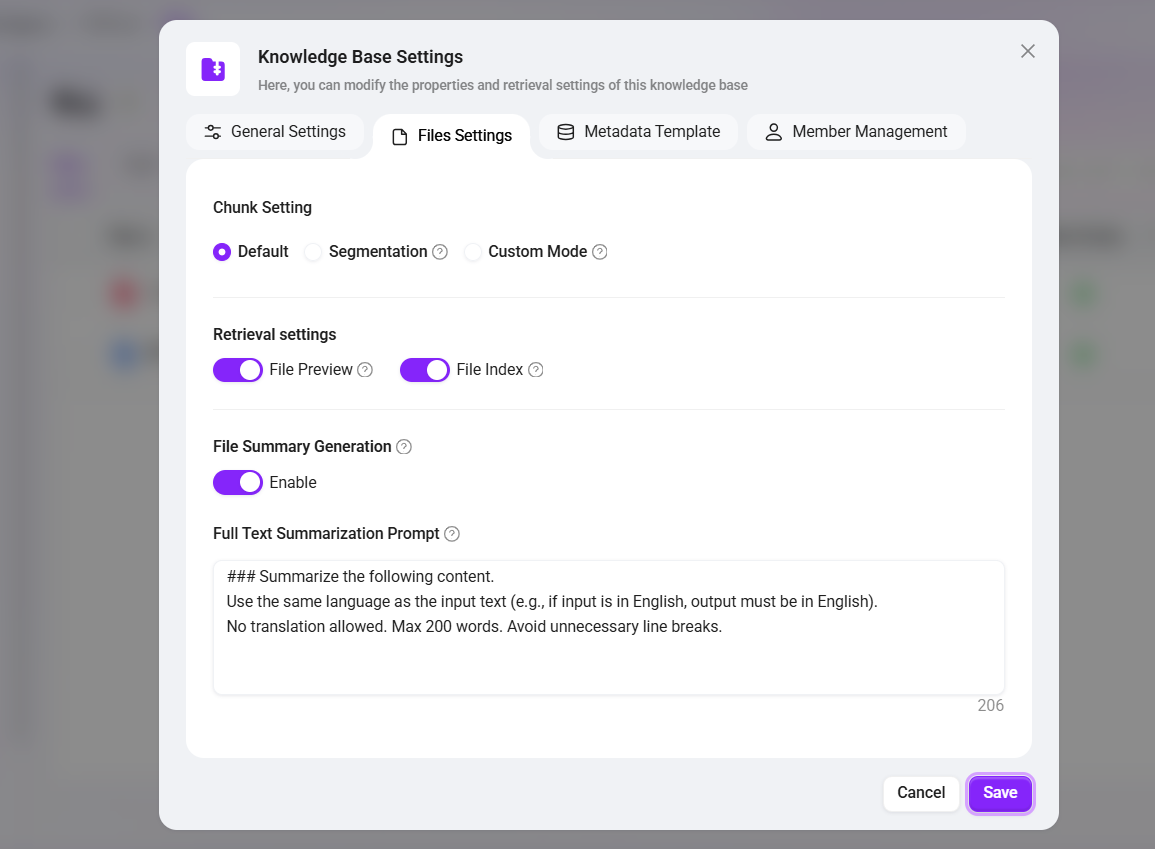
Chunk Setting:
- Default: The system segments text according to the default segmentation method.
- Segmentation: Text is first segmented into chunks with a maximum of 1024 characters, then each chunk is further subdivided into segments of 200 characters. Each small segment has its own independent index.
- Custom Mode: Users can customize the maximum characters per segment. For example, if set to 500, every 500 characters will be segmented into one piece.
Retrieval Settings:
- File Preview: Controls whether files (documents, images, videos, audio) in the knowledge base support online preview.
- File Index: Sets whether various resources (documents, images, videos, audio) in the knowledge base are added to the global search index. When turned off, the corresponding resources cannot be retrieved via keyword search.
File Summary Generation: Automatically generates content summaries for documents in the knowledge base, facilitating quick browsing of core information. When turned off, newly uploaded documents will no longer have summaries auto-generated.
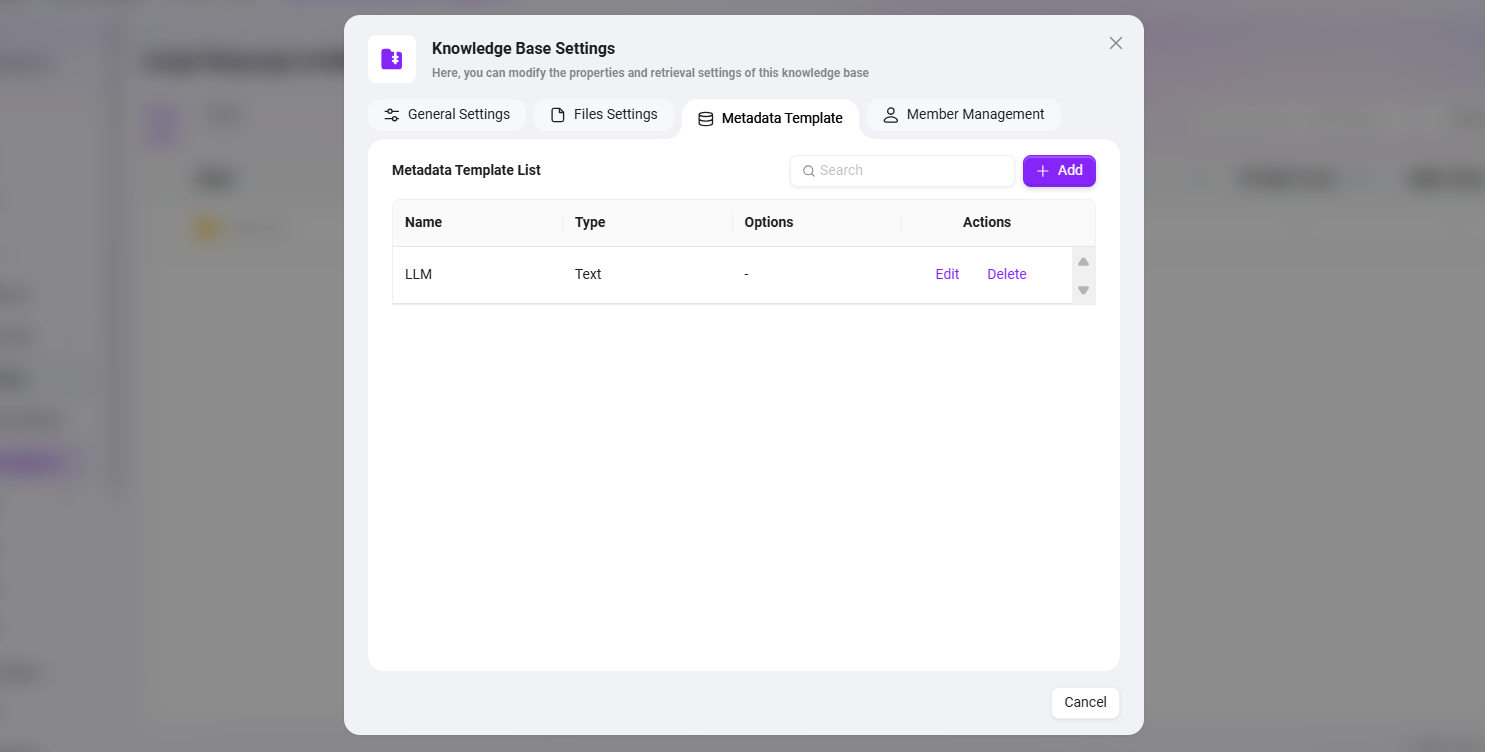
Metadata
Metadata is data that describes data, such as information about a file's size, name, location, etc. In SERVICEME, metadata is used to enhance file management and knowledge base retrieval capabilities.
Role of Metadata in SERVICEME
File-Level Metadata:
- When uploading a file, the system automatically saves basic metadata, such as file size, name, storage location, etc.
- Users can customize metadata, e.g., tags, categories, uploader, etc., for more precise file management.
- When searching for knowledge base files, filtering can be based on metadata to improve search hit rates.
Knowledge-Base-Level Metadata:
- The knowledge base itself can also be configured with metadata, such as topic, industry category, permission information, etc.
- Through knowledge base metadata, more advanced classification and retrieval can be achieved, improving knowledge management efficiency.
Automatic Inheritance and Population Mechanism of Metadata
-
In the knowledge base structure of SERVICEME, if a folder has a metadata template configured (i.e., specific Keys defined), then newly uploaded or synchronized files under that folder will automatically inherit these metadata Keys.
-
If a file has the "Summarization" feature enabled, during file processing and parsing, the system will automatically populate relevant field information based on the file content and metadata, making the file's semantic features and business tags more consistent, thereby improving the accuracy and contextual relevance of AI summarization and retrieval.
User Management
Owner: The knowledge base owner possesses all permissions for this knowledge base, including management, editing, and access permissions.
Visitor: Visitors can only view knowledge base content and cannot make any modifications to it.
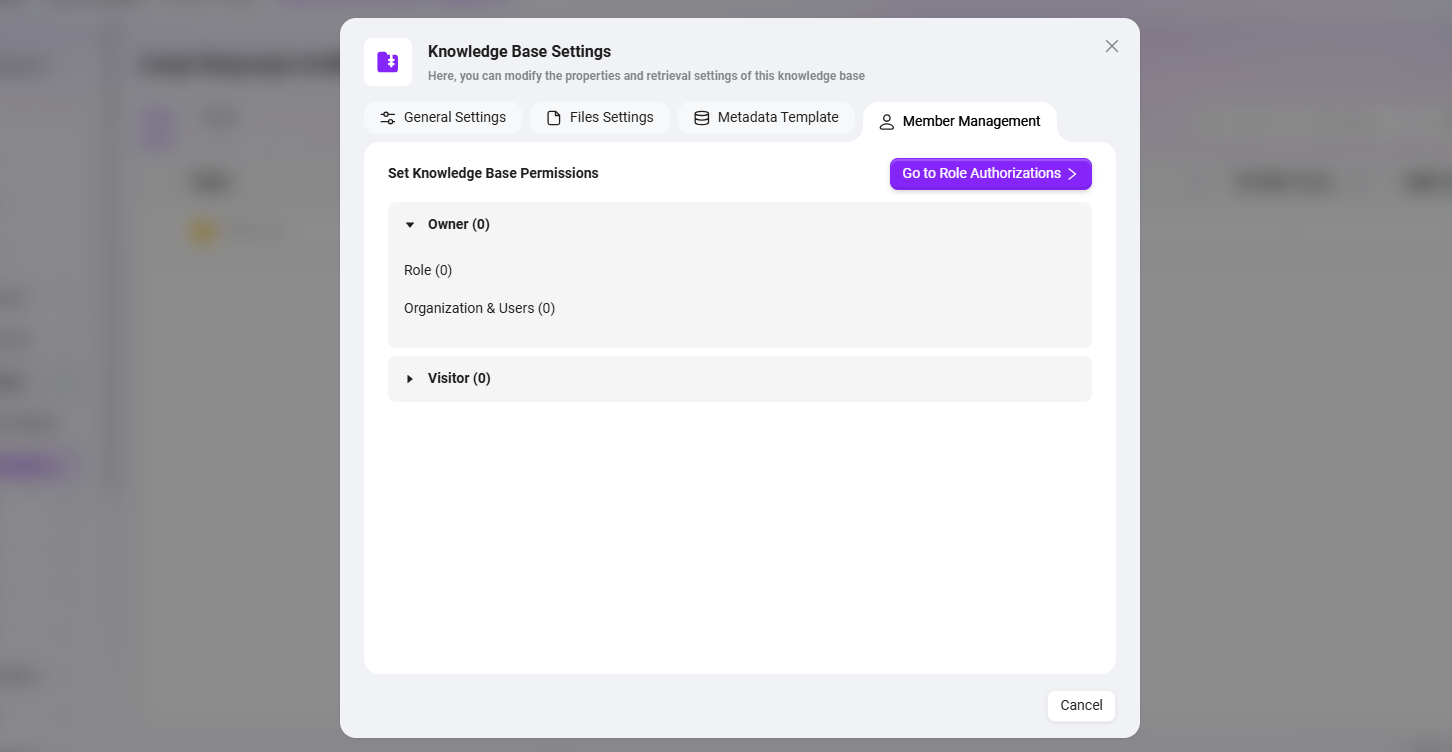
- Member permissions can be managed through roles, but the role permissions page is accessible only by administrators.
- For specific operations on managing member permissions through roles, refer to the later section "How to Manage Knowledge Base Member Permissions via Roles".
Knowledge Base Member Permission Configuration
Before understanding how to manage knowledge base member permissions via roles, it is necessary to understand three concepts: Role, User Authorization, Functional Authorization.
- Role: Roles are created by administrators and can be created for different scenarios.
- User Authorization: After a role is created, users can be added to this role, which can also be understood as granting a certain role to a user.
- Functional Authorization: The functional authorization of a role refers to what functionalities this role can have.
💡 Tip: From the above: Functional Authorization + Role Authorization = Granting specific permissions to a user.
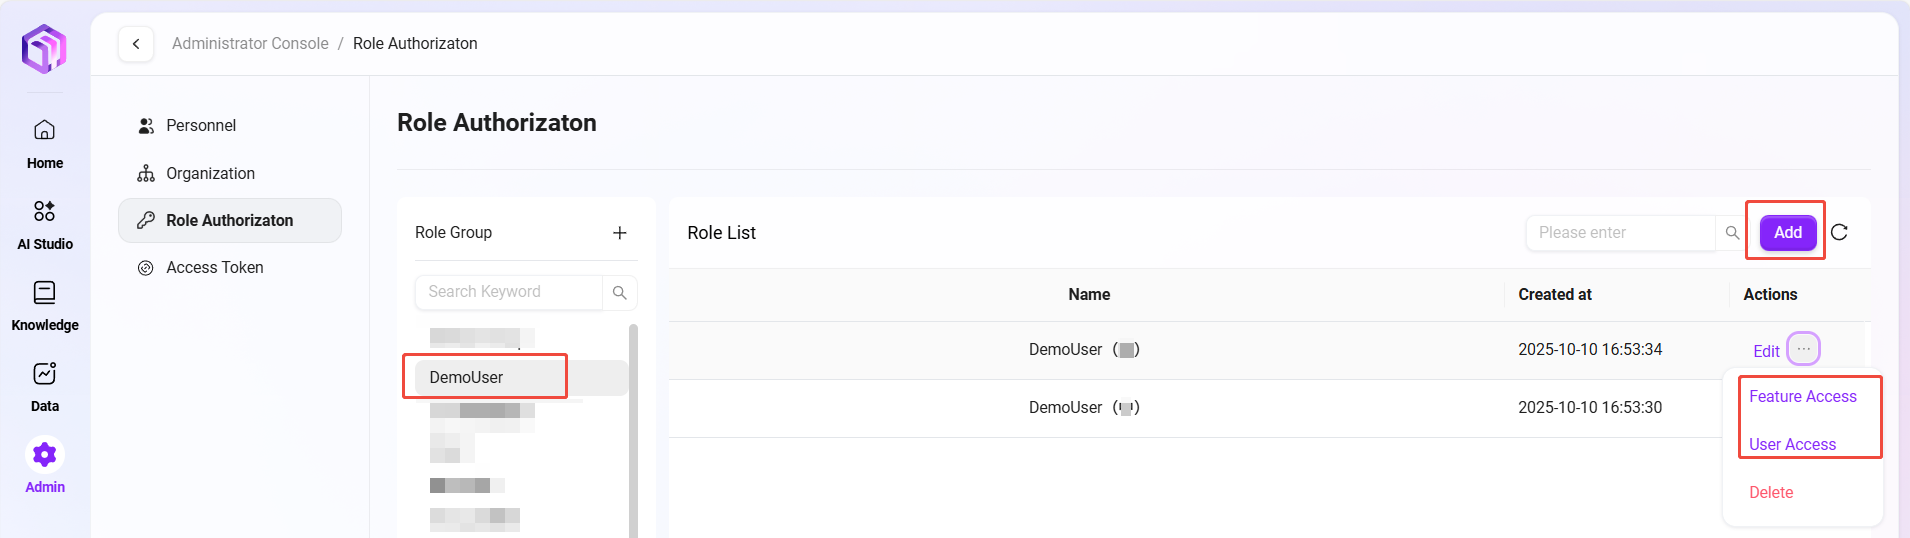
⏳ Specific Example: Grant DemoUser Management permissions for the Demo knowledge base.
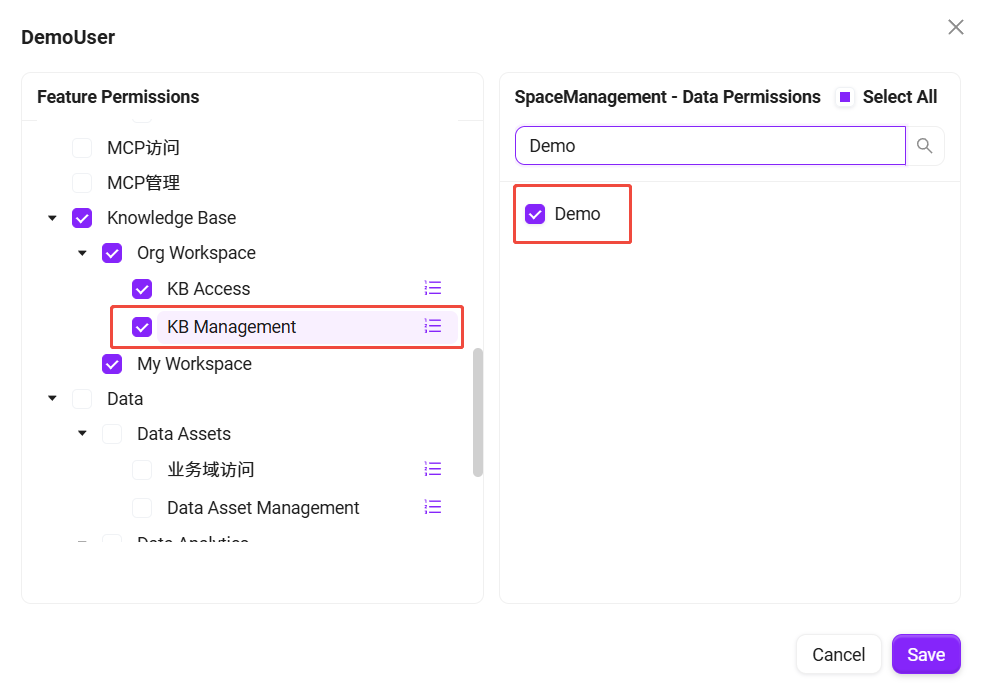
- Click "Add New" on the right side of the role list to create a new role named "Knowledge Base Management".
- After creating the Knowledge Base Management role, click the "Functional Authorization" corresponding to the role, find "Workspace Management", locate and check "Demo" under the knowledge bases subordinate to Workspace Management, then click "Confirm".
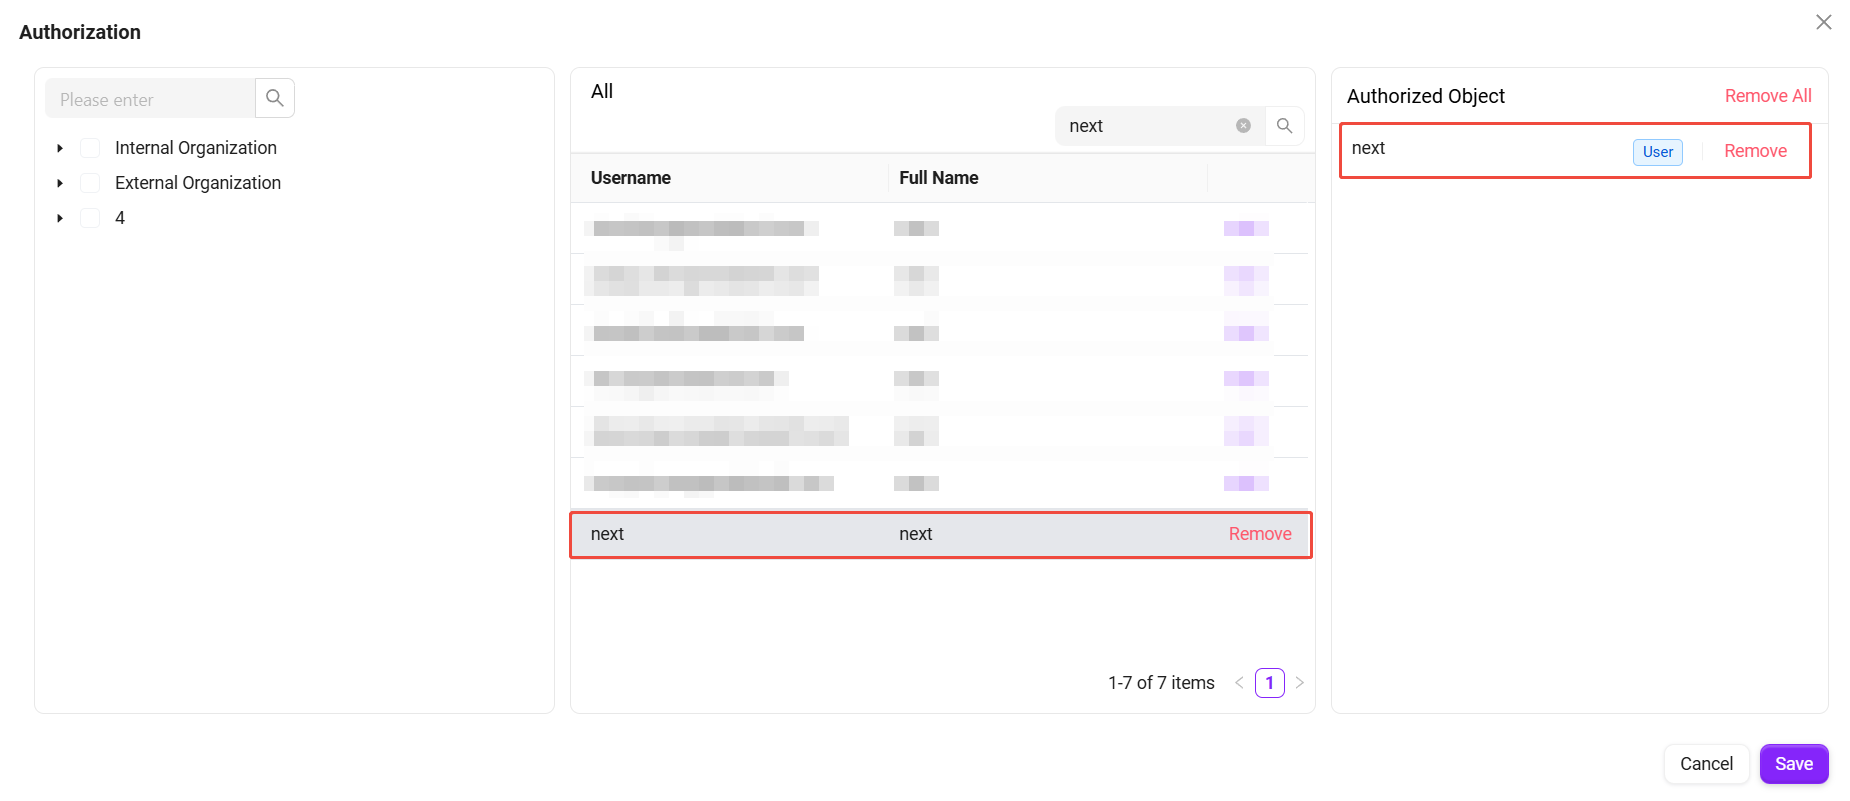
- Next, add the test account to this role. Click "User Authorization" after the corresponding role, locate and check DemoUser based on the test account's organization, then click "Confirm".
- After completing the above operations, DemoUser has been successfully granted Management permissions for the Demo knowledge base.
How to Delete Org Workspaces and Knowledge Bases?
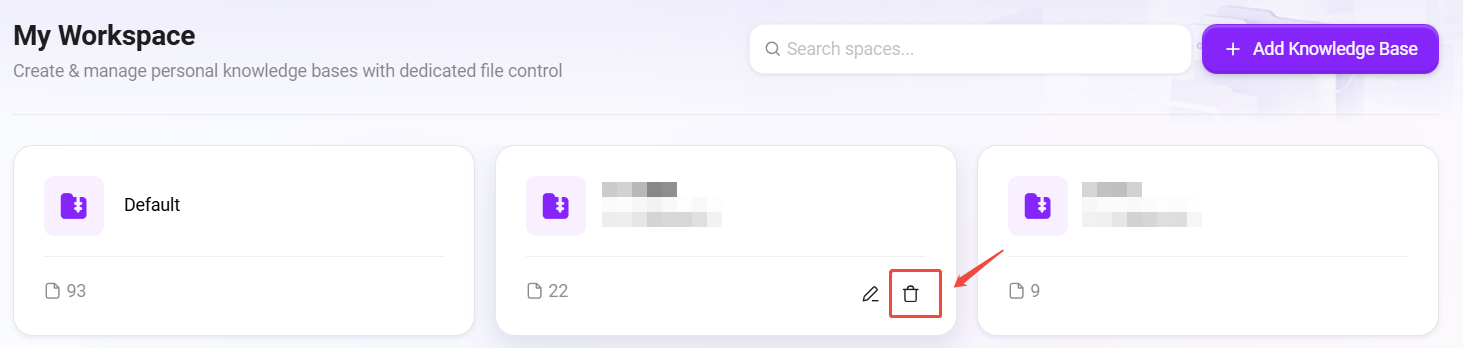
Deleting a Knowledge Base
To delete a knowledge base, simply navigate to the corresponding knowledge base card on the knowledge base overview page and click the " 🗑️ " in the lower right corner of the card. The deletion method is the same for My Workspace and Org Workspace.
As shown below:
Deleting an Org Workspace
Deleting an org workspace requires a user with workspace management permissions to navigate to "Settings -> Knowledge Management -> Org Workspace", click the "⚙️" next to Org Workspace, select the org workspace to delete on the popped-up org workspace page, click the "Delete" in the upper right corner, and confirm again to delete.
As shown below:

Comparison of File-Related Operations in My Workspace vs. Org Workspace
| My Workspace | Org Workspace | |
|---|---|---|
| Download | ✅ | ✅ |
| Favorite | ✅ | ✅ |
| Delete | ✅ | ✅ |
| Rename | ✅ | ✅ |
| Re-preview | ✅ | ✅ |
| Re-segment | ✅ | ✅ |
| File Properties | ✅ | ✅ |
| Move To | ❌ | ✅ |
| Copy To | ❌ | ✅ |
| Create Shortcut | ❌ | ✅ |
| Tags | ❌ | ✅ |
| Metadata Properties | ❌ | ✅ |